I was recently re-writing a yet to be published iPhone app to use Core Data with a pre-populated SQLite database. I was able to get the app to function with a new database using the CoreDataBooks sample code as a reference but could not get the app to read a pre-populated database added to the project.
After many hours of troubleshooting, I discovered differences in the pre-populated database and a Core Data created SQLite database. The pre-populated database consisted of just my simple 1 table structure and the Core Data created SQLite database consisted of “extra ‘Z’ tables’ For example: Z_METADATA, I searched the Internet and Apple docs but could not find a utility or any other way to convert or prep a pre-populated SQLite database for use with Core Data.
Right or wrong. Here’s what I finally did (NOTE: All the ‘coding’ is based on the CoreDataBooks sampe):
In XCode:
1. Ensure the CoreData framework is added to your project.
** If creating a new project, check the ‘Use Core Data for storage’ option when selecting a template.
2. Create the Data Model file (xcdatamodel) if not already created.
a. Click File | New File.
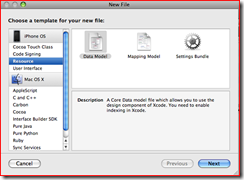
b. Choose iPhone OS | Resource | Data Model
c. Click Next, name the file and click Next again.
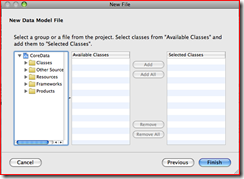
d. If the model class is already created, select it from the next window. You can create it later if it isn’t created already.
2. Add an Entity (table name) and bind it to the class.
a. Click Design | Data Model | Add Entity
b. Rename Entity to the table name you wish to create and change the Class to the desired class name.
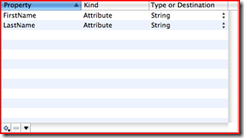
3. Create the Attributes (columns).
a. Click Design | Data Model | Add Attribute
b. Rename newAttribute to the desired column name and set the type.
c. Repeat step b for each additional attribute.
4. Set the name of the SQLite database name and location in the AppDelegate.m file (Please refer to the CoreDataBooks sample code for further info).
- (NSPersistentStoreCoordinator *)persistentStoreCoordinator {
if (persistentStoreCoordinator != nil) {
return persistentStoreCoordinator;
}
NSString *storePath = [[self applicationDocumentsDirectory] stringByAppendingPathComponent: @”CoreData.sqlite”];
/*
Set up the store.
For the sake of illustration, provide a pre-populated default store.
*/
NSFileManager *fileManager = [NSFileManager defaultManager];
// If the expected store doesn’t exist, copy the default store.
if (![fileManager fileExistsAtPath:storePath]) {
NSString *defaultStorePath = [[NSBundle mainBundle] pathForResource:@”CoreData” ofType:@”sqlite”];
if (defaultStorePath) {
[fileManager copyItemAtPath:defaultStorePath toPath:storePath error:NULL];
}
}NSURL *storeUrl = [NSURL fileURLWithPath:storePath];
NSDictionary *options = [NSDictionary dictionaryWithObjectsAndKeys:[NSNumber numberWithBool:YES], NSMigratePersistentStoresAutomaticallyOption, [NSNumber numberWithBool:YES], NSInferMappingModelAutomaticallyOption, nil];
persistentStoreCoordinator = [[NSPersistentStoreCoordinator alloc] initWithManagedObjectModel: [self managedObjectModel]];NSError *error;
if (![persistentStoreCoordinator addPersistentStoreWithType:NSSQLiteStoreType configuration:nil URL:storeUrl options:options error:&error]) {
// Update to handle the error appropriately.
NSLog(@”Unresolved error %@, %@”, error, [error userInfo]);
exit(-1); // Fail
}
return persistentStoreCoordinator;
}5. Build and Run the app.
In Finder:
1. Use Spotlight to search for the SQLite database created by the app in the iPhone Simulator. This is /Users/<Username>/Library/Application Support/iPhone Simulator/User/Application/<Application GUID>/Documents/<database name.sqlite>
2. Copy that database to a working folder.
3. Populate that database.
4. Add the populated database to the project.
I hope this helps! If anyone has a better or preferred way of formatting a SQLite database for use with Core Data, please let me know.


