第一步 安裝geth
下載地址:https://ethereum.github.io/go-ethereum/downloads/
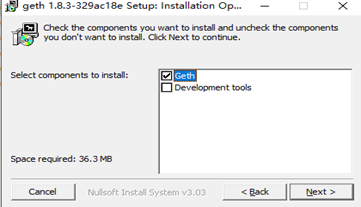
點擊安裝勾選development tools
第二步 創建您的帳戶
在當前文件夾下創建node1文件夾
創建一個賬戶(也稱為錢包)
Devnet $ geth --datadir node1/ account new
Your new account is locked with a password. Please give a password. Do not forget this password.
Passphrase: 輸入你的密碼
Repeat passphrase: 確認你的密碼
Address: {08a58f09194e403d02a1928a7bf78646cfc260b0}
第三步 geth命令創建您的Genesis文件
生成的文件是用于初始化區塊鏈的文件。第一個塊叫做創世塊,是根據genesis.json文件中的參數生成的。
Geth安裝后目錄下有很多可執行文件如puppeth或bootnode。你可以在Geth github上找到完整的列表。
Puppeth可以創建創世區塊的json文件。
開始使用Puppeth:
1、win鍵 + r 進入cmd命令行,進入到安裝geth的文件夾執行 puppeth 然后順序執行下面操作
2、Please specify a network name to administer (no spaces, please)
> devnet(這里隨便填寫一個網絡管理名稱即可,如有需要后面可以通過--network重新設置)
What would you like to do? (default = stats)
1. Show network stats
2. Configure new genesis
3. Track new remote server
4. Deploy network components
> 2(這里選擇2,回車,配置新的創世區塊)
3、Which consensus engine to use? (default = clique)
1. Ethash - proof-of-work
2. Clique - proof-of-authorit
> 1(這里選擇pow共識機制)
4、Which accounts should be pre-funded? (advisable at least one)
> 0x1234567890123456789012345678901234567890(這個是設置預分配以太坊的賬戶,建議設置一個有私鑰的地址可以后面測試使用,設置好后再按一次回車)
5、Specify your chain/network ID if you want an explicit one (default = random)
> 666(這里就是鏈的chainId,可以隨意輸入也可以不輸直接回車默認隨機數字)
6、What would you like to do? (default = stats)
- Show network stats
- Manage existing genesis
- Track new remote server
- Deploy network components
> 2(管理已擁有的創世塊)
7、 1. Modify existing fork rules
2. Export genesis configuration
3. Remove genesis configuration
> 2(選擇導出創世配置)
8、Which file to save the genesis into? (default = devnet.json)
> ./genesis.json(導出的路徑及文件名)
OK,到這里創世json文件創建完成了
第四步 geth命令初始化節點
現在我們有了這個genesis.json文件,可以初始化創世塊了!
進入到geth安裝文件夾下執行
geth --datadir node1/ init genesis.json
第五步 bootnode命令操作
bootnode唯一的目的是幫助節點發現彼此(記住,以太坊區塊鏈是一個對等網絡)
初始化 bootnode
bootnode -genkey boot.Key
啟動bootnode服務
bootnode -nodekey boot.key -addr:30310
隨意使用任何您喜歡的端口,但請避免使用主流端口(例如HTTP)。30303用于公共以太坊網絡。
第六步 geth命令啟動節點
geth --datadir .\node1\ --syncmode 'full' --port 30311 --rpc --rpcaddr '127.0.0.1' --rpcport 8501 --rpcapi 'personal,db,eth,net,web3,txpool,miner' --bootnodes 'enode://ca88962dbcc8eb0c7587789866f21db68cdf32ad1ea890fe0d9f8fe010f7e9afe2e6a88d5c9d418be61a10b8a31b1e7c55213bb426dab91596ae36bd7d559333@127.0.0.1:30310' --networkid 666
參數解釋:
--syncmode 'full' 有助于防止錯誤丟棄錯誤的傳播塊。
--port 是node1的端口
--rpcapi 允許RPC調用的模塊
--bootnodes 要連接的bootnode
--networkId genesis.json文件中的chainId
第七步 與您的節點進行交互
通過RPC方式
$ cd devnet
devnet$ geth attach 'http://localhost:8501'
Welcome to the Geth JavaScript console!
instance: Geth/v1.7.3-stable-4bb3c89d/linux-amd64/go1.9
coinbase: 0x87366ef81db496edd0ea2055ca605e8686eec1e6
at block: 945 (Sat, 10 Feb 2018 21:16:14 CET)
modules: eth:1.0 miner:1.0 net:1.0 personal:1.0 rpc:1.0 txpool:1.0 web3:1.0
使用Geth控制臺
>net.version
"1515"
> eth.blockNumber
1910
> eth.coinbase
"0x87366ef81db496edd0ea2055ca605e8686eec1e6"
> eth.sendTransaction({'from':eth.coinbase, 'to':'0x08a58f09194e403d02a1928a7bf78646cfc260b0', 'value':web3.toWei(3, 'ether')})
"0x299a99baa1b39bdee5f02e3c660e19e744f81c2e886b5fc24aa83f92fe100d3f"
>eth.getTransactionReceipt("0x299a99baa1b39bdee5f02e3c660e19e744f81c2e886b5fc24aa83f92fe100d3f")
{
blockHash: "0x212fb593980bd42fcaf3f6d1e6db2dd86d3764df8cac2d90408f481ae7830de8",
blockNumber: 2079,
contractAddress: null,
cumulativeGasUsed: 21000,
from: "0x87366ef81db496edd0ea2055ca605e8686eec1e6",
gasUsed: 21000,
logs: [],
logsBloom: "0x00000000000000000000000000000000000000000000000000000000000000000000000000000000000000000000000000000000000000000000000000000000000000000000000000000000000000000000000000000000000000000000000000000000000000000000000000000000000000000000000000000000000000000000000000000000000000000000000000000000000000000000000000000000000000000000000000000000000000000000000000000000000000000000000000000000000000000000000000000000000000000000000000000000000000000000000000000000000000000000000000000000000000000000000000000000",
status: "0x1",
to: "0x08a58f09194e403d02a1928a7bf78646cfc260b0",
transactionHash: "0x299a99baa1b39bdee5f02e3c660e19e744f81c2e886b5fc24aa83f92fe100d3f",
transactionIndex: 0
}
> exit(退出)
來自:https://www.haowenbo.com/articles/2019/07/24/1563963176492.html