CodeFirstMigrations更新數據庫結構
背景
code first起初當修改model后,要持久化至數據庫中時,總要把原數據庫給刪除掉再創建(DropCreateDatabaseIfModelChanges),此時就會產生一個問題,當我們的舊數據庫中包含一些測試數據時,當持久化更新后,原數據將全部丟失,故我們可以引入EF的數據遷移功能來完成。
要求
已安裝NuGet
過程示例
//原model using System.Collections; using System.Collections.Generic; using System.ComponentModel.DataAnnotations; public class Lesson { public int lessonID { get; set; } [Required] [MaxLength(50)] public string lessonName { get; set; } [Required] public string teacherName { get; set; } public virtual UserInfo UserInfo{get;set;} } //新model using System.Collections; using System.Collections.Generic; using System.ComponentModel.DataAnnotations; public class Lesson { public int lessonID { get; set; } [Required] [MaxLength(50)] public string lessonName { get; set; } [Required] [MaxLength(10)] public string teacherName { get; set; } public virtual UserInfo UserInfo{get;set;} } |
注:區別在于,我們給teacherName屬性加了一個長度限制。
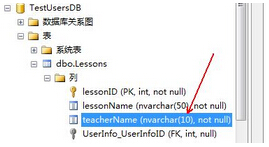
接下來,我們將開始持久化此model至數據庫中(我們現在只是對屬性作修改,此時數據庫中此字段的長度為nvarchar(max),并不是nvarchar(10))
1:在config中配置數據庫連接:
<connectionStrings>
<add name="TestUsersDB" connectionString="Integrated Security=SSPI;Persist Security Info=False;Initial Catalog=TestUsersDB;Data Source=XCL-PC\SQLEXPRESS" providerName="System.Data.SqlClient" />
</connectionStrings>
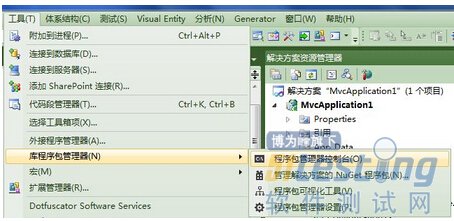
2:打開NuGet控制臺:
posted on 2014-07-21 09:55 順其自然EVO 閱讀(343) 評論(0) 編輯 收藏 所屬分類: 測試學習專欄


