轉載于http://blog.csdn.net/sunyujia/archive/2008/06/15/2549347.aspx
<html>
<head>
<title>Add Files</title>
<style>
a.addfile {
background-image:url(http://p.mail.163.com/js31style/lib/0703131650/163blue/f1.gif);
background-repeat:no-repeat;
background-position:-823px -17px;
display:block;
float:left;
height:20px;
margin-top:-1px;
position:relative;
text-decoration:none;
top:0pt;
width:80px;
}
input.addfile {
/*left:-18px;*/
}
input.addfile {
cursor:pointer !important;
height:18px;
left:-13px;
filter:alpha(opacity=0);
position:absolute;
top:5px;
width:1px;
z-index: -1;
}
</style>
<script type="text/javascript">
function MultiSelector(list_target, max)
{
// Where to write the list
this.list_target = list_target;
// How many elements?
this.count = 0;
// How many elements?
this.id = 0;
// Is there a maximum?
if (max)
{
this.max = max;
}
else
{
this.max = -1;
};
/**
* Add a new file input element
*/
this.addElement = function(element)
{
// Make sure it's a file input element
if (element.tagName == 'INPUT' && element.type == 'file')
{
// Element name -- what number am I?
element.name = 'file_' + this.id++;
// Add reference to this object
element.multi_selector = this;
// What to do when a file is selected
element.onchange = function()
{
// New file input
var new_element = document.createElement('input');
new_element.type = 'file';
new_element.size = 1;
new_element.className = "addfile";
// Add new element
this.parentNode.insertBefore(new_element, this);
// Apply 'update' to element
this.multi_selector.addElement(new_element);
// Update list
this.multi_selector.addListRow(this);
// Hide this: we can't use display:none because Safari doesn't like it
this.style.position = 'absolute';
this.style.left = '-1000px';
};
// If we've reached maximum number, disable input element
if (this.max != -1 && this.count >= this.max)
{
element.disabled = true;
};
// File element counter
this.count++;
// Most recent element
this.current_element = element;
}
else
{
// This can only be applied to file input elements!
alert('Error: not a file input element');
};
};
/**
* Add a new row to the list of files
*/
this.addListRow = function(element)
{
// Row div
var new_row = document.createElement('div');
// Delete button
var new_row_button = document.createElement('input');
new_row_button.type = 'button';
new_row_button.value = 'Delete';
// References
new_row.element = element;
// Delete function
new_row_button.onclick = function()
{
// Remove element from form
this.parentNode.element.parentNode.removeChild(this.parentNode.element);
// Remove this row from the list
this.parentNode.parentNode.removeChild(this.parentNode);
// Decrement counter
this.parentNode.element.multi_selector.count--;
// Re-enable input element (if it's disabled)
this.parentNode.element.multi_selector.current_element.disabled = false;
// Appease Safari
// without it Safari wants to reload the browser window
// which nixes your already queued uploads
return false;
};
// Set row value
new_row.innerHTML = element.value + " ";
// Add button
new_row.appendChild(new_row_button);
// Add it to the list
this.list_target.appendChild(new_row);
};
};
</script>
</head>
<body>
<!-- This is the form -->
<form enctype="multipart/form-data" action="http://127.0.0.1:8080/zzgh/cx/upload.jsp" method="post">
<!-- The file element -- NOTE: it has an ID -->
<a href="javascript:void(1==1);" class="addfile" style="cursor: default;" hidefocus="true">
<input id="my_file_element" class="addfile" type="file" name="file_1" size="1" title="點擊選擇附件">
</a>
<input type="submit" value="上 傳">
</form>
Files:
<!-- This is where the output will appear -->
<div id="files_list" style="padding:5px;border:1px;border-style:solid;border-color:#0000ff;height:100px;width:600px;"></div>
<script>
<!-- Create an instance of the multiSelector class, pass it the output target and the max number of files -->
var multi_selector = new MultiSelector(document.getElementById('files_list'), 100);
<!-- Pass in the file element -->
multi_selector.addElement(document.getElementById('my_file_element'));
</script>
</body>
</html>
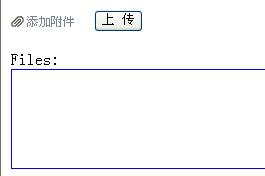
效果圖如下: