
2015年2月3日
1.必須安裝nodejs
2.安裝cnpm用cnpm替代npm
地址:http://npm.taobao.org/
安裝cnpm:
npm install -g cnpm --registry=https://registry.npm.taobao.org
3、用yarn替代npm
yarn的安裝:
第一種方法:參考官方文檔https://yarn.bootcss.com/
第二種方法:cnpm install -g yarn 或者 npm install -g yarn
4、搭建React開發環境的第一種方法(老-現在推薦):
https://reactjs.org/docs/create-a-new-react-app.html
1、必須要安裝nodejs 注意:安裝nodejs穩定版本 教程中的nodejs版本:v8.11.2 教程中的npm版本:v5.6.0
2.安裝腳手架工具 (單文件組件項目生成工具) 只需要安裝一次
npm install -g create-react-app / cnpm install -g create-react-app
3.創建項目 (可能創建多次)
找到項目要創建的目錄:
create-react-app reactdemo
4.cd 到項目里面
cd reactdemo
npm start yarn start運行項目
npm run build yarn build 生成項目
5、搭建React的開發環境的第二種方法(新-未來推薦):
https://reactjs.org/docs/create-a-new-react-app.html
1、必須要安裝nodejs 注意:安裝nodejs穩定版本 教程中的nodejs版本:v8.11.2 教程中的npm版本:v5.6.0
2.安裝腳手架工具并創建項目
找到項目要創建的目錄執行:
npx create-react-app reactdemo
4.cd 到項目里面
cd reactdemo
npm start 運行項目(調試)
npm run build 生成項目(發布)
npx介紹:
npm v5.2.0引入的一條命令(npx),引入這個命令的目的是為了提升開發者使用包內提供的命令行工具的體驗。
詳情:
npx create-react-app reactdemo這條命令會臨時安裝 create-react-app 包,命令完成后create-react-app 會刪掉,不會出現在 global 中。下次再執行,還是會重新臨時安裝。
npx 會幫你執行依賴包里的二進制文件。
再比如 npx http-server 可以一句話幫你開啟一個靜態服務器
posted @
2020-04-16 15:25 Terry Zou 閱讀(319) |
評論 (0) |
編輯 收藏
PostConstruct注釋用于在完成依賴項注入以執行任何初始化之后需要執行的方法。必須在類投入使用之前調用此方法。
所有支持依賴注入的類都必須支持此注釋。即使類沒有請求注入任何資源,也必須調用使用PostConstruct注釋的方法。
只有一個方法可以使用此批注進行批注。
應用PostConstruct注釋的方法必須滿足以下所有條件:除了攔截器之外,方法絕不能有任何參數,在這種情況下它采用Interceptor規范定義的InvocationContext對象。
在攔截器類上定義的方法必須具有以下簽名之一:
void <METHOD>(InvocationContext)Object <METHOD>(InvocationContext)拋出異常注意:
PostConstruct攔截器方法不能拋出應用程序異常,但可以聲明它拋出檢查異常,包括java.lang.Exception,
如果相同的攔截器方法除了生命周期事件之外插入業務或超時方法。
如果PostConstruct攔截器方法返回一個值,容器將忽略它。
在非攔截器類上定義的方法必須具有以下簽名:void <METHOD>()應用PostConstruct的方法可以是public,protected,package private或private。
除應用程序客戶端外,該方法絕不能是靜態的。
該方法可能是最終的。如果該方法拋出一個未經檢查的異常,那么該類絕不能投入使用,除非EJB可以處理異常甚至從它們恢復的EJB
然后就會思考問題,這個注釋是修飾初始化之后需要執行的方法,那么它和@Autowired、構造函數的執行順序是什么呢?(當然注釋中已經說明了PostConstruct注釋用于在完成依賴項注入之后)
@Service
public class BeanA {
@Autowired
private BeanB beanB;
public BeanA() {
System.out.println("這是Bean A 的構造方法");
}
@PostConstruct
private void init() {
System.out.println("這是BeanA的 init 方法");
beanB.testB();
}
}
@Service
public class BeanB {
@PostConstruct
private void init() {
System.out.println("這是BeanB 的init 方法");
}
public BeanB() {
System.out.println("這是Bean B的 構造方法");
}
void testB() {
System.out.println("這是Bean B 的 testB 方法");
}
}
啟動后輸出:
這是Bean A 的構造方法
這是Bean B的 構造方法
這是BeanB 的init 方法
這是BeanA的 init 方法
這是Bean B 的 testB 方法

所以得到結論: 構造方法 > @Autowired > @PostConstruct
posted @
2020-04-09 15:29 Terry Zou 閱讀(319) |
評論 (0) |
編輯 收藏1、ApplicationContext
Spring的核心,Context我們通常解釋為上下文環境。ApplicationContext則是應用的容器。 Spring把Bean(object)放在容器中,需要用就通過get方法取出來。在ApplicationContext接口的眾多實現類中,有3個是我們經常用到的(見表1-1),并且使用這3個實現類也基本能滿足我們Java EE應用開發中的絕大部分需求。
表1-1 ApplicationContext接口的常用實現類介紹
2、ApplicationEvent
是個抽象類,里面只有一個構造函數和一個長整型的timestamp。其源碼如下
public abstract class ApplicationEvent extends EventObject {
/** use serialVersionUID from Spring 1.2 for interoperability */
private static final long serialVersionUID = 7099057708183571937L;
/** System time when the event happened */
private final long timestamp;
/**
* Create a new ApplicationEvent.
* @param source the object on which the event initially occurred (never {@code null})
*/
public ApplicationEvent(Object source) {
super(source);
this.timestamp = System.currentTimeMillis();
}
/**
* Return the system time in milliseconds when the event happened.
*/
public final long getTimestamp() {
return this.timestamp;
}
}
3、ApplicationListener是一個接口,里面只有一個onApplicationEvent方法。如果在上下文中部署一個實現了ApplicationListener接口的bean,那么每當在一個ApplicationEvent發布到 ApplicationContext時,調用ApplicationContext.publishEvent()方法,這個bean得到通知。類似于Oberver設計模式。
其源碼如下:
public interface ApplicationListener<E extends ApplicationEvent> extends EventListener {
/**
* Handle an application event.
* @param event the event to respond to
*/
void onApplicationEvent(E event);
}
下面舉個例子
自定義事件NotifyEvent:
import org.springframework.context.ApplicationEvent;
public class NotifyEvent extends ApplicationEvent {
private String email;
private String content;
public NotifyEvent(Object source){
super(source);
}
public NotifyEvent(Object source,String email,String content){
super(source);
this.email = email;
this.content = content;
}
public String getEmail() {
return email;
}
public void setEmail(String email) {
this.email = email;
}
public String getContent() {
return content;
}
public void setContent(String content) {
this.content = content;
}
}
定義監聽器NotifyListener:
import org.springframework.context.ApplicationListener;
import org.springframework.context.annotation.Configuration;
@Configuration
public class NotifyListener implements ApplicationListener<NotifyEvent>{
@Override
public void onApplicationEvent(NotifyEvent event) {
System.out.println("郵件地址:" + event.getEmail());
System.out.println("郵件內容:" + event.getContent());
}
}
單元測試類ListenerTest: import org.junit.Test;
import org.junit.runner.RunWith;
import org.springframework.beans.factory.annotation.Autowired;
import org.springframework.boot.test.context.SpringBootTest;
import org.springframework.test.context.junit4.SpringRunner;
import org.springframework.web.context.WebApplicationContext;
@RunWith(SpringRunner.class)
@SpringBootTest(classes = ServerLauncher.class, webEnvironment = SpringBootTest.WebEnvironment.RANDOM_PORT)
public class ListenerTest {
@Autowired
private WebApplicationContext webApplicationContext;
@Test
public void testListener(){
NotifyEvent event = new NotifyEvent("object","abc@qq.com","This is the content");
webApplicationContext.publishEvent(event);
}
}
posted @
2020-04-09 14:47 Terry Zou 閱讀(1295) |
評論 (0) |
編輯 收藏之前用戶使用的是3個注解注解他們的main類。分別是@Configuration,@EnableAutoConfiguration,@ComponentScan。由于這些注解一般都是一起使用,spring boot提供了一個統一的注解@SpringBootApplication。
@SpringBootApplication = (默認屬性)@Configuration + @EnableAutoConfiguration + @ComponentScan。
@SpringBootApplication
public class ApplicationMain {
public static void main(String[] args) {
SpringApplication.run(Application.class, args);
}
}
分開解釋@Configuration,@EnableAutoConfiguration,@ComponentScan。
1、@Configuration:提到@Configuration就要提到他的搭檔@Bean。使用這兩個注解就可以創建一個簡單的spring配置類,可以用來替代相應的xml配置文件。
<beans>
<bean id = "car" class="com.test.Car">
<property name="wheel" ref = "wheel"></property>
</bean>
<bean id = "wheel" class="com.test.Wheel"></bean>
</beans>
相當于:
@Configuration
public class Conf {
@Bean
public Car car() {
Car car = new Car();
car.setWheel(wheel());
return car;
}
@Bean
public Wheel wheel() {
return new Wheel();
}
}
@Configuration的注解類標識這個類可以使用Spring IoC容器作為bean定義的來源。@Bean注解告訴Spring,一個帶有@Bean的注解方法將返回一個對象,該對象應該被注冊為在Spring應用程序上下文中的bean。
2、@EnableAutoConfiguration:能夠自動配置spring的上下文,試圖猜測和配置你想要的bean類,通常會自動根據你的類路徑和你的bean定義自動配置。
3、@ComponentScan:會自動掃描指定包下的全部標有@Component的類,并注冊成bean,當然包括@Component下的子注解@Service,@Repository,@Controller。
posted @
2020-04-09 09:10 Terry Zou 閱讀(136) |
評論 (0) |
編輯 收藏package com.zhihe.xqsh.utils;
import java.io.File;
import java.io.FileOutputStream;
import java.io.IOException;
import java.io.InputStream;
import java.io.UnsupportedEncodingException;
import java.util.Date;
import java.util.List;
import org.apache.http.HttpEntity;
import org.apache.http.HttpResponse;
import org.apache.http.HttpStatus;
import org.apache.http.HttpVersion;
import org.apache.http.NameValuePair;
import org.apache.http.client.ClientProtocolException;
import org.apache.http.client.HttpClient;
import org.apache.http.client.entity.UrlEncodedFormEntity;
import org.apache.http.client.methods.HttpGet;
import org.apache.http.client.methods.HttpPost;
import org.apache.http.conn.ClientConnectionManager;
import org.apache.http.conn.params.ConnManagerParams;
import org.apache.http.conn.params.ConnRouteParams;
import org.apache.http.conn.scheme.PlainSocketFactory;
import org.apache.http.conn.scheme.Scheme;
import org.apache.http.conn.scheme.SchemeRegistry;
import org.apache.http.conn.ssl.SSLSocketFactory;
import org.apache.http.impl.client.DefaultHttpClient;
import org.apache.http.impl.conn.tsccm.ThreadSafeClientConnManager;
import org.apache.http.impl.cookie.BasicClientCookie;
import org.apache.http.params.BasicHttpParams;
import org.apache.http.params.HttpConnectionParams;
import org.apache.http.params.HttpParams;
import org.apache.http.params.HttpProtocolParams;
import org.apache.http.util.EntityUtils;
import com.zhihe.xqsh.network.ServerErrorException;
import android.accounts.NetworkErrorException;
import android.annotation.SuppressLint;
import android.util.Log;
public class CustomerHttpClient {
private static final String TAG = CustomerHttpClient.class.getSimpleName();
private static DefaultHttpClient customerHttpClient;
private CustomerHttpClient() {
}
public static synchronized HttpClient getHttpClient() {
if (null == customerHttpClient) {
HttpParams params = new BasicHttpParams();
// 設置????基本參數
HttpProtocolParams.setVersion(params, HttpVersion.HTTP_1_1);
HttpProtocolParams.setContentCharset(params, "UTF-8");
HttpProtocolParams.setUseExpectContinue(params, true);
HttpProtocolParams.setUserAgent(params, "Mozilla/5.0(Linux;U;Android 2.2.1;en-us;Nexus One Build.FRG83) "
+ "AppleWebKit/553.1(KHTML,like Gecko) Version/4.0 Mobile Safari/533.1");
// 超時設置
/* 從連接池中取連接的超時時??*/
ConnManagerParams.setTimeout(params, 2000);
ConnManagerParams.setMaxTotalConnections(params, 800);
/* 連接超時 */
HttpConnectionParams.setConnectionTimeout(params, 5000);
/* 請求超時 */
HttpConnectionParams.setSoTimeout(params, 10000);
// 設置我們的HttpClient支持HTTP和HTTPS兩種模式
SchemeRegistry schReg = new SchemeRegistry();
schReg.register(new Scheme("http", PlainSocketFactory.getSocketFactory(), 80));
schReg.register(new Scheme("https", SSLSocketFactory.getSocketFactory(), 443));
// 使用線程安全的連接管理來創建HttpClient
ClientConnectionManager conMgr = new ThreadSafeClientConnManager(params, schReg);
// ????連接數:ConnManagerParams.setMaxTotalConnections(params, 50);
customerHttpClient = new DefaultHttpClient(conMgr, params);
}
return customerHttpClient;
}
/**
* 以get方式提交數據
*
* @param url 提交地址
* @param params 參數
* @return 響應結果
* @throws ServerErrorException 請求失敗
* @throws NetworkErrorException 連接失敗
*/
public static String get(String url, String params) throws ServerErrorException, NetworkErrorException {
int tryTimes = 0;
NullPointerException ex;
do {
try {
return tryGet(url, params);
} catch (NullPointerException e) {
ex = e;
tryTimes++;
}
} while (tryTimes < 3);
throw ex;
}
/**
* 以get方式提交數據
*
* @param url 提交地址
* @param params 參數
* @return 響應結果
* @throws ServerErrorException 請求失敗
* @throws NetworkErrorException 連接失敗
*/
public static String tryGet(String url, String params) throws ServerErrorException, NetworkErrorException {
try {
HttpGet request = new HttpGet(url + params);
/*if (LotteryApplication.isCmwap()) {
org.apache.http.HttpHost proxy = new org.apache.http.HttpHost("10.0.0.172", 80, "http");
HttpParams httpParams = new BasicHttpParams();
ConnRouteParams.setDefaultProxy(httpParams, proxy);
request.setParams(httpParams);
}*/
HttpClient client = getHttpClient();
HttpResponse response = client.execute(request);
if (response.getStatusLine().getStatusCode() != HttpStatus.SC_OK) {
throw new ServerErrorException("????????æ???????????");
}
HttpEntity resEntity = response.getEntity();
String result = (resEntity == null) ? null : EntityUtils.toString(resEntity, "UTF-8");
return result;
} catch (UnsupportedEncodingException e) {
logw(e.getMessage());
return null;
} catch (ClientProtocolException e) {
logw(e.getMessage());
return null;
} catch (IOException e) {
throw new NetworkErrorException("??????????????????????", e);
}
}
private static void logw(String string) {
if (string != null) {
Log.w(TAG, string);
}
}
/**
* 以post方式提交數據
*
* @param url 提交地址
* @param params 參數
* @return 響應結果
* @throws ServerErrorException 請求失敗
* @throws NetworkErrorException 連接失敗
*/
public static String post(String url, List<NameValuePair> params) throws ServerErrorException, NetworkErrorException {
return post(url, params, null);
}
/**
* 以post方式提交數據
*
* @param url 提交地址
* @param params 參數
* @param soTimeout 響應超時時間,單位毫??
* @return 響應結果
* @throws ServerErrorException 請求失敗
* @throws NetworkErrorException 連接失敗
*/
public static String post(String url, List<NameValuePair> params, int soTimeout) throws ServerErrorException,
NetworkErrorException {
HttpParams httpParams;
if (soTimeout <= 0) {
httpParams = null;
} else {
httpParams = new BasicHttpParams();
HttpConnectionParams.setSoTimeout(httpParams, soTimeout);
}
return post(url, params, httpParams);
}
/**
* 以post方式提交數據
*
* @param url 提交地址
* @param params 參數
* @param httpParams http參數
* @return 響應結果
* @throws ServerErrorException 請求失敗
* @throws NetworkErrorException 連接失敗
*/
public static String post(String url, List<NameValuePair> params, HttpParams httpParams) throws ServerErrorException,
NetworkErrorException {
int tryTimes = 0;
NullPointerException ex;
do {
try {
return tryPost(url, params, httpParams);
} catch (NullPointerException e) {
ex = e;
tryTimes++;
}
} while (tryTimes < 3);
throw ex;
}
/**
* 以post方式提交數據
*
* @param url 提交地址
* @param params 參數
* @param httpParams http參數
* @return 響應結果
* @throws ServerErrorException 請求失敗
* @throws NetworkErrorException 連接失敗
*/
public static String tryPost(String url, List<NameValuePair> params, HttpParams httpParams) throws ServerErrorException,
NetworkErrorException {
try {
HttpPost request = new HttpPost(url);
if (params != null && params.size() > 0) {
request.setEntity(new UrlEncodedFormEntity(params, "UTF-8"));
}
// if (LotteryApplication.isCmwap()) {
// org.apache.http.HttpHost proxy = new org.apache.http.HttpHost("10.0.0.172", 80, "http");
// if (httpParams == null)
// httpParams = new BasicHttpParams();
// ConnRouteParams.setDefaultProxy(httpParams, proxy);
// }
if (httpParams != null)
request.setParams(httpParams);
//Log.v("CS", params.toString());
HttpClient client = getHttpClient();
HttpResponse response = client.execute(request);
if (response.getStatusLine().getStatusCode() != HttpStatus.SC_OK) {
//Log.v("CS", params.toString());
//Log.v("CS", response.getStatusLine().getStatusCode() + "");
request.abort();
throw new ServerErrorException("????????æ???????????");
}
if (response.getStatusLine ().getStatusCode () != 200) {
request.abort(); //?ж?????,?????????????????????
return null;
}
HttpEntity resEntity = response.getEntity();
String result = (resEntity == null) ? null : EntityUtils.toString(resEntity, "UTF-8");
//Log.v("CS", params.toString() + "||||" + result);
return result;
} catch (UnsupportedEncodingException e) {
logw(e.getMessage());
return null;
} catch (ClientProtocolException e) {
logw(e.getMessage());
return null;
} catch (IOException e) {
throw new NetworkErrorException(e.getMessage(), e);
//throw new NetworkErrorException("連接不成功,請檢查網絡設??, e);
}
}
@SuppressLint("SdCardPath")
public static String download(String url) throws ServerErrorException, NetworkErrorException {
try {
//Log.i("http-download", url);
HttpPost request = new HttpPost(url);
HttpClient client = getHttpClient();
HttpResponse response = client.execute(request);
if (response.getStatusLine().getStatusCode() != HttpStatus.SC_OK) {
throw new ServerErrorException("????????æ???????????");
}
HttpEntity entity = response.getEntity();
InputStream is = entity.getContent();
if (is == null)
throw new ServerErrorException("stream is null ");
String fileExt = url.substring(url.lastIndexOf(".") + 1, url.length()).toLowerCase();
String fileName = url.substring(url.lastIndexOf("/") + 1, url.lastIndexOf("."));
File tempFile = new File("/sdcard/" + fileName + "." + fileExt);
if (!tempFile.exists())
tempFile.createNewFile();
FileOutputStream fileOutputStream = new FileOutputStream(tempFile);
byte[] buf = new byte[1024];
int ch;
while ((ch = is.read(buf)) != -1) {
fileOutputStream.write(buf, 0, ch);
}
fileOutputStream.flush();
fileOutputStream.close();
return tempFile.getAbsolutePath();
} catch (UnsupportedEncodingException e) {
logw(e.getMessage());
return null;
} catch (ClientProtocolException e) {
logw(e.getMessage());
return null;
} catch (IOException e) {
throw new NetworkErrorException(e.getMessage(), e);
}
}
/**
* 清空cookie
*/
public static void clearCookie() {
if (customerHttpClient != null)
customerHttpClient.getCookieStore().clear();
}
/**
* 清除指定cookie
*
* @param name cookie名稱
*/
public static void clearCookie(String name) {
if (customerHttpClient == null)
return;
BasicClientCookie expiredCookie = new BasicClientCookie(name, "null");
expiredCookie.setExpiryDate(new Date(System.currentTimeMillis() - 1000));
customerHttpClient.getCookieStore().addCookie(expiredCookie);
}
}
posted @
2015-07-13 22:10 Terry Zou 閱讀(288) |
評論 (0) |
編輯 收藏
http://yunpan.cn/ccdbTgQaYa4U7
posted @
2015-07-13 11:04 Terry Zou 閱讀(144) |
評論 (0) |
編輯 收藏private Drawable img_time_filter,img_time_filter_selected ;
//過濾器TextView中顯示的圖片
img_time_filter = getResources().getDrawable(R.drawable.time_filter);
//調用setCompoundDrawables時,必須調用Drawable.setBounds()方法,否則圖片不顯示
img_time_filter.setBounds(0, 0, img_time_filter.getMinimumWidth(), img_time_filter.getMinimumHeight());
img_time_filter_selected = getResources().getDrawable(R.drawable.time_filter_selected);
img_time_filter_selected.setBounds(0, 0, img_time_filter_selected.getMinimumWidth(), img_time_filter_selected.getMinimumHeight());
tv_filterTime.setCompoundDrawables(img_time_filter_selected, null, null, null);
tv_filterTime.setTextColor(getResources().getColor(R.color.white));
rl_filterTime.setBackgroundColor(getResources().getColor(R.color.red));
tv_filterTime.setCompoundDrawables(img_time_filter, null, null, null);
rl_filterTime.setBackgroundColor(getResources().getColor(R.color.white));
lv_filterTime.setVisibility(View.INVISIBLE);
posted @
2015-07-09 00:04 Terry Zou 閱讀(220) |
評論 (0) |
編輯 收藏<?xml version="1.0" encoding="utf-8"?>
<FrameLayout xmlns:android="http://schemas.android.com/apk/res/android"
android:layout_width="match_parent"
android:layout_height="match_parent"
android:background="@color/white"
android:orientation="vertical" >
<com.baidu.mapapi.map.MapView
android:id="@+id/bmapView_routePlanActivity"
android:layout_width="match_parent"
android:layout_height="match_parent"
android:clickable="true" />
<LinearLayout
android:layout_width="match_parent"
android:layout_height="60dp"
android:background="@drawable/common_title_back"
android:gravity="center"
android:padding="5dp" >
<Button
android:id="@+id/button_transit_routePlan"
android:layout_width="0dp"
android:drawableLeft="@drawable/ic_bus"
android:padding="5dp"
android:background="@drawable/selector_white_gray"
android:layout_height="50dp"
android:layout_weight="1.0"
android:onClick="SearchButtonProcess"
android:text="公交" />
<Button
android:id="@+id/button_drive_routePlan"
android:layout_width="0dp"
android:drawableLeft="@drawable/ic_drive"
android:layout_height="50dp"
android:layout_weight="1.0"
android:padding="5dp"
android:background="@drawable/selector_white_gray"
android:onClick="SearchButtonProcess"
android:text="駕車" />
<Button
android:id="@+id/button_walk_routePlan"
android:layout_width="0dp"
android:layout_height="50dp"
android:drawableLeft="@drawable/ic_walk"
android:layout_weight="1.0"
android:padding="5dp"
android:background="@drawable/selector_white_gray"
android:onClick="SearchButtonProcess"
android:text="步行" />
</LinearLayout>
<LinearLayout
android:id="@+id/linearLayout_node_routePlan"
android:layout_width="match_parent"
android:layout_height="match_parent"
android:layout_marginBottom="10dip"
android:visibility="gone"
android:gravity="bottom|center_horizontal" >
<Button
android:id="@+id/button_pre_routePlan"
android:layout_width="60dp"
android:layout_height="30dp"
android:layout_marginRight="2dip"
android:background="@drawable/pre_"
android:onClick="nodeClick" />
<Button
android:id="@+id/button_next_routePlan"
android:layout_width="60dp"
android:layout_height="30dp"
android:layout_marginLeft="2dip"
android:background="@drawable/next_"
android:onClick="nodeClick" />
</LinearLayout>
</FrameLayout>
posted @
2015-07-08 23:57 Terry Zou|
編輯 收藏<LinearLayout
android:id="@+id/estate_linear"
android:layout_width="fill_parent"
android:layout_height="35dp"
android:layout_weight="1"
android:background="@drawable/border_rounded_gray_white"
android:layout_gravity="center_vertical"
android:gravity="center_vertical"
android:layout_margin="5dp"
android:orientation="horizontal" >
<ImageButton
android:id="@+id/object_btn_search"
android:layout_width="wrap_content"
android:layout_height="wrap_content"
android:layout_marginLeft="8dp"
android:layout_gravity="center_vertical|right"
android:background="@drawable/btn_search"
android:contentDescription="@null"
android:scaleType="fitXY" />
<RelativeLayout
android:layout_width="1dp"
android:layout_height="33dp"
android:layout_marginLeft="8dp"
android:background="@color/color_line" />
<EditText
android:id="@+id/object_et_content"
style="@style/StringSearchText"
android:layout_gravity="left|center_vertical"
android:layout_marginLeft="2dp"
android:layout_marginRight="8dp"
android:layout_weight="1"
android:background="@null"
android:hint="@string/tip_search_hint"
android:imeOptions="actionSend"
android:singleLine="true"
android:textCursorDrawable="@null"
android:textColorHint="#626463" />
<ImageButton
android:id="@+id/object_btn_del"
android:layout_width="wrap_content"
android:layout_height="wrap_content"
android:layout_gravity="right|center_vertical"
android:layout_marginRight="10dp"
android:background="@drawable/ic_clear" />
</LinearLayout>


border_rounded_gray_white.xml
<?xml version="1.0" encoding="utf-8"?>
<layer-list xmlns:android="http://schemas.android.com/apk/res/android" >
<!-- 連框顏色值 -->
<item>
<shape>
<solid android:color="@color/bg_gray" />
<corners
android:bottomLeftRadius="3dp"
android:bottomRightRadius="3dp"
android:topLeftRadius="3dp"
android:topRightRadius="3dp" />
</shape>
</item>
<!-- 主體背景顏色值 -->
<item
android:bottom="1dp"
android:left="1dp"
android:right="1dp"
android:top="1dp">
<shape>
<solid android:color="@color/white" />
<corners
android:bottomLeftRadius="3dp"
android:bottomRightRadius="3dp"
android:topLeftRadius="3dp"
android:topRightRadius="3dp" />
</shape>
</item>
</layer-list>
<style name="StringSearchText">
<item name="android:textSize">14dp</item>
<item name="android:layout_width">wrap_content</item>
<item name="android:layout_height">wrap_content</item>
<item name="android:textColor">@android:color/black</item>
</style>
btn_search.xml
<?xml version="1.0" encoding="utf-8"?>
<selector xmlns:android="http://schemas.android.com/apk/res/android">
<!-- 沒有焦點時的背景圖片 -->
<item android:drawable="@drawable/ic_search_normal" android:state_window_focused="false"/>
<!-- 非觸摸模式下獲得焦點并單擊時的背景圖片 -->
<item android:drawable="@drawable/ic_search_pressed" android:state_focused="true" android:state_pressed="true"/>
<!-- 觸摸模式下單擊時的背景圖片 -->
<item android:drawable="@drawable/ic_search_pressed" android:state_focused="false" android:state_pressed="true"/>
<!-- 選中時的圖片背景 -->
<item android:drawable="@drawable/ic_search_pressed" android:state_selected="true"/>
<!-- 獲得焦點時的圖片背景 -->
<item android:drawable="@drawable/ic_search_pressed" android:state_focused="true"/>
<!-- 默認圖片背景 -->
<item android:drawable="@drawable/ic_search_normal"/>
</selector>
<color name="color_line">#bebebe</color>
private TextWatcher textWatcher = new TextWatcher() {
@Override
public void beforeTextChanged(CharSequence s, int start, int count,
int after) {
}
@Override
public void onTextChanged(CharSequence s, int start, int before,
int count) {
}
@Override
public void afterTextChanged(Editable s) {
mKeywords = tv_keyword.getText().toString();
AgUtils.log(TAG+"mKeywords:"+mKeywords, 4);
if (TextUtils.isEmpty(mKeywords)) {
object_btn_del.setVisibility(View.GONE);
} else {
object_btn_del.setVisibility(View.VISIBLE);
searchIndexListInfo();
}
}
};
tv_keyword.addTextChangedListener(textWatcher);
posted @
2015-07-08 23:55 Terry Zou|
編輯 收藏轉載:http://www.cnblogs.com/allenzheng/archive/2013/04/28/3050065.html
當應用運行起來后就會開啟一條線程,線程中會運行一個任務棧,當Activity實例創建后就會放入任務棧中。Activity啟動模式的設置在AndroidManifest.xml文件中,通過配置Activity的屬性android:launchMode=""設置。
1. Standared模式(默認)
我們平時直接創建的Activity都是這種模式的Activity,這種模式的Activity的特點是:只要你創建了Activity實例,一旦激活該Activity,則會向任務棧中加入新創建的實例,退出Activity則會在任務棧中銷毀該實例。
2. SingleTop模式
這種模式會考慮當前要激活的Activity實例在任務棧中是否正處于棧頂,如果處于棧頂則無需重新創建新的實例,會重用已存在的實例,否則會在任務棧中創建新的實例。
3. SingleTask模式
如果任務棧中存在該模式的Activity實例,則把棧中該實例以上的Activity實例全部移除,調用該實例的newInstance()方法重用該Activity,使該實例處於棧頂位置,否則就重新創建一個新的Activity實例。
4. SingleInstance模式
當該模式Activity實例在任務棧中創建后,只要該實例還在任務棧中,即只要激活的是該類型的Activity,都會通過調用實例的newInstance()方法重用該Activity,此時使用的都是同一個Activity實例,它都會處于任務棧的棧頂。此模式一般用于加載較慢的,比較耗性能且不需要每次都重新創建的Activity。
posted @
2015-06-24 18:10 Terry Zou 閱讀(479) |
評論 (0) |
編輯 收藏
摘要: android中跨進程通訊的4種方式
轉自:http://www.cnblogs.com/sevenyuan/archive/2013/03/22/2975122.html由于android系統中應用程序之間不能共享內存。因此,在不同應用程序之間交互數據(跨進程通訊)就稍微麻煩一些。在android SDK中提供了4種用于跨進程通訊的方式。這4種方式正好對應于android系統中4種應用...
閱讀全文
posted @
2015-06-24 17:28 Terry Zou 閱讀(505) |
評論 (0) |
編輯 收藏Android 手機上的應用一般情況下都在一個進程中運行。
但是,也可以指定Activity或者Service在Remote 進程中執行。多數情況下,只有在用戶認為應用退出后還需要繼續后臺長期運行的應用,才需要這樣做。此時,該應用有兩個進程。
還有一種hack的方式,在apk中通過調用命令行來啟動另外的進程。此種方式用戶不可見,也不安全。不提倡。
posted @
2015-06-24 17:12 Terry Zou 閱讀(557) |
評論 (0) |
編輯 收藏官網幫助文檔鏈接:
http://developer.android.com/guide/components/fragments.html
主要看兩張圖,和跑代碼
一,Fragment的生命周

二,與Activity生命周期的對比

場景演示 : 切換到該Fragment
11-29 14:26:35.095: D/AppListFragment(7649): onAttach
11-29 14:26:35.095: D/AppListFragment(7649): onCreate
11-29 14:26:35.095: D/AppListFragment(7649): onCreateView
11-29 14:26:35.100: D/AppListFragment(7649): onActivityCreated
11-29 14:26:35.120: D/AppListFragment(7649): onStart
11-29 14:26:35.120: D/AppListFragment(7649): onResume
屏幕滅掉:
11-29 14:27:35.185: D/AppListFragment(7649): onPause
11-29 14:27:35.205: D/AppListFragment(7649): onSaveInstanceState
11-29 14:27:35.205: D/AppListFragment(7649): onStop
屏幕解鎖
11-29 14:33:13.240: D/AppListFragment(7649): onStart
11-29 14:33:13.275: D/AppListFragment(7649): onResume
切換到其他Fragment:
11-29 14:33:33.655: D/AppListFragment(7649): onPause
11-29 14:33:33.655: D/AppListFragment(7649): onStop
11-29 14:33:33.660: D/AppListFragment(7649): onDestroyView
切換回本身的Fragment:
11-29 14:33:55.820: D/AppListFragment(7649): onCreateView
11-29 14:33:55.825: D/AppListFragment(7649): onActivityCreated
11-29 14:33:55.825: D/AppListFragment(7649): onStart
11-29 14:33:55.825: D/AppListFragment(7649): onResume
回到桌面
11-29 14:34:26.590: D/AppListFragment(7649): onPause
11-29 14:34:26.880: D/AppListFragment(7649): onSaveInstanceState
11-29 14:34:26.880: D/AppListFragment(7649): onStop
回到應用
11-29 14:36:51.940: D/AppListFragment(7649): onStart
11-29 14:36:51.940: D/AppListFragment(7649): onResume
退出應用
11-29 14:37:03.020: D/AppListFragment(7649): onPause
11-29 14:37:03.155: D/AppListFragment(7649): onStop
11-29 14:37:03.155: D/AppListFragment(7649): onDestroyView
11-29 14:37:03.165: D/AppListFragment(7649): onDestroy
11-29 14:37:03.165: D/AppListFragment(7649): onDetach
比Activity多了一些生命周期,完整和Activity對接上,大家好好利用。
轉載:http://blog.csdn.net/forever_crying/article/details/8238863/
posted @
2015-06-24 16:05 Terry Zou 閱讀(443) |
評論 (0) |
編輯 收藏ANR(Application Not Responding)
ANR定義:在Android上,如果你的應用程序有一段時間響應不夠靈敏,系統會向用戶顯示一個對話框,這個對話框稱作應用程序無響應對話框(ANR:Application Not Responding),用戶可以選擇“等待”讓應用程序繼續運行,也可以選擇“強制關閉”。所以一個順暢合理的應用程序不會出現ANR,而讓用戶處理這個對話框。因此,在程序里對響應性能的設計很重要,這樣系統不會顯示ANR給用戶。
默認情況下,Android的Activity執行時間為5s,BroadcastReceiver的最長執行時間為10s.
第一,什么會引發ANR
在Android里,應用程序響應由Activity Manager和WindowManager系統服務監視的,當它監聽到一下一種情況時,Android就會針對特定的應用程序顯示ANR:
1).在5秒內沒有響應輸入事件(例如,按鍵按下,屏幕觸摸)
2).BroadcastReceiver在10秒內沒有執行完畢
造成以上兩點多原因有很多,比如在主線程中做非常耗時的操作,比如下載,IO異常等。
潛在的耗時操作,例如網絡或數據庫操作或者高耗時的計算如改變位圖尺寸,這些操作應該放在子線程中(或者以數據庫為例,通過異步請求的方式)來完成,然而,不是說你的主線程阻塞在那里等待子線程來完成--也不用調用Thread.wait()或Thread.sleep();替代的方法是主線程需要為子線程提供一個handler,以便完成時能夠交給主線程,以這種方式設計你的應用程序,將能保證你的主線程保持對輸入的響應性并能避免由于5秒輸入事件的超時引發的ANR對話框。
第二,如何避免ANR
1.運行在主線程里的任何方法都盡可能少做事情。特別是,Activity應該在它的關鍵生命周期方法(如onCreate()和onResume())里盡可能少的去做創建操作。(可以采用重新開啟子線程的方式,然后使用Handler+Message的方式做一些操作,比如更新主線程中的ui等)
2.應用程序應該避免在BroadcastReceiver里做耗時的操作或計算。但不再是在子線程里做這些任務(因為 BroadcastReceiver的生命周期短),替代的是,如果響應Intent廣播需要執行一個耗時的動作的話,應用程序應該啟動一個 Service。(此處需要注意的是可以在廣播接受者中啟動Service,但是卻不可以在Service中啟動broadcasereciver,關于原因后續會有介紹,此處不是本文重點)
3.避免在Intent Receiver里啟動一個Activity,因為它會創建一個新的畫面,并從當前用戶正在運行的程序上搶奪焦點。如果你的應用程序在響應Intent廣 播時需要向用戶展示什么,你應該使用Notification Manager來實現。
總結:anr異常也是在程序中自己經常遇到的問題,主要的解決辦法自己最常用的就是不要在主線程中做耗時的操作,而應放在子線程中來實現,比如采用Handler+mesage的方式,或者是有時候需要做一些和網絡相互交互的耗時操作就采用asyntask異步任務的方式(它的底層其實Handler+mesage有所區別的是它是線程池)等,在主線程中更新UI。
posted @
2015-06-24 16:00 Terry Zou 閱讀(312) |
評論 (0) |
編輯 收藏
摘要: String string="
歡迎你來到的
jack
的
android
使用技術總結
";
TextV
iew info2=(TextView)super.findV
iewById(R.id.info); ...
閱讀全文
posted @
2015-06-15 14:21 Terry Zou 閱讀(226) |
評論 (0) |
編輯 收藏
摘要: 開發自定義控件的步驟:
1、了解View的工作原理
2、 編寫繼承自View的子類
3、 為自定義View類增加屬性
4、 繪制控件
5、 響應用戶消息
6 、自定義回調函數
一、View結構原理
Android系統的視圖結構的設計也采用了組合模式,即View作為所有圖形的基類,Viewgroup對View繼承...
閱讀全文
posted @
2015-05-19 17:29 Terry Zou 閱讀(374) |
評論 (0) |
編輯 收藏
摘要: Android 管理Fragments
FragmentManager
為了管理Activity中的fragments,需要使...
閱讀全文
posted @
2015-05-18 18:28 Terry Zou 閱讀(432) |
評論 (0) |
編輯 收藏|
java.version |
Java 運行時環境版本 |
|
java.vendor |
Java 運行時環境供應商 |
|
java.vendor.url |
Java 供應商的 URL |
|
java.home |
Java 安裝目錄 |
|
java.vm.specification.version |
Java 虛擬機規范版本 |
|
java.vm.specification.vendor |
Java 虛擬機規范供應商 |
|
java.vm.specification.name |
Java 虛擬機規范名稱 |
|
java.vm.version |
Java 虛擬機實現版本 |
|
java.vm.vendor |
Java 虛擬機實現供應商 |
|
java.vm.name |
Java 虛擬機實現名稱 |
|
java.specification.version |
Java 運行時環境規范版本 |
|
java.specification.vendor |
Java 運行時環境規范供應商 |
|
java.specification.name |
Java 運行時環境規范名稱 |
|
java.class.version |
Java 類格式版本號 |
|
java.class.path |
Java 類路徑 |
|
java.library.path |
加載庫時搜索的路徑列表 |
|
java.io.tmpdir |
默認的臨時文件路徑 |
|
java.compiler |
要使用的 JIT 編譯器的名稱 |
|
java.ext.dirs |
一個或多個擴展目錄的路徑 |
|
os.name |
操作系統的名稱 |
|
os.arch |
操作系統的架構 |
|
os.version |
操作系統的版本 |
|
file.separator |
文件分隔符(在 UNIX 系統中是“/”) |
|
path.separator |
路徑分隔符(在 UNIX 系統中是“:”) |
|
line.separator |
行分隔符(在 UNIX 系統中是“/n”) |
|
user.name |
用戶的賬戶名稱 |
|
user.home |
用戶的主目錄 |
|
user.dir |
用戶的當前工作目錄 |
StringBuffer response = new StringBuffer();while ((line = reader.readLine()) != null) { response.append(line).append( System.getProperty("line.separator"));}
public class SystemProperty {
public static void main(String args[]) {
System.out.println("java_vendor:" + System.getProperty("java.vendor"));
System.out.println("java_vendor_url:"
+ System.getProperty("java.vendor.url"));
System.out.println("java_home:" + System.getProperty("java.home"));
System.out.println("java_class_version:"
+ System.getProperty("java.class.version"));
System.out.println("java_class_path:"
+ System.getProperty("java.class.path"));
System.out.println("os_name:" + System.getProperty("os.name"));
System.out.println("os_arch:" + System.getProperty("os.arch"));
System.out.println("os_version:" + System.getProperty("os.version"));
System.out.println("user_name:" + System.getProperty("user.name"));
System.out.println("user_home:" + System.getProperty("user.home"));
System.out.println("user_dir:" + System.getProperty("user.dir"));
System.out.println("java_vm_specification_version:"
+ System.getProperty("java.vm.specification.version"));
System.out.println("java_vm_specification_vendor:"
+ System.getProperty("java.vm.specification.vendor"));
System.out.println("java_vm_specification_name:"
+ System.getProperty("java.vm.specification.name"));
System.out.println("java_vm_version:"
+ System.getProperty("java.vm.version"));
System.out.println("java_vm_vendor:"
+ System.getProperty("java.vm.vendor"));
System.out
.println("java_vm_name:" + System.getProperty("java.vm.name"));
System.out.println("java_ext_dirs:"
+ System.getProperty("java.ext.dirs"));
System.out.println("file_separator:"
+ System.getProperty("file.separator"));
System.out.println("path_separator:"
+ System.getProperty("path.separator"));
System.out.println("line_separator:"
+ System.getProperty("line.separator"));
}
轉載:http://blog.csdn.net/kongqz/article/details/3987198
posted @
2015-05-15 09:33 Terry Zou 閱讀(404) |
評論 (0) |
編輯 收藏
注意上面的雙引號,何為“容易”?言下之意就是該activity還沒有被銷毀,而僅僅是一種可能性。這種可能性有哪些?通過重寫一個activity的所有生命周期的onXXX方法,包括onSaveInstanceState和onRestoreInstanceState方法,我們可以清楚地知道當某個activity(假定為activity A)顯示在當前task的最上層時,其onSaveInstanceState方法會在什么時候被執行,有這么幾種情況:
1、當用戶按下HOME鍵時。
這是顯而易見的,系統不知道你按下HOME后要運行多少其他的程序,自然也不知道activity A是否會被銷毀,故系統會調用onSaveInstanceState,讓用戶有機會保存某些非永久性的數據。以下幾種情況的分析都遵循該原則
2、長按HOME鍵,選擇運行其他的程序時。
3、按下電源按鍵(關閉屏幕顯示)時。
4、從activity A中啟動一個新的activity時。
5、屏幕方向切換時,例如從豎屏切換到橫屏時。
在屏幕切換之前,系統會銷毀activity A,在屏幕切換之后系統又會自動地創建activity A,所以onSaveInstanceState一定會被執行。
總而言之,onSaveInstanceState的調用遵循一個重要原則,即當系統“未經你許可”時銷毀了你的activity,則onSaveInstanceState會被系統調用,這是系統的責任,因為它必須要提供一個機會讓你保存你的數據(當然你不保存那就隨便你了)。
至于onRestoreInstanceState方法,需要注意的是,onSaveInstanceState方法和onRestoreInstanceState方法“不一定”是成對的被調用的,onRestoreInstanceState被調用的前提是,activity A“確實”被系統銷毀了,而如果僅僅是停留在有這種可能性的情況下,則該方法不會被調用,例如,當正在顯示activity A的時候,用戶按下HOME鍵回到主界面,然后用戶緊接著又返回到activity A,這種情況下activity A一般不會因為內存的原因被系統銷毀,故activity A的onRestoreInstanceState方法不會被執行。
另外,onRestoreInstanceState的bundle參數也會傳遞到onCreate方法中,你也可以選擇在onCreate方法中做數據還原。 轉載:http://gundumw100.iteye.com/blog/1115080
posted @
2015-05-11 10:34 Terry Zou 閱讀(350) |
評論 (0) |
編輯 收藏Android中常常使用shape來定義控件的一些顯示屬性,今天看了一些shape的使用,對shape有了大體的了解,稍作總結:
先看下面的代碼:
<shape>
<!-- 實心 -->
<solid android:color="#ff9d77"/>
<!-- 漸變 -->
<gradient
android:startColor="#ff8c00"
android:endColor="#FFFFFF"
android:angle="270" />
<!-- 描邊 -->
<stroke
android:width="2dp"
android:color="#dcdcdc" />
<!-- 圓角 -->
<corners
android:radius="2dp" />
<padding
android:left="10dp"
android:top="10dp"
android:right="10dp"
android:bottom="10dp" />
</shape>
solid:實心,就是填充的意思
android:color指定填充的顏色
gradient:漸變
android:startColor和android:endColor分別為起始和結束顏色,ndroid:angle是漸變角度,必須為45的整數倍。
另外漸變默認的模式為android:type="linear",即線性漸變,可以指定漸變為徑向漸變,android:type="radial",徑向漸變需要指定半徑android:gradientRadius="50"。
stroke:描邊
android:width="2dp" 描邊的寬度,android:color 描邊的顏色。
我們還可以把描邊弄成虛線的形式,設置方式為:
android:dashWidth="5dp"
android:dashGap="3dp"
其中android:dashWidth表示'-'這樣一個橫線的寬度,android:dashGap表示之間隔開的距離。
corners:圓角
android:radius為角的弧度,值越大角越圓。
我們還可以把四個角設定成不同的角度,方法為:
<corners
android:topRightRadius="20dp" 右上角
android:bottomLeftRadius="20dp" 右下角
android:topLeftRadius="1dp" 左上角
android:bottomRightRadius="0dp" 左下角
/>
這里有個地方需要注意,bottomLeftRadius是右下角,而不是左下角,這個有點郁悶,不過不影響使用,記得別搞錯了就行。
還有網上看到有人說設置成0dp無效,不過我在測試中發現是可以的,我用的是2.2,可能修復了這個問題吧,如果無效的話那就只能設成1dp了。
padding:間隔
這個就不用多說了,XML布局文件中經常用到。
大體的就是這樣,以下是一個使用的具體示例:用在Selector中作為Button的背景,分別定義了按鈕的一般狀態、獲得焦點狀態和按下時的狀態,具體代碼如下:
main.xml:
<Button
android:layout_width="wrap_content"
android:layout_height="wrap_content"
android:text="TestShapeButton"
android:background="@drawable/button_selector"
/>
button_selector.xml:
<?xml version="1.0" encoding="utf-8"?>
<selector
xmlns:android="http://schemas.android.com/apk/res/android">
<item android:state_pressed="true" >
<shape>
<!-- 漸變 -->
<gradient
android:startColor="#ff8c00"
android:endColor="#FFFFFF"
android:type="radial"
android:gradientRadius="50" />
<!-- 描邊 -->
<stroke
android:width="2dp"
android:color="#dcdcdc"
android:dashWidth="5dp"
android:dashGap="3dp" />
<!-- 圓角 -->
<corners
android:radius="2dp" />
<padding
android:left="10dp"
android:top="10dp"
android:right="10dp"
android:bottom="10dp" />
</shape>
</item>
<item android:state_focused="true" >
<shape>
<gradient
android:startColor="#ffc2b7"
android:endColor="#ffc2b7"
android:angle="270" />
<stroke
android:width="2dp"
android:color="#dcdcdc" />
<corners
android:radius="2dp" />
<padding
android:left="10dp"
android:top="10dp"
android:right="10dp"
android:bottom="10dp" />
</shape>
</item>
<item>
<shape>
<solid android:color="#ff9d77"/>
<stroke
android:width="2dp"
android:color="#fad3cf" />
<corners
android:topRightRadius="5dp"
android:bottomLeftRadius="5dp"
android:topLeftRadius="0dp"
android:bottomRightRadius="0dp"
/>
<padding
android:left="10dp"
android:top="10dp"
android:right="10dp"
android:bottom="10dp" />
</shape>
</item>
</selector>
運行效果如下圖:
一般狀態:
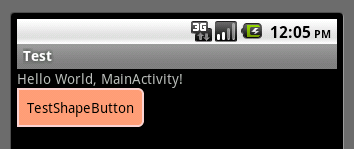
獲得焦點狀態:
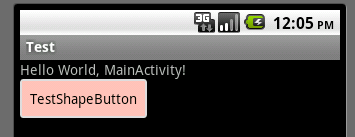
按下狀態:
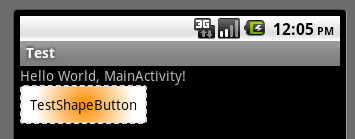
轉載:http://kofi1122.blog.51cto.com/2815761/521605/
posted @
2015-04-18 10:41 Terry Zou 閱讀(275) |
評論 (0) |
編輯 收藏
摘要: 所謂自定義控件(或稱組件)也就是編寫自己的控件類型,而非Android中提供的標準的控件,如TextView,CheckBox等等.不過自定義的控件一般也都是從標準控件繼承來的,或者是多種控件組合,或者是對標準控件的屬性進行改變而得到的自己滿意的控件.
自定義控件可能會有很多種方法,這里只介紹我要介紹的方法.
&nb...
閱讀全文
posted @
2015-04-14 10:53 Terry Zou 閱讀(332) |
評論 (0) |
編輯 收藏在Android的聯機文檔中,有對Activity的簡單介紹,現在通過編寫代碼對Activity的啟動模式做一個深入的理解。
在配置文件AndroidManifest.xml中,activity元素的android:launchMode屬性用來配置對應Activity的啟動模式,目前有以下四種啟動模式:
1.standard
2.singleTop
3.singleTask
4.singleInstance
如果不對Activity設置啟動模式,默認就是standard模式
一、standard
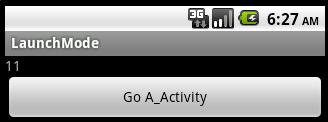
請看以下代碼,實現了一個Activity :
public class A_Activity extends Activity {
/** Called when the activity is first created. */
@Override
public void onCreate(Bundle savedInstanceState) {
super.onCreate(savedInstanceState);
TextView textView=new TextView(this);
textView.setText(this+"");//這里用于打印當前Activity的hashcode,可以此判斷Activity實例是不是同一個對象
Button button=new Button(this);
button.setText("Go next activity");
button.setOnClickListener(new OnClickListener(){
public void onClick(View v) {
// TODO Auto-generated method stub
Intent intent=new Intent();
intent.setClass(A_Activity.this, A_Activity.class);//說明發出Intent與啟動的Activity都是A_Activity的實例
startActivity(intent);
}
});
LinearLayout layout=new LinearLayout(this);
layout.setOrientation(LinearLayout.VERTICAL);
layout.addView(textView);
layout.addView(button);
setContentView(layout);
}
}
運行之,請看下圖:

點擊button后,注意看第一行的textView
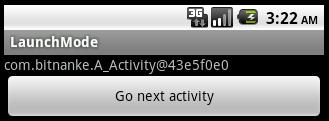
由此可知,生成了新的A_Activity對象,這時我們按回退鍵,就會依次回到之前的Activity。點擊button的過程就是壓棧的過程,在standard模式下,就會不斷生成新的Activity對象
二、singleTop
singleTop和standard模式都會將intent發送給新的Activity實例,不同的是,如果創建Intent的時候棧頂有要創建的singleTop模式下的Activity實例,則將Intent發送給該實例,不會再創建Activity的新實例。
還是使用之前的代碼,只是設置A_Activity的啟動模式為singleTop:android:launchMode="singleTop",運行之,請看下圖:

這個時候我們無論點擊多少次button,textView都顯示同一個Activity實例,按回退鍵時會直接退出程序,表明在singleTop模式下,如果在棧頂存在Intent中那個目標Activity的實例,就不會創建新的實例,而直接使用棧頂的對象,對于資源有限的移動設備來說,也是有實際意義的。
如果是在不同Activity之間跳轉,就會跟standard模式的情形一樣,請看下面代碼:
public class A_Activity extends Activity {
/** Called when the activity is first created. */
@Override
public void onCreate(Bundle savedInstanceState) {
super.onCreate(savedInstanceState);
TextView textView=new TextView(this);
textView.setText(this+"");
Button button=new Button(this);
button.setText("Go B_Activity");
button.setOnClickListener(new OnClickListener(){
public void onClick(View v) {
// TODO Auto-generated method stub
Intent intent=new Intent();
intent.setClass(A_Activity.this, B_Activity.class);//從A跳轉到B
startActivity(intent);
}
});
LinearLayout layout=new LinearLayout(this);
layout.setOrientation(LinearLayout.VERTICAL);
layout.addView(textView);
layout.addView(button);
setContentView(layout);
}
}
public class B_Activity extends Activity {
/**<li>Description: </li>
*
* @param savedInstanceState
* @see android.app.Activity#onCreate(android.os.Bundle)
*/
@Override
protected void onCreate(Bundle savedInstanceState) {
// TODO Auto-generated method stub
super.onCreate(savedInstanceState);
TextView textView=new TextView(this);
textView.setText(this+"");
Button button=new Button(this);
button.setText("Go A_Activity");
button.setOnClickListener(new OnClickListener(){
public void onClick(View v) {
// TODO Auto-generated method stub
Intent intent=new Intent();
intent.setClass(B_Activity.this, A_Activity.class);//從B跳轉到A
startActivity(intent);
}
});
LinearLayout layout=new LinearLayout(this);
layout.setOrientation(LinearLayout.VERTICAL);
layout.addView(textView);
layout.addView(button);
setContentView(layout);
}
}
運行后,如下圖:

點擊button后:

再點擊button后:

這樣每次都會創建目標Activity的新實例,因為在跳轉時,處于棧頂的對象不是目標Activity的實例
三、singleTask
singleTask模式只能創建一個實例,當發送一個Intent,目標Activity為singleTask模式時,系統會檢查棧里面是否已經有該Activity的實例,如果有就直接將Intent發送給它,還是使用(二)中的代碼,將A_Activity啟動模式設置為singleTask,B_Activity啟動模式設置為standard,啟動后如下圖:

點擊button后:

繼續點擊button:

由此可知,singleTask模式的A_Activity在棧中只有一個實例,可以被重復使用
并且,如果收到Intent生成一個新實例,那么用戶可以通過回退鍵回到上一個狀態,如果是已經存在的一個activity來處理這個Intent的話,就無法通過回退鍵回到上一個狀態(對singleInstance同樣適用) ,比如剛才最后一步如果再按回退鍵,就會直接退出程序,而不會回到上一步的狀態。
四、singleInstance
這個模式下的Activity在一個單獨的task棧中,這個棧也只能包含一個Activity的實例,將上面代碼稍微改動一下,顯示taskId:
A_Activity 中:textView.setText(this.getTaskId()+"");
B_Activity 中:textView.setText(this.getTaskId()+"");
另外將B_Activity 設置為singleInstance模式,A_Activity 設置為standard模式,啟動后:

點擊button后:
表明啟動了新的task
總結四個模式的不同:
1、Intent的目標Activity由哪個task持有
standard與singleTop的Activity所在task,與收到的Intent的發送者所在task相同,除非Intent包括參數FLAG_ACTIVITY_NEW_TASK,該參數會啟動Activity到新的task中;singleTask和singleInstance總是把Activity作為一個task的根元素,它們不會被啟動到其他task里
2、是否允許Activity的多個實例
standard與singleTop可以被實例化多次,可以存在不同task中,并且一個task可以包括同一activity的多個實例
singleTask與singleInstance則在同一個task中只能允許Activity的一個實例,并且是task的根元素
3、在同一個task棧中,是否允許其他Activity的實例存在
singleInstance單獨在一個task中,其他啟動模式允許不同Activity的實例存在
4、是否每次生成新實例接收Intent
standard每次啟動都會生成新實例
singleTop的activity如果在task的棧頂的話,則不生成新的activity實例,直接使用該實例,否則,就要生成新的實例
singleInstance在所在棧中是唯一的activity,它每次都會被重用
singleTask如果task棧中有該模式的Activity,就不生成新的activity實例,直接使用該實例,否則,就要生成新的實例
轉載:http://blog.csdn.net/leiswpu/article/details/6248528
posted @
2015-04-13 17:56 Terry Zou 閱讀(324) |
評論 (0) |
編輯 收藏1. reference:參考某一資源ID。
(1)屬性定義:
<declare-styleable name = "名稱">
<attr name = "background" format = "reference" />
</declare-styleable>
(2)屬性使用:
<ImageView
android:layout_width = "42dip"
android:layout_height = "42dip"
android:background = "@drawable/圖片ID"
/>
2. color:顏色值。
(1)屬性定義:
<declare-styleable name = "名稱">
<attr name = "textColor" format = "color" />
</declare-styleable>
(2)屬性使用:
<TextView
android:layout_width = "42dip"
android:layout_height = "42dip"
android:textColor = "#00FF00"
/>
3. boolean:布爾值。
(1)屬性定義:
<declare-styleable name = "名稱">
<attr name = "focusable" format = "boolean" />
</declare-styleable>
(2)屬性使用:
<Button
android:layout_width = "42dip"
android:layout_height = "42dip"
android:focusable = "true"
/>
4. dimension:尺寸值。
(1)屬性定義:
<declare-styleable name = "名稱">
<attr name = "layout_width" format = "dimension" />
</declare-styleable>
(2)屬性使用:
<Button
android:layout_width = "42dip"
android:layout_height = "42dip"
/>
5. float:浮點值。
(1)屬性定義:
<declare-styleable name = "AlphaAnimation">
<attr name = "fromAlpha" format = "float" />
<attr name = "toAlpha" format = "float" />
</declare-styleable>
(2)屬性使用:
<alpha
android:fromAlpha = "1.0"
android:toAlpha = "0.7"
/>
6. integer:整型值。
(1)屬性定義:
<declare-styleable name = "AnimatedRotateDrawable">
<attr name = "visible" />
<attr name = "frameDuration" format="integer" />
<attr name = "framesCount" format="integer" />
<attr name = "pivotX" />
<attr name = "pivotY" />
<attr name = "drawable" />
</declare-styleable>
(2)屬性使用:
<animated-rotate
xmlns:android = "
android:drawable = "@drawable/圖片ID"
android:pivotX = "50%"
android:pivotY = "50%"
android:framesCount = "12"
android:frameDuration = "100"
/>
7. string:字符串。
(1)屬性定義:
<declare-styleable name = "MapView">
<attr name = "apiKey" format = "string" />
</declare-styleable>
(2)屬性使用:
<com.google.android.maps.MapView
android:layout_width = "fill_parent"
android:layout_height = "fill_parent"
android:apiKey = "0jOkQ80oD1JL9C6HAja99uGXCRiS2CGjKO_bc_g"
/>
8. fraction:百分數。
(1)屬性定義:
<declare-styleable name="RotateDrawable">
<attr name = "visible" />
<attr name = "fromDegrees" format = "float" />
<attr name = "toDegrees" format = "float" />
<attr name = "pivotX" format = "fraction" />
<attr name = "pivotY" format = "fraction" />
<attr name = "drawable" />
</declare-styleable>
(2)屬性使用:
<rotate
xmlns:android = "
android:interpolator = "@anim/動畫ID"
android:fromDegrees = "0"
android:toDegrees = "360"
android:pivotX = "200%"
android:pivotY = "300%"
android:duration = "5000"
android:repeatMode = "restart"
android:repeatCount = "infinite"
/>
9. enum:枚舉值。
(1)屬性定義:
<declare-styleable name="名稱">
<attr name="orientation">
<enum name="horizontal" value="0" />
<enum name="vertical" value="1" />
</attr>
</declare-styleable>
(2)屬性使用:
<LinearLayout
xmlns:android = " android:orientation = "vertical"
android:layout_width = "fill_parent"
android:layout_height = "fill_parent"
>
</LinearLayout>
10. flag:位或運算。
(1)屬性定義:
<declare-styleable name="名稱">
<attr name="windowSoftInputMode">
<flag name = "stateUnspecified" value = "0" />
<flag name = "stateUnchanged" value = "1" />
<flag name = "stateHidden" value = "2" />
<flag name = "stateAlwaysHidden" value = "3" />
<flag name = "stateVisible" value = "4" />
<flag name = "stateAlwaysVisible" value = "5" />
<flag name = "adjustUnspecified" value = "0x00" />
<flag name = "adjustResize" value = "0x10" />
<flag name = "adjustPan" value = "0x20" />
<flag name = "adjustNothing" value = "0x30" />
</attr>
</declare-styleable>
(2)屬性使用:
<activity
android:name = ".StyleAndThemeActivity"
android:label = "@string/app_name"
android:windowSoftInputMode = "stateUnspecified | stateUnchanged | stateHidden">
<intent-filter>
<action android:name = "android.intent.action.MAIN" />
<category android:name = "android.intent.category.LAUNCHER" />
</intent-filter>
</activity>
注意:
屬性定義時可以指定多種類型值。
(1)屬性定義:
<declare-styleable name = "名稱">
<attr name = "background" format = "reference|color" />
</declare-styleable>
(2)屬性使用:
<ImageView
android:layout_width = "42dip"
android:layout_height = "42dip"
android:background = "@drawable/圖片ID|#00FF00"
/>
posted @
2015-03-23 22:43 Terry Zou 閱讀(169) |
評論 (0) |
編輯 收藏
摘要: showDialog()調用createDialog()和onPrepareDialog(),其中createDialog()調用onCreateDialog()。例子如下所示
Code highlighting produced by Actipro CodeHighlighter (freeware)http://www.CodeHighlighter.com/--> ...
閱讀全文
posted @
2015-02-03 08:55 Terry Zou 閱讀(309) |
評論 (0) |
編輯 收藏