甜咖啡

          我的IT空間

          mysql這個數(shù)據(jù)庫是開源的,尤其適合一些輕量級的軟件開發(fā),但是其安裝過程與使用過程總是讓一些初學(xué)者摸不著頭腦。我也是從這樣的痛苦中過來的,在此希望我的經(jīng)驗對小菜們有些許幫助。

          1.下載地址:

          http://www.5ipopo.com/soft/17815.html

          2.配置參數(shù)

          1)解壓縮綠色版軟件到D:\Java\mysql-5.1.14-beta-win32。

          2)修改D:\Java\mysql-5.1.14-beta-win32\my-small.ini文件內(nèi)容,添加紅色內(nèi)容:

          [client]
          #password = your_password
          port  = 3306
          socket  = /tmp/mysql.sock
          default-character-set=gbk

          [mysqld]
          port  = 3306
          socket  = /tmp/mysql.sock
          default-character-set=gbk
          skip-locking
          key_buffer = 16K
          max_allowed_packet = 1M
          table_cache = 4
          sort_buffer_size = 64K
          read_buffer_size = 256K
          read_rnd_buffer_size = 256K
          net_buffer_length = 2K
          thread_stack = 64K

          3.安裝MySQL5的服務(wù),服務(wù)名自己定義為MySQL5

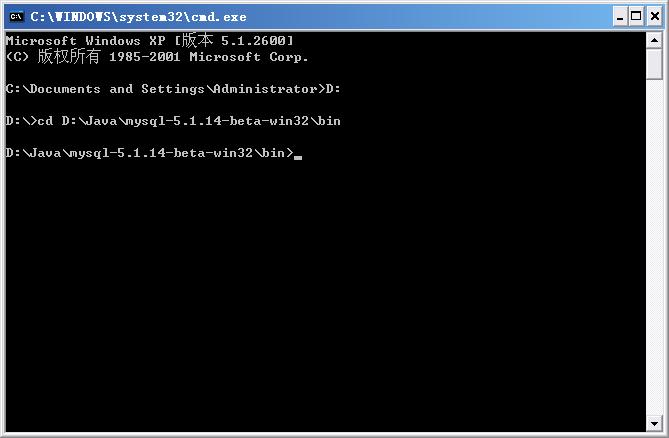
          1)在DOS窗口下進入D:\Java\mysql-5.1.14-beta-win32\bin目錄

          開始——運行——cmd

          2)執(zhí)行安裝MySQL服務(wù)名的命令:

          D:\Java\mysql-5.1.14-beta-win32\bin> mysqld --install MySQL5 --defaults-file=D:\Java\mysql-5.1.14-beta-win32\my-small.ini

          請注意紅色字體中的粗體部分,此為你mysql的路徑,不要一味的粘貼。)
          【數(shù)據(jù)庫學(xué)習(xí)筆記】MySQL5綠色版安裝教程(自己總結(jié))

          3)啟動MySQL5服務(wù):

          D:\Java\mysql-5.1.14-beta-win32\bin>net start mysql5

          【數(shù)據(jù)庫學(xué)習(xí)筆記】MySQL5綠色版安裝教程(自己總結(jié))

          4)登陸MySQL5服務(wù)器

          D:\Java\mysql-5.1.14-beta-win32\bin>mysql -uroot -p

          注意密碼為空,直接按回車就可以了。

          【數(shù)據(jù)庫學(xué)習(xí)筆記】MySQL5綠色版安裝教程(自己總結(jié))

          5)查看數(shù)據(jù)庫:

          mysql>show databases;

          【數(shù)據(jù)庫學(xué)習(xí)筆記】MySQL5綠色版安裝教程(自己總結(jié))


          安裝部分到此結(jié)束,此后為操作部分,轉(zhuǎn)載自網(wǎng)上。


          6)使用數(shù)據(jù)庫
          mysql>
           use test 
          Database changed

          7)查看數(shù)據(jù)庫中的表
          sql>
           show tables; 
          Empty set (0.00 sec)

          8)創(chuàng)建表ttt
          mysql>
           create table ttt(a int,b varchar(20)); 
          Query OK, 0 rows affected (0.00 sec)

          9)插入三條數(shù)據(jù)
          mysql>
           insert into ttt values(1,'aaa'); 
          Query OK, 1 row affected (0.02 sec)

          mysql>
           insert into ttt values(2,'bbb'); 
          Query OK, 1 row affected (0.00 sec)

          mysql>
           insert into ttt values(3,'ccc'); 
          Query OK, 1 row affected (0.00 sec)

          10)查詢數(shù)據(jù)
          mysql>
           select * from ttt; 
          +------+------+
          | a      | b       |
          +------+------+
             1 | aaa     |
             2 | bbb    |
             3 | ccc     |
          +------+------+
          3 rows in set (0.00 sec)

          11)刪除數(shù)據(jù)
          mysql>
           delete from ttt where a=3; 
          Query OK, 1 row affected (0.01 sec)

          刪除后查詢操作結(jié)果:
          mysql>
           select * from ttt; 
          +------+------+
          | a    | b         |
          +------+------+
             1 | aaa      |
             2 | bbb     |
          +------+------+
          2 rows in set (0.00 sec)

          12)更新數(shù)據(jù)
          mysql>
           update ttt set b = 'xxx' where a =2; 
          Query OK, 1 row affected (0.00 sec)
          Rows matched: 1  Changed: 1  Warnings: 0

          查看更新結(jié)果:
          mysql>
           select * from ttt;+------+------+
          | a    | b          |
          +------+------+
             1 | aaa      |
             2 | xxx       |
          +------+------+
          2 rows in set (0.00 sec)

          13)刪除表
          mysql>
           drop table ttt; 
          Query OK, 0 rows affected (0.00 sec)

          查看數(shù)據(jù)庫中剩余的表:
          mysql>
           show tables; 
          Empty set (0.00 sec)


          3.更改MySQL5數(shù)據(jù)庫root用戶的密碼

          1)使用mysql數(shù)據(jù)庫
          mysql>
           use mysql 
          Database changed

          2)查看mysql數(shù)據(jù)庫中所有的表
          mysql>
           show tables; 
          +---------------------------+
          | Tables_in_mysql           |
          +---------------------------+
          | columns_priv              |
          | db                        |
          | func                      |
          | help_category             |
          | help_keyword              |
          | help_relation             |
          | help_topic                |
          | host                      |
          | proc                      |
          | procs_priv                |
          | tables_priv               |
          | time_zone                 |
          | time_zone_leap_second     |
          | time_zone_name            |
          | time_zone_transition      |
          | time_zone_transition_type |
          | user                      |
          +---------------------------+
          17 rows in set (0.00 sec)

          3)刪除mysql數(shù)據(jù)庫中用戶表的所有數(shù)據(jù)
          mysql>
           delete from user; 
          Query OK, 3 rows affected (0.00 sec)

          4)創(chuàng)建一個root用戶,密碼為“xiaohui”。
          mysql>
           grant all on *.* to root@'%' identified by 'xiaohui' with grant option; 
          Query OK, 0 rows affected (0.02 sec)

          5)查看user表中的用戶
          mysql>
           select User from user; 
          +------+
          | User |
          +------+
          | root |
          +------+
          1 row in set (0.00 sec)

          6)重啟MySQL5:更改了MySQL用戶后,需要重啟MySQL服務(wù)器才可以生效。
          D:\mysql-5.0.67-win32\bin>
          net stop mysql5 
          MySQL5 服務(wù)正在停止..
          MySQL5 服務(wù)已成功停止。

          D:\mysql-5.0.67-win32\bin>
          net start mysql5 
          MySQL5 服務(wù)正在啟動 .
          MySQL5 服務(wù)已經(jīng)啟動成功。

          7)重新登陸MySQL5服務(wù)器
          D:\mysql-5.0.67-win32\bin>
          mysql -uroot -pxiaohui 
          Welcome to the MySQL monitor.  Commands end with ; or \g.
          Your MySQL connection id is 1
          Server version: 5.0.67-community MySQL Community Edition (GPL)

          Type 'help;' or '\h' for help. Type '\c' to clear the buffer.

          mysql>

          4.數(shù)據(jù)庫的創(chuàng)建與刪除

          1)創(chuàng)建數(shù)據(jù)庫testdb
          mysql>
           create database testdb; 
          Query OK, 1 row affected (0.02 sec)

          2)使用數(shù)據(jù)庫testdb
          mysql>
           use testdb; 
          Database changed

          3)刪除數(shù)據(jù)庫testdb
          mysql>
           drop database testdb; 
          Query OK, 0 rows affected (0.00 sec)

          4)退出登陸
          mysql>
           exit 
          Bye

          5.操作數(shù)據(jù)庫數(shù)據(jù)的一般步驟

          1、啟動MySQL服務(wù)器
          2、登陸數(shù)據(jù)庫服務(wù)器
          3、使用某個要操作的數(shù)據(jù)庫
          4、操作該數(shù)據(jù)庫中的表,可執(zhí)行增刪改查各種操作。
          5、退出登陸。

          6.mysql5的卸載 
          刪除服務(wù),執(zhí)行mysqld --remove MySQL5 即可。

          posted @ 2011-09-16 17:58 甜咖啡 閱讀(2136) | 評論 (1)編輯 收藏

          總體思想:

          1.前臺網(wǎng)頁用js得到裁剪圖片的id及x,y,寬度和高度。

          2.服務(wù)端根據(jù)id取出要裁剪的圖片 。

          3.根據(jù)這些參數(shù)來生成裁剪的圖像。

          后臺代碼如下:

          package com.wodexiangce;

          import java.awt.Rectangle;

          import java.awt.image.BufferedImage;

          import java.io.File;

          import java.io.FileInputStream;

          import java.io.IOException;

          import java.util.Iterator;

          import javax.imageio.ImageIO;

          import javax.imageio.ImageReadParam;

          import javax.imageio.ImageReader;

          import javax.imageio.stream.ImageInputStream;

          /** *//**

          *

          *

          * @author <a href="mailto:lqinglong@yahoo.cn">qinglong.lu</a>

          *

          * 2008-3-21

          */

          public class OperateImage ...{


              //===源圖片路徑名稱如:c:/1.jpg

              private String srcpath ;


              //===剪切圖片存放路徑名稱.如:c:/2.jpg

              private String subpath ;


              //===剪切點x坐標

              private int x ;


              private int y ;   


              //===剪切點寬度

              private int width ;


              private int height ;


              public OperateImage()...{


              } 

              public OperateImage(int x,int y,int width,int height)...{

                   this.x = x ;

                   this.y = y ;

                   this.width = width ;  

                   this.height = height ;

              }


              /** *//**

               * 對圖片裁剪,并把裁剪完蛋新圖片保存 。

               */

              public void cut() throws IOException...{


                  FileInputStream is = null ;

                  ImageInputStream iis =null ;


                  try...{  

                      //讀取圖片文件

                      is = new FileInputStream(srcpath);


                      /**//*

                       * 返回包含所有當前已注冊 ImageReader 的 Iterator,這些 ImageReader

                       * 聲稱能夠解碼指定格式。 參數(shù):formatName - 包含非正式格式名稱 .

                       *(例如 "jpeg" 或 "tiff")等 。

                       */

                      Iterator<ImageReader> it = ImageIO.getImageReadersByFormatName("jpg"); 

                      ImageReader reader = it.next();

                      //獲取圖片流

                      iis = ImageIO.createImageInputStream(is);


                      /**//*

                       * <p>iis:讀取源.true:只向前搜索 </p>.將它標記為 ‘只向前搜索’。

                       * 此設(shè)置意味著包含在輸入源中的圖像將只按順序讀取,可能允許 reader

                       *  避免緩存包含與以前已經(jīng)讀取的圖像關(guān)聯(lián)的數(shù)據(jù)的那些輸入部分。

                       */

                      reader.setInput(iis,true) ;


                      /**//*

                       * <p>描述如何對流進行解碼的類<p>.用于指定如何在輸入時從 Java Image I/O

                       * 框架的上下文中的流轉(zhuǎn)換一幅圖像或一組圖像。用于特定圖像格式的插件

                       * 將從其 ImageReader 實現(xiàn)的 getDefaultReadParam 方法中返回

                       * ImageReadParam 的實例。 

                       */

                      ImageReadParam param = reader.getDefaultReadParam();


                      /**//*

                       * 圖片裁剪區(qū)域。Rectangle 指定了坐標空間中的一個區(qū)域,通過 Rectangle 對象

                       * 的左上頂點的坐標(x,y)、寬度和高度可以定義這個區(qū)域。

                       */

                      Rectangle rect = new Rectangle(x, y, width, height);


                      //提供一個 BufferedImage,將其用作解碼像素數(shù)據(jù)的目標。

                      param.setSourceRegion(rect);

                      /**//*

                       * 使用所提供的 ImageReadParam 讀取通過索引 imageIndex 指定的對象,并將

                       * 它作為一個完整的 BufferedImage 返回。

                       */

                      BufferedImage bi = reader.read(0,param);               


                      //保存新圖片

                      ImageIO.write(bi, "jpg", new File(subpath));    

                  }


                  finally...{

                      if(is!=null)

                         is.close() ;      

                      if(iis!=null)

                         iis.close(); 

                  }


              }

              public int getHeight() ...{

                  return height;

              }

              public void setHeight(int height) ...{

                  this.height = height;

              }

              public String getSrcpath() ...{

                  return srcpath;

              }

              public void setSrcpath(String srcpath) ...{

                  this.srcpath = srcpath;

              }

              public String getSubpath() ...{

                  return subpath;

              }

              public void setSubpath(String subpath) ...{

                  this.subpath = subpath;

              }

              public int getWidth() ...{

                  return width;

              }

              public void setWidth(int width) ...{

                  this.width = width;

              }

              public int getX() ...{

                  return x;

              }

              public void setX(int x) ...{

                  this.x = x;

              }

              public int getY() ...{

                  return y;

              }

              public void setY(int y) ...{

                  this.y = y;

              }

              public static void main(String[] args)throws Exception...{


                  String name = "d:/2005121210161588950.jpg";


                  OperateImage o = new OperateImage(100,100,100,100);

                  o.setSrcpath(name); 

                  o.setSubpath("D:/2.jpg");

                  o.cut() ; 


              }

          }

          posted @ 2011-08-02 18:43 甜咖啡 閱讀(729) | 評論 (0)編輯 收藏

          3.DOM4J生成和解析XML文檔


          DOM4J 是一個非常非常優(yōu)秀的Java XML
          API,具有性能優(yōu)異、功能強大和極端易用使用的特點,同時它也是一個開放源代碼的軟件。如今你可以看到越來越多的 Java 軟件都在使用 DOM4J 來讀寫
          XML,特別值得一提的是連 Sun 的 JAXM 也在用 DOM4J。

          import java.io.File;  
          import java.io.FileWriter;  
          import java.io.IOException;
          import java.io.Writer;  
          import java.util.Iterator;  

          import org.dom4j.Document;  
          import org.dom4j.DocumentException;  
          import org.dom4j.DocumentHelper;  
          import org.dom4j.Element;  
          import org.dom4j.io.SAXReader;  
          import org.dom4j.io.XMLWriter;  
          /** 
          *  
          * @author hongliang.dinghl 
          * Dom4j 生成XML文檔與解析XML文檔 
          */ 
          public class Dom4jDemo implements XmlDocument {  

          public void createXml(String fileName) {  
          Document document = DocumentHelper.createDocument();  
          Element employees=document.addElement("employees");  
          Element employee=employees.addElement("employee");  
          Element name= employee.addElement("name");  
          name.setText("ddvip");  
          Element sex=employee.addElement("sex");  
          sex.setText("m");  
          Element age=employee.addElement("age");  
          age.setText("29");  
          try {  
          Writer fileWriter=new FileWriter(fileName);  
          XMLWriter xmlWriter=new XMLWriter(fileWriter);  
          xmlWriter.write(document);  
          xmlWriter.close();  
          } catch (IOException e) {  

          System.out.println(e.getMessage());  
          }  


          }  


          public void parserXml(String fileName) {  
          File inputXml=new File(fileName);  
          SAXReader saxReader = new SAXReader();  
          try {  
          Document document = saxReader.read(inputXml);  
          Element employees=document.getRootElement();  
          for(Iterator i = employees.elementIterator(); i.hasNext();){  
          Element employee = (Element) i.next();  
          for(Iterator j = employee.elementIterator(); j.hasNext();){  
          Element node=(Element) j.next();  
          System.out.println(node.getName()+":"+node.getText());  
          }  

          }  
          } catch (DocumentException e) {  
          System.out.println(e.getMessage());  
          }  
          System.out.println("dom4j parserXml");  
          }  
          }
          posted @ 2011-07-19 16:33 甜咖啡 閱讀(228) | 評論 (0)編輯 收藏

          4.JDOM生成和解析XML  

          為減少DOM、SAX的編碼量,出現(xiàn)了JDOM;優(yōu)點:20-80原則,極大減少了代碼量。使用場合:要實現(xiàn)的功能簡單,如解析、創(chuàng)建等,但在底層,JDOM還是使用SAX(最常用)、DOM、Xanan文檔。

          import java.io.FileNotFoundException;  
          import java.io.FileOutputStream;  
          import java.io.IOException;  
          import java.util.List;  

          import org.jdom.Document;  
          import org.jdom.Element;  
          import org.jdom.JDOMException;  
          import org.jdom.input.SAXBuilder;  
          import org.jdom.output.XMLOutputter;  
          /** 
          *  
          * @author hongliang.dinghl 
          * JDOM 生成與解析XML文檔 
          *  
          */ 
          public class JDomDemo implements XmlDocument {  

          public void createXml(String fileName) {  
          Document document;  
          Element  root;  
          root=new Element("employees");  
          document=new Document(root);  
          Element employee=new Element("employee");  
          root.addContent(employee);  
          Element name=new Element("name");  
          name.setText("ddvip");  
          employee.addContent(name);  
          Element sex=new Element("sex");  
          sex.setText("m");  
          employee.addContent(sex);  
          Element age=new Element("age");  
          age.setText("23");  
          employee.addContent(age);  
          XMLOutputter XMLOut = new XMLOutputter();  
          try {  
          XMLOut.output(document, new FileOutputStream(fileName));  
          } catch (FileNotFoundException e) {  
          e.printStackTrace();  
          } catch (IOException e) {  
          e.printStackTrace();  
          }  

          }  

          public void parserXml(String fileName) {  
          SAXBuilder builder=new SAXBuilder(false);   
          try {  
          Document document=builder.build(fileName);  
          Element employees=document.getRootElement();   
          List employeeList=employees.getChildren("employee");  
          for(int i=0;iElement employee=(Element)employeeList.get(i);  
          List employeeInfo=employee.getChildren();  
          for(int j=0;jSystem.out.println(((Element)employeeInfo.get(j)).getName()+":"+((Element)employeeInfo.get(j)).getValue());  

          }  
          }  
          } catch (JDOMException e) {  

          e.printStackTrace();  
          } catch (IOException e) {  

          e.printStackTrace();  
          }   

          }  
          }
          posted @ 2011-07-19 16:33 甜咖啡 閱讀(194) | 評論 (0)編輯 收藏

          2.SAX生成和解析XML文檔


          為解決DOM的問題,出現(xiàn)了SAX。SAX
          ,事件驅(qū)動。當解析器發(fā)現(xiàn)元素開始、元素結(jié)束、文本、文檔的開始或結(jié)束等時,發(fā)送事件,程序員編寫響應(yīng)這些事件的代碼,保存數(shù)據(jù)。優(yōu)點:不用事先調(diào)入整個文檔,占用資源少;SAX解析器代碼比DOM解析器代碼小,適于Applet,下載。缺點:不是持久的;事件過后,若沒保存數(shù)據(jù),那么數(shù)據(jù)就丟了;無狀態(tài)性;從事件中只能得到文本,但不知該文本屬于哪個元素;使用場合:Applet;只需XML文檔的少量內(nèi)容,很少回頭訪問;機器內(nèi)存少;

          import java.io.FileInputStream;  
          import java.io.FileNotFoundException;  
          import java.io.IOException;  
          import java.io.InputStream;  

          import javax.xml.parsers.ParserConfigurationException;  
          import javax.xml.parsers.SAXParser;  
          import javax.xml.parsers.SAXParserFactory;  

          import org.xml.sax.Attributes;  
          import org.xml.sax.SAXException;  
          import org.xml.sax.helpers.DefaultHandler;  
          /** 
          *  
          * @author hongliang.dinghl 
          * SAX文檔解析 
          */ 
          public class SaxDemo implements XmlDocument {  

          public void createXml(String fileName) {  
          System.out.println("<<"+filename+">>");  
          }  

          public void parserXml(String fileName) {  
          SAXParserFactory saxfac = SAXParserFactory.newInstance();  

          try {  

          SAXParser saxparser = saxfac.newSAXParser();  

          InputStream is = new FileInputStream(fileName);  

          saxparser.parse(is, new MySAXHandler());  

          } catch (ParserConfigurationException e) {  

          e.printStackTrace();  

          } catch (SAXException e) {  

          e.printStackTrace();  

          } catch (FileNotFoundException e) {  

          e.printStackTrace();  

          } catch (IOException e) {  

          e.printStackTrace();  

          }  

          }  

          }  

          class MySAXHandler extends DefaultHandler {  

          boolean hasAttribute = false;  

          Attributes attributes = null;  

          public void startDocument() throws SAXException {  

          System.out.println("文檔開始打印了");  

          }  

          public void endDocument() throws SAXException {  

          System.out.println("文檔打印結(jié)束了");  

          }  

          public void startElement(String uri, String localName, String qName,  

          Attributes attributes) throws SAXException {  

          if (qName.equals("employees")) {  

          return;  

          }  

          if (qName.equals("employee")) {  

          System.out.println(qName);  

          }  

          if (attributes.getLength() > 0) {  

          this.attributes = attributes;  

          this.hasAttribute = true;  

          }  

          }  

          public void endElement(String uri, String localName, String qName)  

          throws SAXException {  

          if (hasAttribute && (attributes != null)) {  

          for (int i = 0; i < attributes.getLength(); i++) {  

          System.out.println(attributes.getQName(0)  
          + attributes.getValue(0));  

          }  

          }  

          }  

          public void characters(char[] ch, int start, int length)  

          throws SAXException {  

          System.out.println(new String(ch, start, length));  

          }  


          package com.alisoft.facepay.framework.bean;
          import java.io.FileInputStream;
          import java.io.FileNotFoundException;
          import java.io.IOException;
          import java.io.InputStream;
          import javax.xml.parsers.ParserConfigurationException;
          import javax.xml.parsers.SAXParser;
          import javax.xml.parsers.SAXParserFactory;
          import org.xml.sax.Attributes;
          import org.xml.sax.SAXException;
          import org.xml.sax.helpers.DefaultHandler;
          /**
          *
          * @author hongliang.dinghl
          * SAX文檔解析
          */
          public class SaxDemo implements XmlDocument {
          public void createXml(String fileName) {
          System.out.println("<<"+filename+">>");
          }
          public void parserXml(String fileName) {
          SAXParserFactory saxfac = SAXParserFactory.newInstance();
          try {
          SAXParser saxparser = saxfac.newSAXParser();
          InputStream is = new FileInputStream(fileName);
          saxparser.parse(is, new MySAXHandler());
          } catch (ParserConfigurationException e) {
          e.printStackTrace();
          } catch (SAXException e) {
          e.printStackTrace();
          } catch (FileNotFoundException e) {
          e.printStackTrace();
          } catch (IOException e) {
          e.printStackTrace();
          }
          }
          }
          class MySAXHandler extends DefaultHandler {
          boolean hasAttribute = false;
          Attributes attributes = null;
          public void startDocument() throws SAXException {
          System.out.println("文檔開始打印了");
          }
          public void endDocument() throws SAXException {
          System.out.println("文檔打印結(jié)束了");
          }
          public void startElement(String uri, String localName, String qName,
          Attributes attributes) throws SAXException {
          if (qName.equals("employees")) {
          return;
          }
          if (qName.equals("employee")) {
          System.out.println(qName);
          }
          if (attributes.getLength() > 0) {
          this.attributes = attributes;
          this.hasAttribute = true;
          }
          }
          public void endElement(String uri, String localName, String qName)
          throws SAXException {
          if (hasAttribute && (attributes != null)) {
          for (int i = 0; i < attributes.getLength(); i++) {
          System.out.println(attributes.getQName(0)
          + attributes.getValue(0));
          }
          }
          }
          public void characters(char[] ch, int start, int length)
          throws SAXException {
          System.out.println(new String(ch, start, length));
          }
          }
          posted @ 2011-07-19 16:32 甜咖啡 閱讀(360) | 評論 (0)編輯 收藏

          1.DOM生成和解析XML文檔


          為 XML 文檔的已解析版本定義了一組接口。解析器讀入整個文檔,然后構(gòu)建一個駐留內(nèi)存的樹結(jié)構(gòu),然后代碼就可以使用 DOM
          接口來操作這個樹結(jié)構(gòu)。優(yōu)點:整個文檔樹在內(nèi)存中,便于操作;支持刪除、修改、重新排列等多種功能;缺點:將整個文檔調(diào)入內(nèi)存(包括無用的節(jié)點),浪費時間和空間;使用場合:一旦解析了文檔還需多次訪問這些數(shù)據(jù);硬件資源充足(內(nèi)存、CPU)。

          import java.io.FileInputStream;
          import java.io.FileNotFoundException;
          import java.io.FileOutputStream;
          import java.io.IOException;
          import java.io.InputStream;
          import java.io.PrintWriter;
          import javax.xml.parsers.DocumentBuilder;
          import javax.xml.parsers.DocumentBuilderFactory;
          import javax.xml.parsers.ParserConfigurationException;
          import javax.xml.transform.OutputKeys;
          import javax.xml.transform.Transformer;
          import javax.xml.transform.TransformerConfigurationException;
          import javax.xml.transform.TransformerException;
          import javax.xml.transform.TransformerFactory;
          import javax.xml.transform.dom.DOMSource;
          import javax.xml.transform.stream.StreamResult;
          import org.w3c.dom.Document;
          import org.w3c.dom.Element;
          import org.w3c.dom.Node;
          import org.w3c.dom.NodeList;
          import org.xml.sax.SAXException;
          /**
          *
          * @author hongliang.dinghl
          * DOM生成與解析XML文檔
          */
          public class DomDemo implements XmlDocument {
          private Document document;
          private String fileName;
          public void init() {
          try {
          DocumentBuilderFactory factory = DocumentBuilderFactory
          .newInstance();
          DocumentBuilder builder = factory.newDocumentBuilder();
          this.document = builder.newDocument();
          } catch (ParserConfigurationException e) {
          System.out.println(e.getMessage());
          }
          }
          public void createXml(String fileName) {
          Element root = this.document.createElement("employees");
          this.document.appendChild(root);
          Element employee = this.document.createElement("employee");
          Element name = this.document.createElement("name");
          name.appendChild(this.document.createTextNode("丁宏亮"));
          employee.appendChild(name);
          Element sex = this.document.createElement("sex");
          sex.appendChild(this.document.createTextNode("m"));
          employee.appendChild(sex);
          Element age = this.document.createElement("age");
          age.appendChild(this.document.createTextNode("30"));
          employee.appendChild(age);
          root.appendChild(employee);
          TransformerFactory tf = TransformerFactory.newInstance();
          try {
          Transformer transformer = tf.newTransformer();
          DOMSource source = new DOMSource(document);
          transformer.setOutputProperty(OutputKeys.ENCODING, "gb2312");
          transformer.setOutputProperty(OutputKeys.INDENT, "yes");
          PrintWriter pw = new PrintWriter(new FileOutputStream(fileName));
          StreamResult result = new StreamResult(pw);
          transformer.transform(source, result);
          System.out.println("生成XML文件成功!");
          } catch (TransformerConfigurationException e) {
          System.out.println(e.getMessage());
          } catch (IllegalArgumentException e) {
          System.out.println(e.getMessage());
          } catch (FileNotFoundException e) {
          System.out.println(e.getMessage());
          } catch (TransformerException e) {
          System.out.println(e.getMessage());
          }
          }
          public void parserXml(String fileName) {
          try {
          DocumentBuilderFactory dbf = DocumentBuilderFactory.newInstance();
          DocumentBuilder db = dbf.newDocumentBuilder();
          Document document = db.parse(fileName);
          NodeList employees = document.getChildNodes();
          for (int i = 0; i < employees.getLength(); i++) {
          Node employee = employees.item(i);
          NodeList employeeInfo = employee.getChildNodes();
          for (int j = 0; j < employeeInfo.getLength(); j++) {
          Node node = employeeInfo.item(j);
          NodeList employeeMeta = node.getChildNodes();
          for (int k = 0; k < employeeMeta.getLength(); k++) {
          System.out.println(employeeMeta.item(k).getNodeName()
          + ":" + employeeMeta.item(k).getTextContent());
          }
          }
          }
          System.out.println("解析完畢");
          } catch (FileNotFoundException e) {
          System.out.println(e.getMessage());
          } catch (ParserConfigurationException e) {
          System.out.println(e.getMessage());
          } catch (SAXException e) {
          System.out.println(e.getMessage());
          } catch (IOException e) {
          System.out.println(e.getMessage());
          }
          }
          }
          posted @ 2011-07-19 16:12 甜咖啡 閱讀(300) | 評論 (0)編輯 收藏

          一、前言
            
            用Java解析XML文檔,最常用的有兩種方法:使用基于事件的XML簡單API(Simple
          API for XML)稱為SAX和基于樹和節(jié)點的文檔對象模型(Document Object Module)稱為DOM。Sun公司提供了Java API
          for XML
          Parsing(JAXP)接口來使用SAX和DOM,通過JAXP,我們可以使用任何與JAXP兼容的XML解析器。
            
            JAXP接口包含了三個包:
            
           ?。?)org.w3c.dom W3C推薦的用于XML標準規(guī)劃文檔對象模型的接口。
            
           ?。?)org.xml.sax 
          用于對XML進行語法分析的事件驅(qū)動的XML簡單API(SAX)
            
           ?。?)javax.xml.parsers解析器工廠工具,程序員獲得并配置特殊的特殊語法分析器。
            
            二、前提
            
            DOM編程不要其它的依賴包,因為JDK里自帶的JDK里含有的上面提到的org.w3c.dom、org.xml.sax
          和javax.xml.parsers包就可以滿意條件了。
            
            三、使用DOM解析XML文檔
            
            我們現(xiàn)在來看看DOM是如何解析XML的吧!同樣的,我將從一個簡單的不能再簡單的例子來說明DOM是如何解析XML文檔的,先讓我們看看XML是什么內(nèi)容吧:
            
            <?xml
          version="1.0"
          encoding="gb2312"?>
            
            <books>
            
            <book
          email="zhoujunhui">
            
            <name>rjzjh</name>
            
            <price>jjjjjj</price>
            
            </book>
            
            </books>
            
            簡單的不能再簡單了。但是該有的都有了,根元素、屬性、子節(jié)點。好了,能反應(yīng)問題就行了,下面來看看解析這個XML文件的Java代碼吧!
            
            1
          public class DomParse {
            
            2   public
          DomParse(){
            
            3      DocumentBuilderFactory
          domfac=DocumentBuilderFactory.newInstance();
            
            4      try
          {
            
            5          DocumentBuilder
          dombuilder=domfac.newDocumentBuilder();
            
            6          InputStream is=new
          FileInputStream("bin/library.xml");
            
            7          Document
          doc=dombuilder.parse(is);
            
            8
            
            9          Element
          root=doc.getDocumentElement();
            
            10         NodeList
          books=root.getChildNodes();
            
            11         if(books!=null){
            
            12            
          for(int i=0;i<books.getLength();i++){
            
            13                Node
          book=books.item(i);
            
            14                if(book.getNodeType()==Node.ELEMENT_NODE){
            
            15         String
          email=book.getAttributes().getNamedItem("email").getNodeValue();
            
            16                   
          System.out.println(email);
            
            17         for(Node
          node=book.getFirstChild();node!=null;node=node.getNextSibling()){
            
            18                if(node.getNodeType()==Node.ELEMENT_NODE){
            
            19                    if(node.getNodeName().equals("name")){
            
            20                     String
          name=node.getNodeValue();
            
            21                    String
          name1=node.getFirstChild().getNodeValue();
            
            22                              System.out.println(name);
            
            23                              System.out.println(name1);
            
            24                          
          }
            
            25                   if(node.getNodeName().equals("price")){
            
            26                       String
          price=node.getFirstChild().getNodeValue();
            
            27                              System.out.println(price);
            
            28                          
          }
            
            29                       }
            
            30                   
          }
            
            31                }
            
            32            
          }
            
            33         }
            
            34      } catch
          (ParserConfigurationException e)
          {
            
            35         e.printStackTrace();
            
            36      } catch
          (FileNotFoundException e)
          {
            
            37         e.printStackTrace();
            
            38      } catch
          (SAXException e) {
            
            39         e.printStackTrace();
            
            40     
          } catch (IOException e)
          {
            
            41         e.printStackTrace();
            
            42     
          }
            
            43  }
            
            44  public static void main(String[] args)
          {
            
            45      new DomParse();
            
            46  }
            
            47
          }
            
            四、代碼解釋
            
            先看看這個程序引用類:
            
            import
          java.io.FileInputStream;
            
            import
          java.io.FileNotFoundException;
            
            import
          java.io.IOException;
            
            import java.io.InputStream;
            
            import
          javax.xml.parsers.DocumentBuilder;
            
            import
          javax.xml.parsers.DocumentBuilderFactory;
            
            import
          javax.xml.parsers.ParserConfigurationException;
            
            //下面主要是org.xml.sax包的類
            
            import
          org.w3c.dom.Document;
            
            import org.w3c.dom.Element;
            
            import
          org.w3c.dom.Node;
            
            import org.w3c.dom.NodeList;
            
            import
          org.xml.sax.SAXException;
            
            上面那么簡單的代碼一看就明白了,但是為了介紹個DOM編程的大概還是來看看這個程序吧:
            
           ?。?)得到DOM解析器的工廠實例
            
            DocumentBuilderFactory
          domfac=DocumentBuilderFactory.newInstance();
            
            得到j(luò)avax.xml.parsers.DocumentBuilderFactory;類的實例就是我們要的解析器工廠
            
            (2)從DOM工廠獲得DOM解析器
            
            DocumentBuilder
          dombuilder=domfac.newDocumentBuilder();
            
            通過javax.xml.parsers.DocumentBuilderFactory實例的靜態(tài)方法newDocumentBuilder()得到DOM解析器
            
           ?。?)把要解析的XML文檔轉(zhuǎn)化為輸入流,以便DOM解析器解析它
            
            InputStream
          is=new
          FileInputStream("bin/library.xml");
            
            InputStream是一個接口。
            
           ?。?)解析XML文檔的輸入流,得到一個Document
            
            Document
          doc=dombuilder.parse(is);
            
            由XML文檔的輸入流得到一個org.w3c.dom.Document對象,以后的處理都是對Document對象進行的
            
           ?。?)得到XML文檔的根節(jié)點
            
            Element
          root=doc.getDocumentElement();
            
            在DOM中只有根節(jié)點是一個org.w3c.dom.Element對象。
            
           ?。?)得到節(jié)點的子節(jié)點
            
            NodeList books=root.getChildNodes();
            
            for(int
          i=0;i<books.getLength();i++){
            
            Node
          book=books.item(i);
            
            }
            
            這是用一個org.w3c.dom.NodeList接口來存放它所有子節(jié)點的,還有一種輪循子節(jié)點的方法,后面有介紹
            
           ?。?)取得節(jié)點的屬性值
            
            String
          email=book.getAttributes().getNamedItem("email").getNodeValue();
            
            System.out.println(email);
            
            注意,節(jié)點的屬性也是它的子節(jié)點。它的節(jié)點類型也是Node.ELEMENT_NODE
            
           ?。?)輪循子節(jié)點
            
            for(Node
          node=book.getFirstChild();node!=null;node=node.getNextSibling()){
            
            if(node.getNodeType()==Node.ELEMENT_NODE){
            
            if(node.getNodeName().equals("name")){
            String
          name=node.getNodeValue();
            
            String
          name1=node.getFirstChild().getNodeValue();
            
            System.out.println(name);
            
            System.out.println(name1);
            
            }
            
            if(node.getNodeName().equals("price")){
            
            String
          price=node.getFirstChild().getNodeValue();
            
            System.out.println(price);
            }
            
            }
            
            這段代碼的打印輸出為:
            
            null
            
            alterrjzjh
            
            jjjjjj
            
            從上面可以看出
            
            String
          name=node.getNodeValue();  是一個空值。而
            
            String
          name1=node.getFirstChild().getNodeValue(); 才是真正的值,這是因為DOM把<name>rjzjh</name>也當作是兩層結(jié)構(gòu)的節(jié)點,其父節(jié)點是<name>,子節(jié)點rjzjh才是我們真正想得到的。

          posted @ 2011-07-19 09:57 甜咖啡 閱讀(1984) | 評論 (0)編輯 收藏
          1. package test; 
          2.  
          3. import java.util.Calendar; 
          4. import java.util.Date; 
          5. import java.util.GregorianCalendar; 
          6. import java.util.Timer; 
          7.  
          8. import javax.servlet.ServletContextEvent; 
          9. import javax.servlet.ServletContextListener; 
          10.  
          11. public class ContextListener implements ServletContextListener { 
          12.      
          13.     //定時器 
          14.     Timer timer = null
          15.      
          16.     //銷毀 
          17.     public void contextDestroyed(ServletContextEvent event) { 
          18.         timer.cancel();      
          19.         event.getServletContext().log("定時器以銷毀"); 
          20.  
          21.     } 
          22.  
          23.     //初始化 
          24.     public void contextInitialized(ServletContextEvent event) { 
          25.         timer = new Timer(); 
          26.         event.getServletContext().log("定時器已啟動"); 
          27.         //設(shè)置在每晚19:15分執(zhí)行任務(wù) 
          28.         Calendar calendar = Calendar.getInstance(); 
          29.         calendar.set(Calendar.HOUR_OF_DAY, 19); 
          30.         calendar.set(Calendar.MINUTE, 16); 
          31.         calendar.set(Calendar.SECOND, 0); 
          32.         Date date = calendar.getTime(); 
          33.          
          34.         timer.schedule(new Task(),date); 
          35.         event.getServletContext().log("已經(jīng)添加任務(wù)調(diào)度表");  
          36.     } 
          37.  
          38. }


          1. package test; 
          2.  
          3. import java.util.Date; 
          4. import java.util.TimerTask; 
          5. /**
          6. * 具體任務(wù)
          7. */ 
          8. public class Task extends TimerTask { 
          9.  
          10.     private static boolean isRunning = false
          11.  
          12.     @Override 
          13.     public void run() { 
          14.         if (!isRunning) { 
          15. isRunning = true
          16.             System.out.println("開始執(zhí)行........."+new Date()); 
          17.             isRunning = false
          18.         }else
          19.             System.out.println("上次任務(wù)還沒執(zhí)行完"); 
          20.         } 
          21.     } 
          22.  
          23. }


          1. <?xml version="1.0" encoding="UTF-8"?> 
          2. <web-app version="2.4"  
          3.     xmlns="http://java.sun.com/xml/ns/j2ee"  
          4.     xmlns:xsi="http://www.w3.org/2001/XMLSchema-instance"  
          5.     xsi:schemaLocation="http://java.sun.com/xml/ns/j2ee  
          6.     http://java.sun.com/xml/ns/j2ee/web-app_2_4.xsd"> 
          7.  
          8. <!-- 定時監(jiān)聽器 -->     
          9. <listener>   
          10.   <listener-class>test.ContextListener</listener-class>  
          11. </listener>  
          12.   <welcome-file-list> 
          13.     <welcome-file>index.jsp</welcome-file> 
          14.   </welcome-file-list> 
          15. </web-app> 
          posted @ 2011-07-13 16:21 甜咖啡 閱讀(314) | 評論 (0)編輯 收藏
          這個類最終功能是每天某個時間點(如每晚22點)執(zhí)行某一功能.

          首先介紹java定時器(java.util.Timer)有定時執(zhí)行計劃任務(wù)的功能,通過設(shè)定定時器的間隔時間,會自動在此間隔時間后執(zhí)行預(yù)先安排好的任務(wù)(java.util. TimerTask)

          如: 每隔一個小時執(zhí)行任務(wù) timer.schedule(TimerTask, 0, 60 * 60 * 1000);

              schedule方法的第一個參數(shù)是需要執(zhí)行的任務(wù),此類的類型為java.util.TimerTask,第二個參數(shù)為執(zhí)行任務(wù)前等待時間,此處0表示不等待,第三個參數(shù)為間隔時間,單位為毫秒

          由于我們希望當Web工程啟動時,定時器能自動開始計時,這樣在整個Web工程的生命期里,就會定時的執(zhí)行任務(wù),因此啟動定時器的類不能是一般的類,此處用Servlet的監(jiān)聽器類來啟動定時器,通過在配置文件里配置此監(jiān)聽器, 讓其在工程啟動時自動加載運行,存活期為整個Web工程生命期.

          要運用Servlet偵聽器需要實現(xiàn)javax.servlet.ServletContextListener接口,以下是類設(shè)計:


          public class WorkServiceImpl implements WorkService , ServletContextListener ...{


          public void contextDestroyed(ServletContextEvent arg0) ...{
           
              timer.cancel();
              System.out.println("定時器已銷毀");
               }

          public void contextInitialized(ServletContextEvent event) ...{
           
                timer = new java.util.Timer(true);
                sampleTask =   new SampleTask(event.getServletContext());
                System.out.println("定時器已啟動");
                      timer.schedule(sampleTask, 0, 60 * 60 * 1000);
                      System.out.println("已經(jīng)添加任務(wù)調(diào)度表");
               }
          }


          class SampleTask extends TimerTask...{  

           
          private ServletContext context; 
              private static boolean isRunning = false;
              private static boolean flag = true;
              private static final int C_SCHEDULE_HOUR = 23;
              private WorkServiceImpl workService;
            
              public SampleTask(ServletContext context)...{
               this.context = context;
              } 

              public void run() ...{
               workService = new WorkServiceImpl();
                  Calendar cal = Calendar.getInstance();
                  if (!isRunning) ...{
                      if (C_SCHEDULE_HOUR == cal.get(Calendar.HOUR_OF_DAY) && flag) ...{
                          isRunning = true;
                          workService.autoWorkOff();
                          isRunning = false;
                          flag = false;
                          context.log("指定任務(wù)執(zhí)行結(jié)束");
                      }
                  } else ...{
                      context.log("上一次任務(wù)執(zhí)行還未結(jié)束");
                  }
                  if(C_SCHEDULE_HOUR != cal.get(Calendar.HOUR_OF_DAY))...{
                      flag = true;
                  }
                }
          }


          要使用此監(jiān)聽器需要在web.xml中配置,如下:
          <listener>
                  <listener-class>com.css.wam.service.impl.WorkServiceImpl</listener-class>
          </listener>


          這樣在web工程啟動時,就會自動啟動此監(jiān)聽器
          posted @ 2011-07-13 16:20 甜咖啡 閱讀(169) | 評論 (0)編輯 收藏
          //   SessionListener.java    


            import  
          java.io.*;    
             
            import   java.util.*;    
             
            import  
          javax.servlet.http.*;    


            //監(jiān)聽登錄的整個過程    
           
           
            public   class   SessionListener   implements    


          HttpSessionBindingListener    
             
            {    


            public   String   privateInfo="";   //生成監(jiān)聽器的初始化參數(shù)字符串    
             
           
          private   String   logString="";   //日志記錄字符串    
             
            private   int  
          count=0;   //登錄人數(shù)計數(shù)器    


            public  
          SessionListener(String   info){    
             
            this.privateInfo=info;    

             
            }    


            public   int   getCount(){  
           
             
            return   count;    
             
            }    


            public   void   valueBound(HttpSessionBindingEvent   event)    
             

            {    
             
            count++;    
             
            if  
          (privateInfo.equals("count"))    
             
            {    
             
            return;    

             
            }    
             
            try{    
             
            Calendar   calendar=new
            GregorianCalendar();    
             
           
          System.out.println("LOGIN:"+privateInfo+"    


          TIME:"+calendar.getTime());    
             
            logString="\nLOGIN:"+privateInfo+"
            TIME:"+calendar.getTime()  
             
             
            +"\n";    
             
           
          for(int   i=1;i<1000;i++){    
             
            File   file=new  
          File("yeeyoo.log"+i);    
             
            if(!(file.exists()))    
             
           
          file.createNewFile();   //如果文件不存在,創(chuàng)建此文件    
             
           
          if(file.length()>1048576)   //如果文件大于1M,重新創(chuàng)建一個文件    
             
            continue;  
           
             
            FileOutputStream   foo=new   FileOutputStream  


            ("yeeyoo.log"+i,true);//以append方式打開創(chuàng)建文件    
             
           
          foo.write(logString.getBytes(),0,logString.length());   //寫入日志  


            字符串    
             
            foo.close();    
             
            break;//退出    
           
           
            }    
             
            }catch(FileNotFoundException   e){}    
             

            catch(IOException   e){}    
             
            }    


            public   void   valueUnbound(HttpSessionBindingEvent   event)    
             

            {    
             
            count--;    
             
            if  
          (privateInfo.equals("count"))    
             
            {    
             
            return;    

             
            }    
             
            try{    
             
            Calendar   calendar=new
            GregorianCalendar();    
             
           
          System.out.println("LOGOUT:"+privateInfo+"    


          TIME:"+calendar.getTime());    
             
          logString="\nLOGOUT:"+privateInfo+" TIME:"+calendar.getTime()


            +"\n";    
             
            for(int   i=1;i<1000;i++){    
             
           
          File   file=new   File("yeeyoo.log"+i);    
             
            if(!(file.exists()))  
           
             
            file.createNewFile();   //如果文件不存在,創(chuàng)建此文件    
             
           
          if(file.length()>1048576)   //如果文件大于1M,重新創(chuàng)建一個文件    
             
            continue;  
           
             
            FileOutputStream   foo=new   FileOutputStream  


            ("yeeyoo.log"+i,true);//以append方式打開創(chuàng)建文件    
             
           
          foo.write(logString.getBytes(),0,logString.length());   //寫入日志  


            字符串    
             
            foo.close();    
             
            break;//退出    
           
           
            }    
             
            }catch(FileNotFoundException   e){}    
             

            catch(IOException   e){}    
             
            }    


            }    


            登錄日志的實現(xiàn):    


            下面再來看看我們的登錄Servlet中使用這個監(jiān)聽器的部分源代碼:    
             
            ……    
             
           
          HttpSession   session   =   req.getSession   (true);    
             
            ……    

             
          ////////////////////////////////////////////////////////////////
             
             
            ///////    
             
            SessionListener  
          sessionListener=new   SessionListener("    


          IP:"+req.getRemoteAddr());   //對于每一個會話過程均啟動一個監(jiān)聽器    
             
           
          session.setAttribute("listener",sessionListener);   //將監(jiān)聽器植入  


            HttpSession,這將激發(fā)監(jiān)聽器調(diào)用valueBound方法,從而記錄日志文件  
             
             
            。    

             
            ////////////////////////////////////////////////////////////////  


            ///////    
             
           
          當系統(tǒng)退出登錄時,只需簡單地調(diào)用session.removeAttribute  


          (“listener”);即可自動調(diào)用監(jiān)聽器的valueUnbound方法?;蛘撸?nbsp; 
             
             
            Session  
          Time   Out的時候也會調(diào)用此方法。    


          登錄人數(shù)的統(tǒng)計:    
             
            ServletContext  
          session1=getServletConfig().getServletContext  


          ();//取得ServletContext對象實例    
             
           
          if((SessionListener)session1.getAttribute("listener1")==null)    
             
           
          {    
             
            SessionListener   sessionListener1=new  
          SessionListener("count");//  


          只設(shè)置一次,不同于上面日志文件的記錄每次會話均設(shè)置。即當?shù)谝粋€客  


          戶連接到服務(wù)器時啟動一個全局變量,此后所有的客戶將使用相同的上下  
             
             
            文。    
             
           
          session1.setAttribute("listener1",sessionListener1);//將監(jiān)聽器對  


            象設(shè)置成ServletContext的屬性,具有全局范圍有效性,即所有的客戶均  
             
             
            可以取得它的實例。
             
             
            }    
             
           
          session.setAttribute("listener1",(SessionListener)  


          session1.getAttribute("listener1"));//取出此全局對象,并且將此對  


          象綁定到某個會話中,此舉將促使監(jiān)聽器調(diào)用valueBound,計數(shù)器加一。    
             
           
          在此后的程序中隨時可以用以下代碼取得當前的登錄人數(shù):    
             
           
          ((SessionListener)session.getAttribute("listener1")).getCount()    
             

            getCount()是監(jiān)聽器的一個方法,即取得當前計數(shù)器的值也就是登錄人數(shù)  
             
             
            了。

          修改web.xml,增加:  


          <listener>
             

            <listener-class>SessionListener</listener-class>    
             

            </listener>  


          <servlet-mapping>  
             
                           
          <servlet-name>SessionListener</servlet-name>  
             
                   
                  <url-pattern>/servlet/SessionListener</url-pattern>  
           
           
                    </servlet-mapping>  


            <servlet>  
             
                           
          <servlet-name>SessionListener</servlet-name>  
             
                   
                  <servlet-class>SessionListener</servlet-class>  
             

            </servlet>  
          posted @ 2011-07-13 16:19 甜咖啡 閱讀(1166) | 評論 (0)編輯 收藏
          表類型
          MySQL的數(shù)據(jù)表類型很多,其中比較重要的是MyISAM,InnoDB這兩種。
          這兩種類型各有優(yōu)缺點,需要根據(jù)實際情況選擇適合的,MySQL支持對不同的表設(shè)置不同的類型。下面做個對比:
          MyISAM表類型是一種比較成熟穩(wěn)定的表類型,但是MyISAM對一些功能不支持。
          MyISAMInnoDB
          事務(wù)不支持支持
          數(shù)據(jù)行鎖定不支持,只有表鎖定支持
          外鍵約束不支持支持
          表空間大小相對小相對大,最大是2倍
          全文索引支持不支持
          GIS數(shù)據(jù)支持不支持
          COUNT問題執(zhí)行COUNT(*)查詢時,速度慢
          一般情況下我覺得選擇MyISAM就行,如果需要事務(wù),或者需要很多用戶同時修改某個數(shù)據(jù)表里的數(shù)據(jù)時,可以考慮InnoDB數(shù)據(jù)表。
          數(shù)據(jù)類型
          1.整型(xxxint)
          MySQL數(shù)據(jù)類型含義
          tinyint(m)1個字節(jié)表示(-128~127)
          smallint(m)2個字節(jié)表示(-32768~32767)
          mediumint(m)3個字節(jié)表示(-8388608~8388607)
          int(m)4個字節(jié)表示(-2147483648~2147483647)
          bigint(m)8個字節(jié)表示(+-9.22*10的18次方)
          右側(cè)的取值范圍是在未加unsigned關(guān)鍵字的情況下,如果加了unsigned,則最大值翻倍,如tinyint unsigned的取值范圍為(0~256)。
          書上說int(m)括弧里的m是表示SELECT查詢結(jié)果集中的顯示寬度,并不影響實際的取值范圍,我測了一下,定義一個字段number 類型為int(4),插入一條記錄"123456",用mysql query broswer執(zhí)行SELECT查詢,返回的結(jié)果集中123456正確顯示,沒有影響到顯示的寬度,不知道這個m有什么用。

          2.浮點型(float和double)
          MySQL數(shù)據(jù)類型含義
          float(m,d)單精度浮點型,8位精度(4字節(jié)),m是十進制數(shù)字的總個數(shù),
          d是小數(shù)點后面的數(shù)字個數(shù)。
          double(m,d)雙精度浮點型,16位精度(8字節(jié))
          參數(shù)m只影響顯示效果,不影響精度,d卻不同,會影響到精度。
          比如設(shè)一個字段定義為float(5,3),如果插入一個數(shù)123.45678,實際數(shù)據(jù)庫里存的是123.457,小數(shù)點后面的數(shù)別四舍五入截成457了,但總個數(shù)不受到限制(6位,超過了定義的5位)。

          3.定點數(shù)(decimal)
          decimal(m,d) 定點類型
          浮點型在數(shù)據(jù)庫中存放的是近似值,而定點類型在數(shù)據(jù)庫中存放的是精確值。參數(shù)m是定點類型數(shù)字的最大個數(shù)(精度),范圍為0~65,d小數(shù)點右側(cè)數(shù)字的個數(shù),范圍為0~30,但不得超過m。
          對定點數(shù)的計算能精確到65位數(shù)字。

          4.字符串(char,varchar,xxxtext)
          MySQL數(shù)據(jù)類型含義
          char(n)固定長度的字符串,最多255個字符
          varchar(n)固定長度的字符串,最多65535個字符
          tinytext可變長度字符串,最多255個字符
          text可變長度字符串,最多65535個字符
          mediumtext可變長度字符串,最多2的24次方-1個字符
          longtext可變長度字符串,最多2的32次方-1個字符
          char和varchar:
          1.都可以通過指定n,來限制存儲的最大字符數(shù)長度,char(20)和varchar(20)將最多只能存儲20個字符,超過的字符將會被截掉。n必須小于該類型允許的最大字符數(shù)。
          2.char類型指定了n之后,如果存入的字符數(shù)小于n,后面將會以空格補齊,查詢的時候再將末尾的空格去掉,所以char類型存儲的字符串末尾不能有空格,varchar不受此限制。
          3.內(nèi)部存儲的機制不同。char是固定長度,char(4)不管是存一個字符,2個字符或者4個字符(英文的),都將占用4個字節(jié),varchar是存入的實際字符數(shù)+1個字節(jié)(n<=255)或2個字節(jié)(n>255),所以varchar(4),存入一個字符將占用2個字節(jié),2個字符占用3個字節(jié),4個字符占用5個字節(jié)。
          4.char類型的字符串檢索速度要比varchar類型的快。

          varchar和text:
          1.都是可變長度的,最多能存儲65535個字符。
          2.varchar可指定n,text不能指定,內(nèi)部存儲varchar是存入的實際字符數(shù)+1個字節(jié)(n<=255)或2個字節(jié)(n>255),text是實際字符數(shù)+2個字節(jié)。
          3.text類型不能有默認值。
          4.varchar可直接創(chuàng)建索引,text創(chuàng)建索引要指定前多少個字符。查詢速度varchar要快于text,在都創(chuàng)建了索引的情況下,text的索引好像沒起作用,參見這篇文章:http://forums.mysql.com/read.php?24,105964,105964

          5.二進制數(shù)據(jù)(xxxBlob)
          XXXBLOB和xxxtext是對應(yīng)的,不過存儲方式不同,xxxTEXT是以文本方式存儲的,如果存儲英文的話區(qū)分大小寫,而xxxBlob是以二進制方式存儲的,不區(qū)分大小寫。
          xxxBlob存儲的數(shù)據(jù)只能整體讀出。
          xxxTEXT可以指定字符集,xxxblob不用指定字符集。

          6.日期時間類型(date,time,datetime,timestamp)
          MySQL數(shù)據(jù)類型含義
          date日期'2008-12-2'
          time時間'12:25:36'
          datetime日期時間'2008-12-2 22:06:44'
          timestamp不固定
          timestamp比較特殊,如果定義一個字段的類型為timestamp,這個字段的時間會在其他字段修改的時候自動刷新。所以這個數(shù)據(jù)類型的字段可以存放這條記錄最后被修改的時間,而不是真正來的存放時間。
          數(shù)據(jù)類型的屬性
          MySQL關(guān)鍵字含義
          NULL數(shù)據(jù)列可包含NULL值
          NOT NULL數(shù)據(jù)列不允許包含NULL值
          DEFAULT xxx默認值,如果插入記錄的時候沒有指定值,將取這個默認值
          PRIMARY KEY主鍵
          AUTO_INCREMENT遞增,如果插入記錄的時候沒有指定值,則在上一條記錄的值上加1,僅適用于整數(shù)類型
          UNSIGNED無符號
          CHARACTER SET name指定一個字符集
          posted @ 2011-06-27 09:24 甜咖啡 閱讀(405) | 評論 (0)編輯 收藏

          類繼承關(guān)系映射
          (1)DB表之間不存在繼承關(guān)系,要把JavaBean中的繼承關(guān)系映射到關(guān)系數(shù)據(jù)庫中的有三種映射方式:
          ·每個類建一張表
          ·所有類建一張表
          ·只為具體類建表

          eg. 以公司Company(一方)和員工Employee(多方),Employee有兩個子:類小時工HourlyEmployee和正式員工SalariedEmployee


          1)每個類建一張表
          可以有效減少數(shù)據(jù)冗余,減少字段,查詢效率不很高。
          配置文件:
          Company.hbm.xml
          <class name="Company" table="company">
             <id name="oid" column="oid" >
                  <generator class="native">
                  </generator>
             </id>
             <property name="name" type="string"/>
             <!-- Company與Employee是多態(tài)關(guān)聯(lián),
              但是由于DB沒有描述Employee類和它的兩個子類的繼承關(guān)系,
              因此無法映射Company類的employees集合,
              所以該文件僅僅映射了Company的id和name屬性 -->
          </class>
          <一>:需要針對每個類寫映射配置文件,就和普通的單表映射的xml文件相同
          Employee.hbm.xml
          <class name="Employee" table="employee">
             <id name="oid" column="oid" >
                  <generator class="native">
                  </generator>
             </id>
             <property name="name"/>

          </class>

          HourlyEmployee.hbm.xml
          <class name="HourlyEmployee" table="hourly">
             <id name="oid" column="oid" >
                  <generator class="native">
                  </generator>
             </id>
             <property name="name"/>
             <property name="rate"></property>
             <many-to-one name="company" class="Company"
              column="companyid" cascade="save-update"></many-to-one>
          </class>

          SalaryEmployee.hbm.xml
          <class name="SalariedEmployee" table="salaried">
             <id name="oid" column="oid" >
                  <generator class="native">
                  </generator>
             </id>
             <property name="name"/>
             <property name="salary"></property>
            
             <many-to-one name="company" class="Company"
              column="companyid" cascade="save-update"></many-to-one>
          </class>
          采用這種獨立映射方式的配置方法,在配置文件中沒有定義這些類之間的任何關(guān)系,也就是說,三個類都是獨立存在的。使用這種映射方式解決了相同屬性必須使用相同字段名的限制,但是從父類繼承的屬性需要在每個子類中都進行相應(yīng)的定義,造成屬性配置的重復(fù)。
          <二>也可以使用一個xml文件來進行映射,要使用<union-subclass>標簽!!!
          注意:這里不能使用id生成策略中的native,而是要指定特定的生成策略。
          Employee2.hbm.xml:
          <class name="Employee" table="employee">
             <id name="oid" column="oid" >
                 <generator class="hilo">
                     <param name="table">tt_hi</param>
                     <param name="column">hi</param>
                  </generator>
             </id>
             <property name="name"/>
            
              <union-subclass name="HourlyEmployee" table="hourly" >
               <property name="rate"></property>
               <many-to-one name="Company"
          column="companyid" cascade="save-update">
          </many-to-one>
              </union-subclass>
             
              <union-subclass name="SalariedEmployee"
          table="salaried" >
               <property name="salary"></property>
               <many-to-one name="Company" column="companyid"
          cascade="save-update">
          </many-to-one>
              </union-subclass>
              </class>

          使用這種方式除了每個子類對應(yīng)一個表外,其定義方式與java對象的繼承非常相似,即子類可以繼承父類中公共的屬性定義,解決了屬性配置的重復(fù),但是,造成了相同屬性必須使用相同字段名的限制。
          2)所有類建一張表
          查尋效率比較高,但是會產(chǎn)生很多空間浪費,當子類中的非空約束,就不大適用了,這是對于子類要使用<subclass>標簽表示。
          配置文件:
          Company2.hbm.xml:
          <class name="Company" table="company">
             <id name="oid" column="oid" >
                  <generator class="native">
                  </generator>
             </id>
             <property name="name" type="string"/>
             <set name="employees"
          cascade="all-delete-orphan" inverse="true">
              <key column="companyid"></key>
              <one-to-many class="Employee"/>
             </set>
             </class>
          Employee3.hbm.xml:
          <class name="Employee" table="employee2">
             <id name="oid" column="oid" >
                 <generator class="native">
                  </generator>
             </id>
             <property name="name" />
             <discriminator column="employee_type" type="string"/>

             <subclass name="HourlyEmployee"
          discriminator-value="hourly">
              <property name="rate"></property>
               <many-to-one name="Company"
          column="companyid" cascade="all">
          </many-to-one>
             </subclass>
            
             <subclass name="SalariedEmployee"
          discriminator-value="salaried">
             <property name="salary"></property>
               <many-to-one name="Company"
          column="companyid" cascade="save-update">
          </many-to-one>   
             </subclass>
          </class>
          使 用這種映射方式需要注意的是它通過<discriminator>標簽(<discriminator column="employee_type" type="string"/>)增加一個字段(這里是employee_type字段)來標示某個記錄是屬于哪個實體對象的。通過< subclass>標記中的discriminator-value屬性來定義哪個值代表哪個子類的持久化對象。
          3)只為具體類建表
          ·適用于不使用多態(tài)的情況下
          ·跟每個類建一張表的區(qū)別:
          ① 每個類一張表的映射策略所建立的表示獨立的,每個表都包括子類所自定義 的屬性和由父類鎖繼承的屬性的映射字段。
          ② 只為具體類建表,子類所對應(yīng)的表只包括子類所定義的屬性,而子類所對應(yīng)的 表與父類所對應(yīng)的表是通過外鍵來進行關(guān)聯(lián)的,即當持久化一個子類時,需要在父 類的表和子類的表各增加一條記錄,這兩個記錄通過外鍵來關(guān)聯(lián)。
          ·好處:父類所定義的屬性就在父類的表中進行映射,而子類所定義的屬性就在子類的表中進行映射。避免了子類所定義的表中仍然需要定義父類屬性的映射字段。
          ·映射文件中的子類可以使用<join-subclass>標簽來表示,并且引用父類的主 鍵作為共享主鍵,就是不需要指定id生成策略
          配置文件:
          Company3.hbm.xml:
          <class name="Company" table="company3">
             <id name="oid" column="oid" >
                  <generator class="native">
                  </generator>
             </id>
             <property name="name" type="string"/>
            
             <set name="employees" cascade="all-delete-orphan"
          inverse="true">
              <key column="companyid"></key>
              <one-to-many class="Employee"/>
             </set>
          </class>
          Employee4.hbm.xml:
          <class name="Employee" table="employee3">
             <id name="oid" column="oid" >
                 <generator class="native">
                  </generator>
             </id>
             <property name="name" />
            
             <joined-subclass name="HourlyEmployee" table="hourly2">
              <key column="oid"></key>
              <property name="rate"></property>
              <many-to-one name="Company" column="companyid"
          cascade="save-update">
          </many-to-one>
             </joined-subclass>

             <joined-subclass name="SalariedEmployee" table="salaried2">
              <key column="oid"></key>
              <property name="salary"></property>
              <many-to-one name="Company" column="companyid"
          cascade="save-update">
          </many-to-one>
             </joined-subclass>
          </class>

          posted @ 2011-03-26 23:41 甜咖啡 閱讀(502) | 評論 (0)編輯 收藏

          根據(jù)hibernate的文檔,有兩種方式實現(xiàn)實體對象的主鍵自動增長。
          第一種:設(shè)置ID的增長策略是sequence,同時指定sequence的名字,最好每個表建一個sequence,此種做法就如同MS-SQL,MY-SQL中的自動增長一樣,不需要創(chuàng)建觸發(fā)器,具體的oracle數(shù)據(jù)庫腳本及hibernate配置文件如下:

          oracle數(shù)據(jù)表的創(chuàng)建腳本:
          CREATE TABLE DEPARTMENT (  
              ID NUMBER(19,0) DEFAULT '0' NOT NULL,  
              NAME VARCHAR2(255) NOT NULL,  
              DESCRIPTION CLOB  
          );  
          ALTER TABLE DEPARTMENT ADD CONSTRAINT PRIMARY_0 PRIMARY KEY(ID) ENABLE;  
          ALTER TABLE DEPARTMENT ADD CONSTRAINT UK_DEPARTMENT_1 UNIQUE (NAME);  

          CREATE SEQUENCE DEPARTMENT_ID_SEQ MINVALUE 10000 MAXVALUE 999999999999999999999999 INCREMENT BY 1 NOCYCLE;

          CREATE TABLE DEPARTMENT (
          ID NUMBER(19,0) DEFAULT '0' NOT NULL,
          NAME VARCHAR2(255) NOT NULL,
          DESCRIPTION CLOB
          );
          ALTER TABLE DEPARTMENT ADD CONSTRAINT PRIMARY_0 PRIMARY KEY(ID) ENABLE;
          ALTER TABLE DEPARTMENT ADD CONSTRAINT UK_DEPARTMENT_1 UNIQUE (NAME);

          CREATE SEQUENCE DEPARTMENT_ID_SEQ MINVALUE 10000 MAXVALUE 999999999999999999999999 INCREMENT BY 1 NOCYCLE;

          創(chuàng)建DEPARTMENT表,并為DEPARTMENT表創(chuàng)建一個單獨的SEQUENCE,名字為SEQUENCE_ID_SEQ,并不需要創(chuàng)建觸發(fā)器。

          [2]hibernate映射文件的配置:
          Java代碼
          <?xml version="1.0"?>  
          <!DOCTYPE hibernate-mapping PUBLIC  
                "-//Hibernate/Hibernate Mapping DTD 3.0//EN"
                    " <hibernate-mapping package="com.liyanframework.demo.domain">  
              <class name="Department" table="DEPARTMENT">  
                  <id name="id" column="ID">  
                      <generator class="sequence">  
                          <param name="sequence">DEPARTMENT_ID_SEQ</param>  
                      </generator>  
                  </id>  
                  <property name="name" column="NAME" type="string" />  
                  <property name="description" column="DESCRIPTION" type="text" />  
              </class>  
          </hibernate-mapping>  


          在hibernate映射文件中,對ID的生成策略選擇sequence,指定sequence的名字DEPARTMENT_ID_SEQ 就可以了,當你保存新對象的時候,hibernate會自動取得DEPARTMENT_ID_SEQ.NEXTVAL作為新對象的ID保存到數(shù)據(jù)庫,所以 不需要再使用觸發(fā)器再來生成新記錄的ID。
          [/list]
          第二種:設(shè)置ID的增長策略是native,但是需要創(chuàng)建一個名字為 hibernate_sequence(這個名字好像是hibernate默認的sequence名字,不創(chuàng)建會出錯的)的全局使用的sequence, 然后再對每一個表的ID生成的時候,使用觸發(fā)器,取得hibernate_sequence.CURRVAL作為新記錄的ID,具體的oracle數(shù)據(jù)庫 腳本及hibernate配置文件如下:
          [list]
          [1]oracle數(shù)據(jù)表的創(chuàng)建腳本:
          Java代碼
          CREATE TABLE STAFF (  
              ID NUMBER(19,0) DEFAULT '0' NOT NULL,  
              NAME VARCHAR2(255) NOT NULL,  
              AGE NUMBER(3,0) NOT NULL,  
              BIRTHDAY DATE NOT NULL,  
              SALARY NUMBER(10,2) NOT NULL,  
              LEVELNESS FLOAT NOT NULL,  
              CREATETIME TIMESTAMP NOT NULL,  
              ENABLE CHAR(2) DEFAULT 'Y' NOT NULL,  
              STATUS VARCHAR2(64) NOT NULL,  
              DEPARTMENT_ID NUMBER(19,0)  
          );  
          ALTER TABLE STAFF ADD CONSTRAINT PRIMARY_1 PRIMARY KEY(ID) ENABLE;  
          ALTER TABLE STAFF ADD CONSTRAINT STAFF_IBFK_0 FOREIGN KEY(DEPARTMENT_ID) REFERENCES DEPARTMENT(ID) ENABLE;  
          ALTER TABLE STAFF ADD CONSTRAINT UK_STAFF_1 UNIQUE (NAME);  
          CREATE INDEX IDX_STAFF_STATUS ON STAFF(STATUS);  

          CREATE SEQUENCE HIBERNATE_SEQUENCE MINVALUE 90000 MAXVALUE 999999999999999999999999 INCREMENT BY 1 NOCYCLE;  

          CREATE OR REPLACE TRIGGER STAFF_ID_TRG BEFORE INSERT ON STAFF  
          FOR EACH ROW  
          BEGIN  
              IF INSERTING AND :NEW.ID IS NULL THEN  
                  SELECT HIBERNATE_SEQUENCE.CURRVAL INTO :NEW.ID FROM DUAL;  
              END IF;  
          END;

          CREATE TABLE STAFF (
          ID NUMBER(19,0) DEFAULT '0' NOT NULL,
          NAME VARCHAR2(255) NOT NULL,
          AGE NUMBER(3,0) NOT NULL,
          BIRTHDAY DATE NOT NULL,
          SALARY NUMBER(10,2) NOT NULL,
          LEVELNESS FLOAT NOT NULL,
          CREATETIME TIMESTAMP NOT NULL,
          ENABLE CHAR(2) DEFAULT 'Y' NOT NULL,
          STATUS VARCHAR2(64) NOT NULL,
          DEPARTMENT_ID NUMBER(19,0)
          );
          ALTER TABLE STAFF ADD CONSTRAINT PRIMARY_1 PRIMARY KEY(ID) ENABLE;
          ALTER TABLE STAFF ADD CONSTRAINT STAFF_IBFK_0 FOREIGN KEY(DEPARTMENT_ID) REFERENCES DEPARTMENT(ID) ENABLE;
          ALTER TABLE STAFF ADD CONSTRAINT UK_STAFF_1 UNIQUE (NAME);
          CREATE INDEX IDX_STAFF_STATUS ON STAFF(STATUS);

          CREATE SEQUENCE HIBERNATE_SEQUENCE MINVALUE 90000 MAXVALUE 999999999999999999999999 INCREMENT BY 1 NOCYCLE;

          CREATE OR REPLACE TRIGGER STAFF_ID_TRG BEFORE INSERT ON STAFF
          FOR EACH ROW
          BEGIN
          IF INSERTING AND :NEW.ID IS NULL THEN
             SELECT HIBERNATE_SEQUENCE.CURRVAL INTO :NEW.ID FROM DUAL;
          END IF;
          END;

          創(chuàng)建STAFF表,但是并沒有為STAFF創(chuàng)建相應(yīng)的主鍵sequence,而是創(chuàng)建了一個名字為HIBERNATE_SEQUENCE的 sequence,然后創(chuàng)建一個觸發(fā)器STAFF_ID_TRG,當執(zhí)行INSERT操作時,hibernate會先執(zhí)行一次 HIBERNATE_SEQUENCE.NEXTVAL,所以在觸發(fā)器中只需要取得HIBERNATE_SEQUENCE.CURRVAL作為新記錄的 ID。

          [2]hibernate映射文件的配置:
          Java代碼
          <?xml version="1.0"?>  
          <!DOCTYPE hibernate-mapping PUBLIC  
                "-//Hibernate/Hibernate Mapping DTD 3.0//EN"
                    "
          <hibernate-mapping package="com.liyanframework.demo.domain">  
              <class name="Staff" table="STAFF">  
                  <id name="id" column="ID">  
                      <generator class="native" />  
                  </id>  
                  <property name="name" column="NAME" type="string" />  
                  <property name="age" column="AGE" type="integer" />  
                  <property name="birthday" column="BIRTHDAY" type="date" />  
                  <property name="salary" column="SALARY" type="big_decimal" />  
                  <property name="level" column="LEVELNESS" type="float" />  
                  <property name="createTime" column="CREATETIME" type="timestamp" />  
                  <property name="enable" column="ENABLE" type="character" />  
                  <property name="status" column="STATUS" type="string" />  
                  <many-to-one name="department" column="DEPARTMENT_ID" class="Department" />  
              </class>  
          </hibernate-mapping>

          在hibernate映射文件中,對ID的生成策略選擇native,hibernate會根據(jù)你數(shù)據(jù)庫的觸發(fā)器來生成新記錄的ID。[/list]
          比 較兩種做法,第二種做法也就是hibernate在代碼中,實現(xiàn)了oracle中的觸發(fā)器功能。對于不同的情況,選擇不懂的做法。如果新的系統(tǒng),新建的 oracle數(shù)據(jù)庫,推薦使用第一種做法,簡單,容易移植到其他支持自動增長的數(shù)據(jù)庫;如果是老的系統(tǒng),需要把其他數(shù)據(jù)庫轉(zhuǎn)換為oracle的,那就要用 第二種了,使用native的方式,可以不改動配置文件,兼容oracle和mysql之類帶有自動增長的數(shù)據(jù)庫。
          posted @ 2011-03-26 23:40 甜咖啡 閱讀(1911) | 評論 (0)編輯 收藏

          通常在數(shù)據(jù)庫或者現(xiàn)實的實體關(guān)系中存在3種現(xiàn)象: 1-1  ,1-N , N-N  其中1對1的關(guān)系 好比一個丈夫 只有一個 妻子 ,一個妻子也只有一個老婆,一對多的關(guān)系 就像 1個人能有多個 房子,而一個房子只能有一個房主, 多對多 好比一個班有多個老師來教,而一個老師能教多個班。

          在實體設(shè)計中 也存在這樣映射關(guān)系,一對一 用的比較少,一對多或者 多對多 用的比較常見。

          先來介紹下一對一 ;

           每種映射關(guān)系都存在 有連接表和無連接表 兩種情況,下面我都講解 無連接表的情況。

          第一種情況; 基于外鍵的雙向 關(guān)聯(lián)

          什么意思呢; 基于外鍵的關(guān)聯(lián)好比 一個表的外鍵是另一個表的主鍵,學(xué)過數(shù)據(jù)庫的朋友應(yīng)該都知道這種主從表關(guān)系(父子表關(guān)系)。

          數(shù)據(jù)的表設(shè)計就不多做解釋了,下面著重講解 映射文件的寫法;

          在hibernate框架中的我們都知道 一個表應(yīng)該對應(yīng)一個實體 即模型(bean) 所有主從表的話基本要設(shè)計兩個bean對象,那么每個bean對象就必須寫上一個xml問價作為hibernate框架 控制的橋梁。

          在主表對應(yīng)的bean對象的 xml文件的寫法如下;

          <hibernate-mapping package="lee‘>

          <class name="對應(yīng)bean對象的全路徑" table=“對應(yīng)的表名">

              <id name="id的名字" column="表中的字段名" > <!-- 如果 兩個的名字一樣的則column可以不寫-->

                 <ganerator class="native” /> 主鍵生成策略</id>

          <property name="其他的屬性名">

          ........

          <!-- 關(guān)鍵代碼-->

              主bean 類的寫法加上一個屬性 表示 另一個 bean的 變量,在子bean中同樣如此

              <one-to-one name="對應(yīng)子表中的對象的變量名"

          " class="另一個bean對象的全路徑" cascade="all" property-ref="在另一個bean中代表本類的變量名"></one-to-one>  cascade="all"表示 同步兩個表

          </class>

          </ hibernate-mapping>

          另一個bean ,即子表bean的xml文件的寫法

          <前面和主bean一樣>

          主鍵生成策略:foreign

          <many-to-one name="對應(yīng)主bean對象的變量名" unique=“true”表示唯一外鍵

          column=“外鍵名”

          class="主bean的全路徑"></many-to-one>


          2:基于主鍵的雙向 1-1關(guān)聯(lián)

          什么是基于主鍵 ; 即一個表的主鍵是另一個的主鍵,一個的主鍵變化 另一個表也同時變化

          xml寫法

          <one-to-one name="另一個bean的變量名" class=“另一個bean的全路徑” cascade="all">

          posted @ 2011-03-26 23:39 甜咖啡 閱讀(773) | 評論 (0)編輯 收藏

          剛接觸java的ssh框架,有很多東西都不了解,最近遇到復(fù)合主鍵的問題,不知道在前臺jsp頁面中如何調(diào)用復(fù)合主鍵,網(wǎng)上查到了一篇博文(http://blog.csdn.net/ttaaoo36/archive/2010/07/26/5766810.aspx)解決了這個問題,現(xiàn)在也把我的內(nèi)容貼出來。

          1.oracle中建表語句

          drop table CUSTRICH cascade constraints;

          /*==============================================================*/
          /* Table: CUSTRICH                                              */
          /*==============================================================*/
          create table CUSTRICH  (
             BRANCH_NO            CHAR(10)                        not null,
             YYYYMM               DATE                            not null,
             CNY_BAL              NUMBER,
             NONCNY_BAL           NUMBER,
             LOAN_TOT_CNY         NUMBER,
             LOAN_TOT_NONCNY      NUMBER,
             RICH_BALCASHUNIT     NUMBER,
             BDF10FR_TOT_BAL      NUMBER,
             FOUND_TOT            NUMBER,
             INSURANCEFEEAMT      NUMBER,
             CD03_CURR_BAL        NUMBER,
             FN1TON_COUNT         NUMBER,
             FNSETPLN_COUNT       NUMBER,
             TPCCACCBAL           NUMBER,
             APPLICATION_ID       NUMBER,
             JGDM                 NUMBER,
             ZCRMBHJ              NUMBER,
             "Reserve1"           NUMBER,
             ASSET_TOT_CNY        NUMBER,
             "Reserve3"           NUMBER,
             "Reserve4"           NUMBER,
             "Reserve5"           NUMBER,
             "Reserve6"           NUMBER,
             "Reserve7"           NUMBER,
             "Reserve8"           NUMBER,
             "Reserve9"           NUMBER,
             "Reserve10"          NUMBER,
             constraint PK_CUSTRICH primary key (BRANCH_NO, YYYYMM)
          );

          兩個字段branch_no 和yyyymm 復(fù)合為一個主鍵

          2. hibernate映射為兩個java類文件  :Custrich.java和 CustrichId.java

          Custrich.java   內(nèi)容如下

          package com.hljzr.bean;

          import java.math.BigDecimal;

          /**
           * Custrich entity. @author MyEclipse Persistence Tools
           */

          public class Custrich implements java.io.Serializable {

           // Fields

           private CustrichId id;
           private BigDecimal cnyBal;
           private BigDecimal noncnyBal;
           private BigDecimal loanTotCny;
           private BigDecimal loanTotNoncny;
           private BigDecimal richBalcashunit;
           private BigDecimal bdf10frTotBal;
           private BigDecimal foundTot;
           private BigDecimal insurancefeeamt;
           private BigDecimal cd03CurrBal;
           private BigDecimal fn1tonCount;
           private BigDecimal fnsetplnCount;
           private BigDecimal tpccaccbal;
           private BigDecimal applicationId;
           private BigDecimal jgdm;
           private BigDecimal zcrmbhj;
           private BigDecimal reserve1;
           private BigDecimal assetTotCny;
           private BigDecimal reserve3;
           private BigDecimal reserve4;
           private BigDecimal reserve5;
           private BigDecimal reserve6;
           private BigDecimal reserve7;
           private BigDecimal reserve8;
           private BigDecimal reserve9;
           private BigDecimal reserve10;

           // Constructors

           /** default constructor */
           public Custrich() {
           }

           /** minimal constructor */
           public Custrich(CustrichId id) {
            this.id = id;
           }

           /** full constructor */
           public Custrich(CustrichId id, BigDecimal cnyBal, BigDecimal noncnyBal,
             BigDecimal loanTotCny, BigDecimal loanTotNoncny,
             BigDecimal richBalcashunit, BigDecimal bdf10frTotBal,
             BigDecimal foundTot, BigDecimal insurancefeeamt,
             BigDecimal cd03CurrBal, BigDecimal fn1tonCount,
             BigDecimal fnsetplnCount, BigDecimal tpccaccbal,
             BigDecimal applicationId, BigDecimal jgdm, BigDecimal zcrmbhj,
             BigDecimal reserve1, BigDecimal assetTotCny, BigDecimal reserve3,
             BigDecimal reserve4, BigDecimal reserve5, BigDecimal reserve6,
             BigDecimal reserve7, BigDecimal reserve8, BigDecimal reserve9,
             BigDecimal reserve10) {
            this.id = id;
            this.cnyBal = cnyBal;
            this.noncnyBal = noncnyBal;
            this.loanTotCny = loanTotCny;
            this.loanTotNoncny = loanTotNoncny;
            this.richBalcashunit = richBalcashunit;
            this.bdf10frTotBal = bdf10frTotBal;
            this.foundTot = foundTot;
            this.insurancefeeamt = insurancefeeamt;
            this.cd03CurrBal = cd03CurrBal;
            this.fn1tonCount = fn1tonCount;
            this.fnsetplnCount = fnsetplnCount;
            this.tpccaccbal = tpccaccbal;
            this.applicationId = applicationId;
            this.jgdm = jgdm;
            this.zcrmbhj = zcrmbhj;
            this.reserve1 = reserve1;
            this.assetTotCny = assetTotCny;
            this.reserve3 = reserve3;
            this.reserve4 = reserve4;
            this.reserve5 = reserve5;
            this.reserve6 = reserve6;
            this.reserve7 = reserve7;
            this.reserve8 = reserve8;
            this.reserve9 = reserve9;
            this.reserve10 = reserve10;
           }

           // Property accessors

           public CustrichId getId() {
            return this.id;
           }

           public void setId(CustrichId id) {
            this.id = id;
           }

           public BigDecimal getCnyBal() {
            return this.cnyBal;
           }

           public void setCnyBal(BigDecimal cnyBal) {
            this.cnyBal = cnyBal;
           }

           public BigDecimal getNoncnyBal() {
            return this.noncnyBal;
           }

           public void setNoncnyBal(BigDecimal noncnyBal) {
            this.noncnyBal = noncnyBal;
           }

           public BigDecimal getLoanTotCny() {
            return this.loanTotCny;
           }

           public void setLoanTotCny(BigDecimal loanTotCny) {
            this.loanTotCny = loanTotCny;
           }

           public BigDecimal getLoanTotNoncny() {
            return this.loanTotNoncny;
           }

           public void setLoanTotNoncny(BigDecimal loanTotNoncny) {
            this.loanTotNoncny = loanTotNoncny;
           }

           public BigDecimal getRichBalcashunit() {
            return this.richBalcashunit;
           }

           public void setRichBalcashunit(BigDecimal richBalcashunit) {
            this.richBalcashunit = richBalcashunit;
           }

           public BigDecimal getBdf10frTotBal() {
            return this.bdf10frTotBal;
           }

           public void setBdf10frTotBal(BigDecimal bdf10frTotBal) {
            this.bdf10frTotBal = bdf10frTotBal;
           }

           public BigDecimal getFoundTot() {
            return this.foundTot;
           }

           public void setFoundTot(BigDecimal foundTot) {
            this.foundTot = foundTot;
           }

           public BigDecimal getInsurancefeeamt() {
            return this.insurancefeeamt;
           }

           public void setInsurancefeeamt(BigDecimal insurancefeeamt) {
            this.insurancefeeamt = insurancefeeamt;
           }

           public BigDecimal getCd03CurrBal() {
            return this.cd03CurrBal;
           }

           public void setCd03CurrBal(BigDecimal cd03CurrBal) {
            this.cd03CurrBal = cd03CurrBal;
           }

           public BigDecimal getFn1tonCount() {
            return this.fn1tonCount;
           }

           public void setFn1tonCount(BigDecimal fn1tonCount) {
            this.fn1tonCount = fn1tonCount;
           }

           public BigDecimal getFnsetplnCount() {
            return this.fnsetplnCount;
           }

           public void setFnsetplnCount(BigDecimal fnsetplnCount) {
            this.fnsetplnCount = fnsetplnCount;
           }

           public BigDecimal getTpccaccbal() {
            return this.tpccaccbal;
           }

           public void setTpccaccbal(BigDecimal tpccaccbal) {
            this.tpccaccbal = tpccaccbal;
           }

           public BigDecimal getApplicationId() {
            return this.applicationId;
           }

           public void setApplicationId(BigDecimal applicationId) {
            this.applicationId = applicationId;
           }

           public BigDecimal getJgdm() {
            return this.jgdm;
           }

           public void setJgdm(BigDecimal jgdm) {
            this.jgdm = jgdm;
           }

           public BigDecimal getZcrmbhj() {
            return this.zcrmbhj;
           }

           public void setZcrmbhj(BigDecimal zcrmbhj) {
            this.zcrmbhj = zcrmbhj;
           }

           public BigDecimal getReserve1() {
            return this.reserve1;
           }

           public void setReserve1(BigDecimal reserve1) {
            this.reserve1 = reserve1;
           }

           public BigDecimal getAssetTotCny() {
            return this.assetTotCny;
           }

           public void setAssetTotCny(BigDecimal assetTotCny) {
            this.assetTotCny = assetTotCny;
           }

           public BigDecimal getReserve3() {
            return this.reserve3;
           }

           public void setReserve3(BigDecimal reserve3) {
            this.reserve3 = reserve3;
           }

           public BigDecimal getReserve4() {
            return this.reserve4;
           }

           public void setReserve4(BigDecimal reserve4) {
            this.reserve4 = reserve4;
           }

           public BigDecimal getReserve5() {
            return this.reserve5;
           }

           public void setReserve5(BigDecimal reserve5) {
            this.reserve5 = reserve5;
           }

           public BigDecimal getReserve6() {
            return this.reserve6;
           }

           public void setReserve6(BigDecimal reserve6) {
            this.reserve6 = reserve6;
           }

           public BigDecimal getReserve7() {
            return this.reserve7;
           }

           public void setReserve7(BigDecimal reserve7) {
            this.reserve7 = reserve7;
           }

           public BigDecimal getReserve8() {
            return this.reserve8;
           }

           public void setReserve8(BigDecimal reserve8) {
            this.reserve8 = reserve8;
           }

           public BigDecimal getReserve9() {
            return this.reserve9;
           }

           public void setReserve9(BigDecimal reserve9) {
            this.reserve9 = reserve9;
           }

           public BigDecimal getReserve10() {
            return this.reserve10;
           }

           public void setReserve10(BigDecimal reserve10) {
            this.reserve10 = reserve10;
           }

          }

          CustrichId.java  內(nèi)容如下:

          package com.hljzr.bean;

          import java.util.Date;

          /**
           * CustrichId entity. @author MyEclipse Persistence Tools
           */

          public class CustrichId implements java.io.Serializable {

           // Fields

           private String branchNo;
           private Date yyyymm;

           // Constructors

           /** default constructor */
           public CustrichId() {
           }

           /** full constructor */
           public CustrichId(String branchNo, Date yyyymm) {
            this.branchNo = branchNo;
            this.yyyymm = yyyymm;
           }

           // Property accessors

           public String getBranchNo() {
            return this.branchNo;
           }

           public void setBranchNo(String branchNo) {
            this.branchNo = branchNo;
           }

           public Date getYyyymm() {
            return this.yyyymm;
           }

           public void setYyyymm(Date yyyymm) {
            this.yyyymm = yyyymm;
           }

           public boolean equals(Object other) {
            if ((this == other))
             return true;
            if ((other == null))
             return false;
            if (!(other instanceof CustrichId))
             return false;
            CustrichId castOther = (CustrichId) other;

            return ((this.getBranchNo() == castOther.getBranchNo()) || (this
              .getBranchNo() != null
              && castOther.getBranchNo() != null && this.getBranchNo()
              .equals(castOther.getBranchNo())))
              && ((this.getYyyymm() == castOther.getYyyymm()) || (this
                .getYyyymm() != null
                && castOther.getYyyymm() != null && this.getYyyymm()
                .equals(castOther.getYyyymm())));
           }

           public int hashCode() {
            int result = 17;

            result = 37 * result
              + (getBranchNo() == null ? 0 : this.getBranchNo().hashCode());
            result = 37 * result
              + (getYyyymm() == null ? 0 : this.getYyyymm().hashCode());
            return result;
           }

          }

          hashCode和equals方法是用來控制主鍵內(nèi)容不能為空和不能重復(fù)的。

          3.Custrich.hbm.xml的配置內(nèi)容為:

          <?xml version="1.0" encoding="utf-8"?>
          <!DOCTYPE hibernate-mapping PUBLIC "-//Hibernate/Hibernate Mapping DTD 3.0//EN"
          " <!--
              Mapping file autogenerated by MyEclipse Persistence Tools
          -->
          <hibernate-mapping>
              <class name="com.hljzr.bean.Custrich" table="CUSTRICH" schema="YHXM">
                  <composite-id name="id" class="com.hljzr.bean.CustrichId">
                      <key-property name="branchNo" type="java.lang.String">
                          <column name="BRANCH_NO" length="10" />
                      </key-property>
                      <key-property name="yyyymm" type="java.util.Date">
                          <column name="YYYYMM" length="7" />
                      </key-property>
                  </composite-id>
                  <property name="cnyBal" type="java.math.BigDecimal">
                      <column name="CNY_BAL" precision="22" scale="0" />
                  </property>
                  <property name="noncnyBal" type="java.math.BigDecimal">
                      <column name="NONCNY_BAL" precision="22" scale="0" />
                  </property>
                  <property name="loanTotCny" type="java.math.BigDecimal">
                      <column name="LOAN_TOT_CNY" precision="22" scale="0" />
                  </property>
                  <property name="loanTotNoncny" type="java.math.BigDecimal">
                      <column name="LOAN_TOT_NONCNY" precision="22" scale="0" />
                  </property>
                  <property name="richBalcashunit" type="java.math.BigDecimal">
                      <column name="RICH_BALCASHUNIT" precision="22" scale="0" />
                  </property>
                  <property name="bdf10frTotBal" type="java.math.BigDecimal">
                      <column name="BDF10FR_TOT_BAL" precision="22" scale="0" />
                  </property>
                  <property name="foundTot" type="java.math.BigDecimal">
                      <column name="FOUND_TOT" precision="22" scale="0" />
                  </property>
                  <property name="insurancefeeamt" type="java.math.BigDecimal">
                      <column name="INSURANCEFEEAMT" precision="22" scale="0" />
                  </property>
                  <property name="cd03CurrBal" type="java.math.BigDecimal">
                      <column name="CD03_CURR_BAL" precision="22" scale="0" />
                  </property>
                  <property name="fn1tonCount" type="java.math.BigDecimal">
                      <column name="FN1TON_COUNT" precision="22" scale="0" />
                  </property>
                  <property name="fnsetplnCount" type="java.math.BigDecimal">
                      <column name="FNSETPLN_COUNT" precision="22" scale="0" />
                  </property>
                  <property name="tpccaccbal" type="java.math.BigDecimal">
                      <column name="TPCCACCBAL" precision="22" scale="0" />
                  </property>
                  <property name="applicationId" type="java.math.BigDecimal">
                      <column name="APPLICATION_ID" precision="22" scale="0" />
                  </property>
                  <property name="jgdm" type="java.math.BigDecimal">
                      <column name="JGDM" precision="22" scale="0" />
                  </property>
                  <property name="zcrmbhj" type="java.math.BigDecimal">
                      <column name="ZCRMBHJ" precision="22" scale="0" />
                  </property>
                  <property name="reserve1" type="java.math.BigDecimal">
                      <column name="RESERVE1" precision="22" scale="0" />
                  </property>
                  <property name="assetTotCny" type="java.math.BigDecimal">
                      <column name="ASSET_TOT_CNY" precision="22" scale="0" />
                  </property>
                  <property name="reserve3" type="java.math.BigDecimal">
                      <column name="RESERVE3" precision="22" scale="0" />
                  </property>
                  <property name="reserve4" type="java.math.BigDecimal">
                      <column name="RESERVE4" precision="22" scale="0" />
                  </property>
                  <property name="reserve5" type="java.math.BigDecimal">
                      <column name="RESERVE5" precision="22" scale="0" />
                  </property>
                  <property name="reserve6" type="java.math.BigDecimal">
                      <column name="RESERVE6" precision="22" scale="0" />
                  </property>
                  <property name="reserve7" type="java.math.BigDecimal">
                      <column name="RESERVE7" precision="22" scale="0" />
                  </property>
                  <property name="reserve8" type="java.math.BigDecimal">
                      <column name="RESERVE8" precision="22" scale="0" />
                  </property>
                  <property name="reserve9" type="java.math.BigDecimal">
                      <column name="RESERVE9" precision="22" scale="0" />
                  </property>
                  <property name="reserve10" type="java.math.BigDecimal">
                      <column name="RESERVE10" precision="22" scale="0" />
                  </property>
              </class>
          </hibernate-mapping>
          4.在配置文件applicationContext-common.xml中mapping上面的映射文件

          <property name="mappingResources">
             <list>
              <value>com/hljzr/bean/Custrich.hbm.xml</value>
             </list>
            </property>
          5.在前臺jsp頁面中

           <%@ taglib prefix="c" uri="http://java.sun.com/jsp/jstl/core"%>

              <c:if test="${!empty pm.list}">
               <c:set var = "sum" value = "0" />
              <c:forEach items="${pm.list}" var="cus">
               <tr>
                <td>
                 ${cus.id.branchNo}    <!--如果寫成cus.branchNo就不對了-->
                </td>
                <td>
                 ${cus.id.yyyymm}
                </td>
                <td>
                 ${cus.insurancefeeamt}
                </td>
                <td>
                 ${cus.foundTot}
                </td>
                <td>
                 ${cus.foundTot}
                </td>
                <td>
                 ${cus.foundTot}
                </td>
               </tr>
               <c:set value="${sum+cus.foundTot}" var="sum" />
              </c:forEach>
             </c:if>

          這里的pm是在action中設(shè)置的數(shù)據(jù)庫查詢結(jié)果集,這里就不詳述啦

          posted @ 2011-03-26 23:38 甜咖啡 閱讀(579) | 評論 (0)編輯 收藏

          一個客戶可以對應(yīng)多個訂單。

          表結(jié)構(gòu):兩張表使用powerdesiner設(shè)計生成,產(chǎn)生引用錯誤。

          出現(xiàn)問題:1.定義的級聯(lián)關(guān)系只安一中方式生成,即雙向的所以刪除了parent表的set屬性,同時刪除映射文件的set集合,

                         2.沒有定義級聯(lián)關(guān)系cascade屬性


          drop table if exists Customer1;

          drop table if exists OrderC1;

          /*==============================================================*/
          /* Table: Customer1                                             */
          /*==============================================================*/
          create table Customer1
          (
             id                   int not null auto_increment,
             name                 varchar(20),
             primary key (id)
          )
          type = InnoDB;

          /*==============================================================*/
          /* Table: OrderC1                                               */
          /*==============================================================*/
          create table OrderC1
          (
             id                   int not null,
             order_id             varchar(20),
             customer_id          int not null,
             primary key (id)
          )
          type = InnoDB;

          alter table OrderC1 add constraint FK_Reference_1111 foreign key (customer_id)
                references Customer1 (id) on delete restrict on update restrict;

          注意:因為有外鍵約束,需要事務(wù)支持,在安裝數(shù)據(jù)庫的時候,需要配置mysql數(shù)據(jù)庫服務(wù)器的參數(shù)。數(shù)據(jù)庫的引擎應(yīng)該用InnoDB

          二、通過myeclipse生成實體和配置文件:
                     

          package many_one;

          @SuppressWarnings("serial")
          public class Customer1  implements java.io.Serializable {
               private Integer id;
               private String name;
              public Customer1() {
              }
              public Customer1(String name ) {
                  this.name = name;
              }

              public Integer getId() {
                  return this.id;
              }
             
              public void setId(Integer id) {
                  this.id = id;
              }

              public String getName() {
                  return this.name;
              }
             
              public void setName(String name) {
                  this.name = name;
              }
          }


          @SuppressWarnings("serial")
          public class Orderc1  implements java.io.Serializable {

               private Integer id;
               private Customer1 customer1;
               private String orderId;

              public Orderc1() {
              }

              public Orderc1(Customer1 customer1) {
                  this.customer1 = customer1;
              }
             
              public Orderc1(Customer1 customer1, String orderId) {
                  this.customer1 = customer1;
                  this.orderId = orderId;
              }
              public Integer getId() {
                  return this.id;
              }
             
              public void setId(Integer id) {
                  this.id = id;
              }

              public Customer1 getCustomer1() {
                  return this.customer1;
              }
             
              public void setCustomer1(Customer1 customer1) {
                  this.customer1 = customer1;
              }

              public String getOrderId() {
                  return this.orderId;
              }
             
              public void setOrderId(String orderId) {
                  this.orderId = orderId;
              }
          }

          配置文件

          Customer1.hbm.xml

          <hibernate-mapping>
              <class name="many_one.Customer1" table="customer1" catalog="test1" >
                  <id name="id" type="integer" >
                      <column name="id" not-null="false"/>
                      <generator class="increment" />
                  </id>
                  <property name="name" type="string">
                      <column name="name" length="20" />
                  </property>
              </class>
          </hibernate-mapping>


          Orderc1.hbm.xml

          <hibernate-mapping>
              <class name="many_one.Orderc1" table="orderc1" catalog="test1">
                  <id name="id" type="integer">
                      <column name="id" />
                      <generator class="increment" />
                  </id>
                  <many-to-one name="customer1" class="many_one.Customer1" fetch="select" cascade="save-update">
                      <column name="customer_id" not-null="true" />
                  </many-to-one>
                  <property name="orderId" type="string">
                      <column name="order_id" length="20" />
                  </property>
              </class>
          </hibernate-mapping>

          package many_one;

          import org.hibernate.Session;
          import org.hibernate.SessionFactory;
          import org.hibernate.Transaction;
          import org.hibernate.cfg.Configuration;

          public class tests {

           /**
            * @param args
            */
           public static void main(String[] args) {

            Configuration cfg = new Configuration().configure();
            SessionFactory sf  =cfg.buildSessionFactory();
            Session session =sf.openSession();
            
            Transaction ts = session.beginTransaction();
            
            Customer1 c = new Customer1("c1");
            Orderc1 o = new Orderc1();
            o.setOrderId("23");
            
            o.setCustomer1(c);
            
            session.save(o);
            
            ts.commit();
           
           }


          }

          posted @ 2011-03-26 23:37 甜咖啡 閱讀(483) | 評論 (0)編輯 收藏

          package org.hibernate.tutorial.domain;

          import javax.persistence.Embedded;
          import javax.persistence.Entity;
          import javax.persistence.GeneratedValue;
          import javax.persistence.Id;

          @Entity
          public class Husband {
              private int id;
              private String name;
              private Wife wife;

              @Id
              @GeneratedValue
              public int getId() {
                  return id;
              }

              public String getName() {
                  return name;
              }

              @Embedded
              public Wife getWife() {
                  return wife;
              }

              public void setId(int id) {
                  this.id = id;
              }

              public void setName(String name) {
                  this.name = name;
              }

              public void setWife(Wife wife) {
                  this.wife = wife;
              }

          }

          package org.hibernate.tutorial.domain;

          import javax.persistence.Column;


          public class Wife {
              private int id;
              private String name;
              
              @Column(name="wife_id") //注意映射的組件內(nèi)屬性名不應(yīng)相同
              public int getId() {
                  return id;
              }
              @Column(name="wife_name")
              public String getName() {
                  return name;
              }
              public void setId(int id) {
                  this.id = id;
              }
              public void setName(String name) {
                  this.name = name;
              }

          }

          package org.hibernate.tutorial.test;

          import org.hibernate.cfg.AnnotationConfiguration;
          import org.hibernate.tool.hbm2ddl.SchemaExport;
          import org.junit.Test;

          /**
           * 測試
           * @author MyPC
           *
           */
          public class TestHusband {
              @Test
              public void testHusband()
              {
                  new SchemaExport(new AnnotationConfiguration().configure()).create(false, true);
              }
          }

          posted @ 2011-03-26 23:37 甜咖啡 閱讀(407) | 評論 (0)編輯 收藏
          自從ibatis 2.0.9以后,ibatis支持動態(tài)表名。 

          以下為用Map做參數(shù)的動態(tài)表名實現(xiàn)方法: 

          示例代碼如下: 
          Sample : 

          < select  id ="getRighe"  
          remapResults ="true" 
          resultMap ="resultRighe"  
          parameterClass ="java.util.Map" > 
          select * from 
          $tablePrefix$_righe 
          where IDUser = #IDUser# 
          </ select > 

          and java code : 

          param.put("IDUser", IDUser); 
          param.put("tablePrefix", "NAG"); 
          utente = (Riga)getSqlMapClientTemplate().queryForObject("getRighe", param); 


          但 如果我們要插入一個對象,我們需傳進一個POJO對象,由于Ibatis 只能接受一個參數(shù),這時用Map來傳對象,會比較麻煩 

          可不可以用POJO對象里的一個屬性來決定表名呢? 

          答案是肯定的。 

          在分表設(shè)計的數(shù)據(jù)庫中,一般存在許多結(jié)構(gòu)相同,但表名后綴不同的表。 

          我們在插入一個新對象到表中里,由自己制定的路由規(guī)則是可以得到這個對象要插到那個表里的。即程序知道插到哪個表里,那么 

          怎么讓Ibatis也知道呢? 

          當然你可以把Pojo對象屬性全放到Map里,再在Map里加一個表名的屬性,傳給Ibatis,但這樣比較麻煩 

          我們可以為每一個POJO對象增加一個表名后綴的屬性(或表名),在Ibatis里直接用這個屬性做表名。 

          不過,且記,用“$”來界定這個屬性的名字,而不是“#” 

          因為,在Ibatis里,每一個#,除了替換值,它都會加上一個單引號'. 

          如下例所示:(假設(shè),你在Pojo對象里,增加了一個suffix的屬性,就可以這樣來決定插入表名) 

          INSERT INTO myTable$suffix$  
               (column1,column2)   
             VALUES (#column1#,#column2#) 
             
          這時的parameterClass仍為你的Pojo類。 


          Ibatis能比較方便地實現(xiàn)數(shù)據(jù)庫的分表問題,Hibernate可以用NamingStrategy實現(xiàn)動態(tài)表名映射 


          以下內(nèi)容引自:http://jinguo.javaeye.com/blog/209642 

          用一個配置文件,一個類去映射多個表,(每個表的結(jié)構(gòu)相同)。按照平時的做法,有多少個表就要 
          寫多少個配置文件,豈不是很麻煩。怎樣才能只寫一個配置文件就能達到上述目的呢? 

             經(jīng)過研究,發(fā)現(xiàn)Hibernate中的NamingStrategy可以達到這個目的。它是用來定義表名和列名映射規(guī) 
          則的一個接口。我們要通過實現(xiàn)這個接口來實現(xiàn)自己的命名策略。這個接口中包含的十個方法,其中的 
          public String classToTableName(String className)是通過類名來映射表名的。實現(xiàn)我們的想法就要用 
          到這個方法。好了,下面來看怎么做: 

             1、自定義一個類MyNamingStrategy來實現(xiàn)NamingStrategy。(這樣你要實現(xiàn)10個方法,如果其他方法 
          不需要,我們可以通過繼承它的一個適配器類DefaultNamingStrategy來只實現(xiàn)我們需要的方法)好了,我 
          們就繼承DefaultNamingStrategy 吧。 
             
                2、實現(xiàn)public String classToTableName(String className)方法來實現(xiàn)自己命名策略。 

                例如業(yè)務(wù)需要是每隔一個月就要換一個表。比如1月用biz_1,那么2月就用biz_2....但是這些表的結(jié)構(gòu)是相同的。我們要做的就是通過獲得月份來動態(tài)的選擇表。我們從這個方法中這樣寫: 
              public class MyNamingStrategy extends DefaultNamingStrategy { 
                  public static final MyNamingStrategy INSTANCE = new MyNamingStrategy(); 
                  public String classToTableName(String className) { 
                  return "biz_" + Calendar.getInstance().get(Calendar.DAY_OF_MONTH); 
                  } 
              } 

                 好了,這樣就可以根據(jù)月份來動態(tài)的選擇表名了。 

              3、使用命名策略。 
                 要使用這個命名策略可以這樣: 
                 Configuration cfg = new Configuration() 
                         .setNamingStrategy(MyNamingStrategy.INSTANCE) 
                         .configure("hibernate.cfg.xml") 
                         .addFile("biz.hbm.xml"); 
          ---------------------------------- 
          for exemple 


          package com.etong.common.hibernate; 

          import net.sf.hibernate.cfg.NamingStrategy; 
          import net.sf.hibernate.util.StringHelper; 

          /** 
          * <p>Title: TNamingStrategy</p> 
          * <p>Description: </p> 
          * <p>Copyright: Copyright (c) 2005</p> 
          * <p>Company: </p> 
          * <p>Created on 2005-5-30 </p> 
          * @author jinguo 
          * @version 1.0 
          * 
          */ 

          public class TNamingStrategy implements NamingStrategy { 

          /** 
          * @see net.sf.hibernate.cfg.NamingStrategy#classToTableName(java.lang.String) 
          */ 
          public String classToTableName(String className) { 
          return tableName(StringHelper.unqualify(className).toUpperCase()); 
          } 

          /** 
          * @see net.sf.hibernate.cfg.NamingStrategy#propertyToColumnName(java.lang.String) 
          * @todo 
          */ 
          public String propertyToColumnName(String arg0) { 
          return null; 
          } 

          /** 
          * @see net.sf.hibernate.cfg.NamingStrategy#tableName(java.lang.String) 
          */ 
          public String tableName(String tableName) { 
          return "TBL_" + tableName.toUpperCase(); 
          } 

          /** 
          * @see net.sf.hibernate.cfg.NamingStrategy#columnName(java.lang.String) 
          */ 
          public String columnName(String columnName) { 
          return "COL_" + columnName; 
          } 

          /** 
          * @see net.sf.hibernate.cfg.NamingStrategy#propertyToTableName(java.lang.String, java.lang.String) 
          * @todo 
          */ 
          public String propertyToTableName(String arg0, String arg1) { 
          return null; 
          } 

          }
          posted @ 2011-03-26 23:36 甜咖啡 閱讀(7226) | 評論 (0)編輯 收藏

          一對一關(guān)聯(lián)映射(單雙向)


          1 單向

          主要是配置文件上的標簽配置
          比如對于person和idcard兩個pojo類。
          Person持有idcard的引用。在person.hbm.xml里,person的主鍵要來源于idcard類,也就是共享idcard的

          主鍵。配置:<id name= "id">
          <generator class="foreign(而不是原來的native)">
          <param name="property(必須是這個)">idcard(用來關(guān)聯(lián)到person類的idcard屬性)</param>
          </generator>
          </id>
          另外主要配置<one-to-one>標簽,此標簽的作用是指示hibernate怎么加載它的關(guān)聯(lián)對象,默認根據(jù)主鍵加

          載.
          標簽name屬性是通過person類的idcard,關(guān)聯(lián)到idcard類.
          Constrained屬性主要聲明是外鍵約束.
          <one-to-one name="idcard" constrained ="true">


          2 雙向
          雙向基本上是從單向演化而來.person.hbm.xml不變,在idcard.java里添加person引用,
          在idcard.hbm.xml里加入<one-to-one>標簽.
          <one-to-one name="person"/>

          二 多對一關(guān)聯(lián)映射(單雙向)


          1 單向

          多對一及其簡單.
          比如兩個類,user和group.user為多的一方,group為一的一方,只要多的一方在類中持有一的一方的引用,

          并且配置文件即user.hbm.xml里加入
          <many-to-one name="group" column="groupid"/>
          只這一句話便能建立起單向多對一關(guān)聯(lián)映射.
          但是,存儲的時候要注意,先存一的一方,再存多的一方.
          如果想讓hibernate自動幫我們存儲一的一方,那么就要修改上面的那句話:
          <many-to-one name="group" column="groupid" cascade="all"/>
          Cascade的意思是級聯(lián)操作.有"all,save-update,delete,none",默認為none.
          即如果要修改多的一方,那hibernate要先把一的一方改了.
          這樣我們只操作多的一方的增刪查改就行了.

          2 雙向

          看下面的一對多就知道,多對一和一對多是相對立的.
          一對多關(guān)聯(lián)映射利用了多對一關(guān)聯(lián)映射原理

          多對一關(guān)聯(lián)映射:在多的一端加入一個外鍵指向一的一端,它維護的關(guān)系是多指向一
          一對多關(guān)聯(lián)映射:在多的一端加入一個外鍵指向一的一端,它維護的關(guān)系是一指向多

          也就是說一對多和多對一的映射策略是一樣的,只是站的角度不同

          總的來說,在多的一方維護是比較好的.

          三 一對多關(guān)聯(lián)映射(單雙向)


          誰要對,那就在誰類里拿到對方的引用,那就再誰配置文件里配.


          1 單向
          還是兩個類,class和student.

          比起不用映射而言,student.hbm.xml不變,class.hbm.xml里多了的是:
          <set name="students">
              <key column="classesid"/>
              <one-to-many class="Student"/>
             </set>
          分析一下,用set標簽的出發(fā)點是因為class類里持有student的引用(一個set集合),至于為什么是集合而不

          是如以往的一個student直觀的引用,是因為外鍵要設(shè)的不只是一個.如果不能理解,就直接理解為必須用

          set標簽就成了.
          那么name屬性是拿到引用,子標簽key的column屬性是在student里加一個字段,名字叫classesid,
          而one-to-many標簽是指向student類.
          如果<hibernate-mapping package="com.bjsxt.hibernate">這樣寫,
          那么在one-to-many標簽直接跟類名.
          需要注意的是,此時的one-to-many標簽里不再像以前的one-to-one標簽里用的是name屬性而是class屬性.

          這兩個屬性的功能要分清楚.

          單向一對多有缺點,因為要在一的一端維護,所以多的一段的表里的外鍵字段不可設(shè)為非空.
          而且要發(fā)出多余的update語句.一般都設(shè)為雙向的.下面來看雙向.


          2 雙向
          雙向配置的話class.hbm.xml不變,在student類里持有class類的引用,student.hbm.xml文件配置添加:

          <many-to-one name="classes" column="classesid(必須和class.hbm.xml里的<key

          column="classesid"/>一致)"/>

          這樣配置就可以存儲.
          有三種存儲方式.這是第一種.因為是一的一端維護,所以多發(fā)兩條update.步驟是先挨個存student,再存

          class.
          第二種先存class,把classid字段存到student里,再挨個存student.也就是反轉(zhuǎn).class.hbm.xml里:
          <set name="students" inverse="true">
          第三種把classid字段存到student里,不存student.只存class. 也就是反轉(zhuǎn)并級聯(lián)操作.class.hbm.xml里

          :<set name="students" inverse="true" cascade="all">

          關(guān)于存儲上,基本上就這三種.無論是一對多還是多對一.個人認為比較麻煩.具體應(yīng)用的時候可以考慮改進

          .
          多對一的時候,因為站在多的立場,如果不級聯(lián),要先存一,把一的數(shù)據(jù)加到多里的引用,再存多.級聯(lián)了,因

          為不用考慮一的關(guān)系,所以只存多.
          而一對多的時候,反轉(zhuǎn)不級聯(lián),就站在多的立場.也要先存一再存多.反轉(zhuǎn)只是立場轉(zhuǎn)為多對一,所以同上.
          反轉(zhuǎn)并級聯(lián),也同上.不考慮一.
          不反轉(zhuǎn)也不級聯(lián),因為站在一的立場,就要先存多.把多加入到一的set集合,再存一.所以呢,立場和先存誰

          是對立的.

          請消化一下以上的總結(jié).
          下面來看多對多.

          四 多對多關(guān)聯(lián)映射(單雙向)

          1 單向.

          多對多涉及到第三方表.hibernate會自動生成.一般權(quán)限上會用到,比如RBAC模型.
          如以往一樣,兩個類,user和role.同樣,user持有role的引用,是一個set集合.(如前面的一對多)
          Role.hbm.xml沒有變化, User.hbm.xml里多的是:
          <set name="roles" table="t_user_role">
              <key column="userid"/>
              <many-to-many class="com.bjsxt.hibernate.Role" column="roleid"/>
             </set>
          分析一下,set標簽不用多說,table屬性是指讓hibernate自動建立第三方表名字叫"t_user_role",key標簽

          是指在此表中生成一個關(guān)聯(lián)到本類(user的)叫userid的字段,
          <many-to-many>標簽里class屬性引入類Role,并在t_user_role里生成一個關(guān)聯(lián)到role的roleid字段.

          在t_user_role表里,userid和roleid一并叫做復(fù)合主鍵.因為兩者的聯(lián)合有不可重復(fù)性.

          其存儲流程:1,存入role,2,用一個set集合接住role放到user的set里,(這里交叉存入比較容易看暈)3,挨

          個存user.與上面的第二種存儲方案差不多.
          Load時候就簡單,加載進來,在user里用一個遍歷挨個從set里拿出來.就得到role表里的值.
          執(zhí)行存入的時候,hibernate就把表t_user_role各個值賦予了.


          2 雙向


          基本上與單向一致.
          Role里要持有user的引用,也是set集合,
          Role.hbm.xml和user.hbm.xml配置差不多.
          <set name="users" table="t_user_role" order-by="userid">
              <key column="roleid"/>
              <many-to-many class="com.bjsxt.hibernate.User" column="userid"/>
             </set>
          注意兩類對比,保持column屬性值一致.

          table屬性值必須和單向關(guān)聯(lián)中的table屬性值一致
          <key>中column屬性值要與單向關(guān)聯(lián)中的<many-to-many>標簽中的column屬性值一致
          在<many-to-many>中的column屬性值要與單向關(guān)聯(lián)中<key>標簽的column屬性值一致

          order-by="userid"屬性是用來排序,按照t_user_role表的字段來排.

          基本上,hibernate映射關(guān)系就是這些了
          posted @ 2011-03-26 23:35 甜咖啡 閱讀(290) | 評論 (0)編輯 收藏
          hibernate 多對多映射配置詳解
          2008-12-12 17:04

          表關(guān)系 如圖:

          Teacher.java文件:
          private int id;
          private String name;
          private Set teachers;

          Student.java文件:
          private int id;
          private String name;
          private Set students;

          Teacher.hbm.xml 配置文件內(nèi)容:
          <hibernate-mapping>
          <class name="com.bean.Teacher" table="teacher">
             <id name="id" type="int">
              <column name="id"></column>
              <generator class="native"></generator>
             </id>
             <property name="name" type="java.lang.String" column="name"></property>
             <set name="students" table="student_teacher" cascade="all">
              <key column="teacher_id"></key>
              <many-to-many class="com.bean.Student" column="student_id"></many-to-many>
             </set>
             </class>
          </hibernate-mapping>

          Student.hbm.xml 配置文件內(nèi)容:
          <hibernate-mapping>
          <class name="com.bean.Student" table="student">
             <id name="id" type="int">
              <column name="id"></column>
              <generator class="native"></generator>
             </id>
             <property name="name" type="java.lang.String" column="name"></property>
          <set name="teachers" table="student_teacher" cascade="all">
              <key column="student_id"></key>
              <many-to-many class="com.bean.Teacher" column="teacher_id"></many-to-many>
             </set>

          </class>
          </hibernate-mapping>

          test測試類部分代碼:
          List list = session.createQuery("from Teacher").list();
             for(int i=0; i<list.size(); i++){
              Teacher teacher = (Teacher)list.get(i);
              System.out.println("Teacher_name: "+teacher.getName());
              Iterator it = teacher.getStudents().iterator();
              while(it.hasNext()){
               Student student =(Student) it.next();
               System.out.println("student_name: "+student.getName());
              }
              System.out.print("---------------------------\n");

          }

          posted @ 2011-03-26 23:34 甜咖啡 閱讀(3532) | 評論 (1)編輯 收藏
          僅列出標題
          共5頁: 上一頁 1 2 3 4 5 下一頁 

          導(dǎo)航

          <2025年6月>
          25262728293031
          1234567
          891011121314
          15161718192021
          22232425262728
          293012345

          統(tǒng)計

          常用鏈接

          留言簿(1)

          我參與的團隊

          隨筆檔案

          搜索

          最新評論

          閱讀排行榜

          評論排行榜

          主站蜘蛛池模板: 县级市| 叶城县| 资源县| 龙海市| 灵丘县| 江孜县| 天津市| 双峰县| 巴楚县| 保定市| 富锦市| 柳河县| 浏阳市| 慈利县| 阳山县| 丰都县| 应城市| 桐城市| 二连浩特市| 康定县| 团风县| 西城区| 达州市| 崇仁县| 唐山市| 元阳县| 无为县| 贵德县| 利辛县| 易门县| 乐平市| 若羌县| 如皋市| 安乡县| 温泉县| 迁西县| 灯塔市| 青田县| 富阳市| 河津市| 牟定县|