做個總結
linux服務器上做負載均衡
自己準備的:linux服務器(45.78.20.168),jdk1.7,nginx,redis,tomcat7兩個,部署的項目;
1:jdk1.7安裝,兩個tomcat分別端口8080,8081;部署相同的項目;啟動;
http://45.78.20.168:8080/redis3.2/getRedis.action2:安裝nginx,添加負載的配置,安裝目錄下找
/etc/nginx/conf.d/default.conf文件(或/etc/nginx/nginx.conf);策略設置為默認輪詢;
upstream www.nimenhaihaoma.com {
server 45.78.20.168:8080;
server 45.78.20.168:8081;
}
server{
listen 80;
server_name www.nimenhaihaoma.com;
location / {
proxy_pass http://www.nimenhaihaoma.com;
proxy_set_header Host $host;
proxy_set_header X-Real-IP $remote_addr;
proxy_set_header X-Forwarded-For $proxy_add_x_forwarded_for;
}
3:配置session共享,方式很多,這里用的redis的session共享(兼容jdk版本至少1.7):
tomcat的lib包加
commons-pool2-2.0.jar,jedis-2.5.2.jar,tomcat-redis-session-manager1.2.jar;
tomcat配置文件context.xml,在標簽<Context>內添加配置:
<Valve className="com.orangefunction.tomcat.redissessions.RedisSessionHandlerValve" />
<Manager className="com.orangefunction.tomcat.redissessions.RedisSessionManager" host="localhost" port="6379" database="0" maxInactiveInterval="60" />
4:項目里面區分session的代碼:
(1):放session的接口(執行一次);
(2):取session數據(不斷刷新),看tomcat打印信息;
5:效果,
http://www.nimenhaihaoma.com/redis3.2/getRedis.action (狂刷session值相同)
posted @
2016-08-17 17:03 魏文甫 閱讀(126) |
評論 (0) |
編輯 收藏
項目只是加載spring的幾個定時任務,啟動服務一直循環加載spring文件,問題的根節點:定時器類里面的service對象采取配置的方式注入,而這個定時器類的構造讓我給加上了:
ApplicationContext context = new ClassPathXmlApplicationContext("applicationContext*.xml");
myServiceImpl = context.getBean("XXXService");
加上這段為了方便測試,在該類里寫main方法測試執行,把調用寫到構造里;,spring定時器配置好時間后,此處構造忘了去掉;導致啟動tomcat服務一直在加載spring注入文件;
同理,spring注入的方式,在action里同樣有這樣的效果,構造方法一定注意;
posted @
2015-04-25 11:09 魏文甫 閱讀(182) |
評論 (0) |
編輯 收藏
是在build.xml編譯的時候,包里有兩個類名一樣的java文件,我只是做了個備份,忘了改文件后綴,備份的文件也編譯了,所以報的這個錯
posted @
2014-08-28 20:18 魏文甫 閱讀(845) |
評論 (0) |
編輯 收藏1,添加索引文件中的一條新的索引
Question addQ = new Question();//新添加的一條數據,對象id在索引文件中沒有
addQ.setId("999999999");
addQ.setQuestionname("新添加的一條數據名稱");
Analyzer sa = new SmartChineseAnalyzer(Version.LUCENE_40);
IndexWriterConfig iwc = new IndexWriterConfig(Version.LUCENE_40, sa);
iwc.setOpenMode(OpenMode.APPEND);
IndexWriter writer = null;
try {
Directory dir1 = FSDirectory.open(new File("F:\\temp"));
writer = new IndexWriter(dir1, iwc);
FieldType ft = new FieldType();
ft.setIndexed(true);
ft.setStored(true);
ft.setTokenized(true);
FieldType ft2 = new FieldType();
ft2.setIndexed(true);
ft2.setStored(true);
ft2.setTokenized(false);
Document doc = new Document();
doc.add(new Field("id", addQ.getId(), ft2));
doc.add(new Field("questionname", addQ.getQuestionname(), ft));
writer.addDocument(doc);
writer.close();
} catch (CorruptIndexException e) {
e.printStackTrace();
} catch (LockObtainFailedException e) {
e.printStackTrace();
} catch (IOException e) {
e.printStackTrace();
} finally{
try {
if(writer!=null){
writer.close();
}
if(sa!=null){
sa.close();
}
} catch (CorruptIndexException e) {
// TODO Auto-generated catch block
e.printStackTrace();
} catch (IOException e) {
// TODO Auto-generated catch block
e.printStackTrace();
}
}執行完程序后,索引文件中已經添加新的索引數據。2,刪除索引文件中的一條新的索引
Question delQ = new Question();//索引文件中有的一條數據,根據對象id刪 delQ.setId("1111111"); delQ.setQuestionname("要刪除的一條數據"); IndexWriter writer = null;
Analyzer sa = new SmartChineseAnalyzer(Version.LUCENE_40);
IndexWriterConfig iwc = new IndexWriterConfig(Version.LUCENE_40, sa);
Directory dir1 = null;
try {
dir1 = FSDirectory.open(new File("F:\\temp"));
writer = new IndexWriter(dir1, iwc);
Term term = new Term("id", delQ.getId());
writer.deleteDocuments(term);
writer.commit();
writer.close();
} catch (CorruptIndexException e) {
e.printStackTrace();
} catch (LockObtainFailedException e) {
e.printStackTrace();
} catch (IOException e) {
e.printStackTrace();
} finally {
try {
if (writer != null) {
writer.close();
sa.close();
}
} catch (CorruptIndexException e) {
e.printStackTrace();
} catch (IOException e) {
e.printStackTrace();
}
}
System.out.println("索引刪除完成");
3,更新索引文件中的一條索引
更新索引文件中的一條索引的理念是:先找到這條索引刪除,然后再添加這條更新后的索引
posted @
2013-08-16 12:08 魏文甫 閱讀(346) |
評論 (0) |
編輯 收藏 IndexReader reader = DirectoryReader.open(FSDirectory.open(new File("F:\\temp")));// 打開索引
IndexSearcher searcher = new IndexSearcher(reader);
Analyzer analyzer = new SmartChineseAnalyzer(Version.LUCENE_40);
String[] fields = { "questionname","id" };
Occur[] occurs = new Occur[] { Occur.SHOULD,Occur.SHOULD };
Query query = MultiFieldQueryParser.parse(Version.LUCENE_40, "測試 的", fields,
occurs, analyzer);
TopDocs result = searcher.search(query, searcher.getIndexReader()
.maxDoc());
ScoreDoc[] hits = result.scoreDocs;
List<Document> list = new ArrayList<Document>();
for (int i = 0; i <hits.length; i++) {
Document doc = searcher.doc(hits[i].doc);
list.add(doc);
}
System.out.println("搜索list的長度\t→→→→\t"+list.size());
for (Document document : list) {
System.out.println(document.getField("questionname"));
}
analyzer.close();
注:紅色字體是輸入的檢索條件,多個用空格隔開,找到的結果先匹配同時符合多個的結果,結果只是拿過來的document一個list集合,具體結果再解析就行了。
結果如圖:

posted @
2013-08-12 17:26 魏文甫 閱讀(1181) |
評論 (1) |
編輯 收藏 Connection conn = null;
Statement stat = null;
ResultSet rs = null;
Analyzer sa = new SmartChineseAnalyzer(Version.LUCENE_40);
IndexWriterConfig iwc = new IndexWriterConfig(Version.LUCENE_40, sa);
iwc.setOpenMode(OpenMode.CREATE);
Directory dir1 = FSDirectory.open(new File("F:\\temp"));
IndexWriter writer = new IndexWriter(dir1, iwc);
int numIndexed = -1;
FieldType ft = new FieldType();
ft.setIndexed(true);
ft.setStored(true);
ft.setTokenized(true);
FieldType ft2 = new FieldType();
ft2.setIndexed(true);
ft2.setStored(true);
ft2.setTokenized(false);
Class.forName("com.mysql.jdbc.Driver");
conn = (Connection) DriverManager.getConnection(
"jdbc:mysql:///question", "root", "root");
stat = (Statement) conn.createStatement();
rs = stat.executeQuery("select id,questionname from question");
List<String> list = new ArrayList<String>();
while (rs.next()) {
String id = rs.getString("questionname");
String questionname = rs.getString("questionname");
list.add(id);
list.add(questionname);
}
rs.close();
stat.close();
conn.close();
for (String string : list) {
Document doc = new Document();
doc.add(new Field("questionname", string, ft2));
writer.addDocument(doc);
}
numIndexed = writer.maxDoc();
writer.close();
執行完這段程序f盤多一個文件夾temp,里面就是創建好的索引文件了,然后進行根據索引文件查詢
posted @
2013-08-12 16:50 魏文甫 閱讀(1421) |
評論 (0) |
編輯 收藏<!DOCTYPE html PUBLIC "-//W3C//DTD XHTML 1.0 Transitional//EN" "http://www.w3.org/TR/xhtml1/DTD/xhtml1-transitional.dtd">
<html xmlns="http://www.w3.org/1999/xhtml" xml:lang="en">
<head>
<meta http-equiv="Content-Type" content="text/html;charset=GBK" />
<title></title>
<script type="text/javascript" src="jquery-1.8.2.js"></script>
<script type="text/javascript">
$(document).mousemove(function(e) {
var innerHeight = window.innerHeight;
if (e.pageY > innerHeight) {
$("#topDiv").css("display", "block");
}
if (e.pageY < innerHeight) {
$("#topDiv").css("display", "none");
}
});
$("#topIcon").mouseover(function() {
$("#topIcon").css("text-decoration", "none");
$("#topIcon").children("i").removeClass();
$("#topIcon").children("i").addClass("icon-chevron-up");
});
$("#topIcon").mouseout(function() {
$("#topIcon").children("i").removeClass();
$("#topIcon").children("i").addClass("icon-arrow-up");
});
</script>
</head>
<body id="bodyId">
<div id="topDiv"
style="position: fixed;right: 60px;bottom: 60px;display: none">
<a id="topIcon" href="#bodyId" style="background-color: #aaaaaa"><span
style="text-align: justify;display: block;text-decoration: none;width: 14px;background-color: #cccccc">回到頂端</span>
</a>
</div>
<h1>O(∩_∩)O哈哈~</h1>
<h2>(*^__^*) 嘻嘻……</h2>
<h3>O(∩_∩)O~</h3>
<h4>\(^o^)/~</h4>
<h5>$_$</h5>
<h6>o(╯□╰)o</h6>
<h1>O(∩_∩)O哈哈~</h1>
<h2>(*^__^*) 嘻嘻……</h2>
<h3>O(∩_∩)O~</h3>
<h4>\(^o^)/~</h4>
<h5>$_$</h5>
<h6>o(╯□╰)o</h6>
<h1>O(∩_∩)O哈哈~</h1>
<h2>(*^__^*) 嘻嘻……</h2>
<h3>O(∩_∩)O~</h3>
<h4>\(^o^)/~</h4>
<h5>$_$</h5>
<h6>o(╯□╰)o</h6>
<h1>O(∩_∩)O哈哈~</h1>
<h2>(*^__^*) 嘻嘻……</h2>
<h3>O(∩_∩)O~</h3>
<h4>\(^o^)/~</h4>
<h5>$_$</h5>
<h6>o(╯□╰)o</h6>
<h1>O(∩_∩)O哈哈~</h1>
<h2>(*^__^*) 嘻嘻……</h2>
<h3>O(∩_∩)O~</h3>
<h4>\(^o^)/~</h4>
<h5>$_$</h5>
<h6>o(╯□╰)o</h6>
<h1>O(∩_∩)O哈哈~</h1>
<h2>(*^__^*) 嘻嘻……</h2>
<h3>O(∩_∩)O~</h3>
<h4>\(^o^)/~</h4>
<h5>$_$</h5>
<h6>o(╯□╰)o</h6>
<h1>O(∩_∩)O哈哈~</h1>
<h2>(*^__^*) 嘻嘻……</h2>
<h3>O(∩_∩)O~</h3>
<h4>\(^o^)/~</h4>
<h5>$_$</h5>
<h6>o(╯□╰)o</h6>
<h1>O(∩_∩)O哈哈~</h1>
<h2>(*^__^*) 嘻嘻……</h2>
<h3>O(∩_∩)O~</h3>
<h4>\(^o^)/~</h4>
<h5>$_$</h5>
<h6>o(╯□╰)o</h6>
</body>
</html>
posted @
2013-08-07 10:35 魏文甫 閱讀(216) |
評論 (0) |
編輯 收藏求單一登陸和單點登陸的思路及核心代碼???
posted @
2013-08-07 09:56 魏文甫 閱讀(330) |
評論 (0) |
編輯 收藏中文的正則表達式:var reg = /^[\u4e00-\u9fa5]$/;(一個中文字符)
放在html中可能出現的問題有:
<!DOCTYPE html PUBLIC "-//W3C//DTD XHTML 1.0 Transitional//EN" "http://www.w3.org/TR/xhtml1/DTD/xhtml1-transitional.dtd">
<html xmlns="http://www.w3.org/1999/xhtml" xml:lang="en">
<head>
<meta http-equiv="Content-Type" content="text/html;charset=UTF-8" />
<title></title>
</head>
<body>
<script type="text/javascript">
var reg0 = /^[\u4e00-\u9fa5]$/;
alert(reg0.test("看"));
</script>
</body>
</html>
本頁編碼為UTF-8時出現的結果可能是錯誤的,
所以出現此類情況,編碼格式改為gb2312(紅色標注的編碼改為gb2312)
posted @
2013-07-29 15:56 魏文甫 閱讀(227) |
評論 (0) |
編輯 收藏
簡單的代碼:
public static void main(String[] args) {
try {
File allfile = new File("f:\\excel\\total.xlsx");
File file2 = new File("f:\\excel\\xxxxxx.xlsx");
XSSFWorkbook h = new XSSFWorkbook(new FileInputStream(allfile));
XSSFSheet x = h.getSheetAt(0);
XSSFWorkbook hssfWorkbook = new XSSFWorkbook(new FileInputStream(file2));
XSSFSheet hssfSheet = hssfWorkbook.getSheetAt(0);
int ii = hssfSheet.getLastRowNum();//讀取的表格行數
System.out.println(ii);
FileOutputStream out_ = new FileOutputStream(allfile);
for (int i = 0; i < ii; i++) {
XSSFRow lastRow = x.createRow(x.getLastRowNum()+1);
XSSFRow xssfRow = hssfSheet.getRow(i);
XSSFCell xssfCell0 = xssfRow.getCell(0);
CellStyle cellStyle0 = xssfCell0.getCellStyle();
CellStyle newStyle0 = h.createCellStyle();
newStyle0.cloneStyleFrom(cellStyle0);
XSSFCell xssfCell0_ = lastRow.createCell(0);
xssfCell0_.setCellStyle(newStyle0);
xssfCell0_.setCellValue(xssfCell0.toString());
XSSFCell xssfCell1 = xssfRow.getCell(1);
CellStyle cellStyle1 = xssfCell1.getCellStyle();
CellStyle newStyle1 = h.createCellStyle();
newStyle1.cloneStyleFrom(cellStyle1);
XSSFCell xssfCell1_ = lastRow.createCell(1);
xssfCell1_.setCellStyle(newStyle1);
xssfCell1_.setCellValue(xssfCell1.toString());
XSSFCell xssfCell2 = xssfRow.getCell(2);
CellStyle cellStyle2 = xssfCell2.getCellStyle();
CellStyle newStyle2 = h.createCellStyle();
newStyle2.cloneStyleFrom(cellStyle2);
XSSFCell xssfCell2_ = lastRow.createCell(2);
xssfCell2_.setCellStyle(newStyle2);
xssfCell2_.setCellValue(xssfCell2.toString());
XSSFCell xssfCell3 = xssfRow.getCell(3);
CellStyle cellStyle3 = xssfCell3.getCellStyle();
CellStyle newStyle3 = h.createCellStyle();
newStyle3.cloneStyleFrom(cellStyle3);
XSSFCell xssfCell3_ = lastRow.createCell(3);
xssfCell3_.setCellStyle(newStyle3);
xssfCell3_.setCellValue(xssfCell3.toString());
XSSFCell xssfCell4 = xssfRow.getCell(4);
CellStyle cellStyle4 = xssfCell4.getCellStyle();
CellStyle newStyle4 = h.createCellStyle();
newStyle4.cloneStyleFrom(cellStyle4);
XSSFCell xssfCell4_ = lastRow.createCell(4);
xssfCell4_.setCellStyle(newStyle4);
xssfCell4_.setCellValue(xssfCell4.toString().toString());
}
h.write(out_);
out_.flush();
out_.close();
} catch (FileNotFoundException e) {
// TODO Auto-generated catch block
e.printStackTrace();
} catch (IOException e) {
// TODO Auto-generated catch block
e.printStackTrace();
}
}
posted @
2013-07-19 18:02 魏文甫 閱讀(639) |
評論 (0) |
編輯 收藏<!DOCTYPE html PUBLIC "-//W3C//DTD XHTML 1.0 Transitional//EN" "http://www.w3.org/TR/xhtml1/DTD/xhtml1-transitional.dtd">
<html xmlns="http://www.w3.org/1999/xhtml" xml:lang="en">
<head>
<meta http-equiv="Content-Type" content="text/html;charset=GBK" />
<title></title>
</head>
<body>
<h1>提示離開當前頁面的js代碼</h1>
<a >百度鏈接</a>
<script type="text/javascript">
if (window != top) {
top.location.href = "login.action";
} else {
if (window.Event) {
window.onbeforeunload = function(event) {
return "你是否要離開此頁面,離開此頁面信息將不被保存!";
};
} else {
window.onbeforeunload = function() {
return "你是否要離開此頁面,離開此頁面信息將不被保存!";
};
}
}
</script>
</body>
</html>
posted @
2013-07-18 15:04 魏文甫 閱讀(247) |
評論 (0) |
編輯 收藏Ajax同步加載數據。發送請求時鎖住瀏覽器。需要鎖定用戶交互操作時使用同步方式。
$.ajax({
url: "some.php",
async: false
})
posted @
2013-07-11 15:48 魏文甫 閱讀(454) |
評論 (0) |
編輯 收藏SimpleDateFormat simpleDateFormat = new SimpleDateFormat("yyyy-MM-dd HH:mm:ss");
Date date = simpleDateFormat.parse(data_);
格式yyyy-MM-dd HH:mm:ss是24小時制,yyyy-MM-dd hh:mm:ss是12小時制。
posted @
2013-07-01 15:48 魏文甫 閱讀(195) |
評論 (0) |
編輯 收藏
/**
* 得到幾天前的時間
*
* @param d
* @param day
* @return
*/
public static Date getDateOfBefore(Date d, int day) {
Calendar now = Calendar.getInstance();
now.setTime(d);
now.set(Calendar.DATE, now.get(Calendar.DATE) - day);
return now.getTime();
}
/**
* 得到幾天后的時間
*
* @param d
* @param day
* @return
*/
public static Date getDateOfAfter(Date d, int day) {
Calendar now = Calendar.getInstance();
now.setTime(d);
now.set(Calendar.DATE, now.get(Calendar.DATE) + day);
return now.getTime();
}
posted @
2013-06-28 17:55 魏文甫 閱讀(287) |
評論 (0) |
編輯 收藏在struts2中配置:<constant name="struts.multipart.saveDir" value="D:\\uploadFiles\\temp\\temp"></constant>
類似的其他的配置有:
<constant name="struts.convention.default.parent.package"
value="crud-default" />
<package name="crud-default" extends="convention-default">
<interceptors>
<interceptor name="checklogin"
class="com.xiaowei.interceptor.CheckLoginInterceptor"></interceptor>
<interceptor-stack name="crudStack">
<interceptor-ref name="store">
<param name="operationMode">AUTOMATIC</param>
</interceptor-ref>
<interceptor-ref name="paramsPrepareParamsStack" />
<interceptor-ref name="checklogin">
<param name="user">user</param>
<param name="exclude">
login,verifyAccount,login.jsp,image
<!--有待添加 -->
</param>
</interceptor-ref>
</interceptor-stack>
</interceptors>
<default-interceptor-ref name="crudStack" />
<global-results>
<result name="loginFail" type="dispatcher">/index.jsp
</result>
</global-results>
<!-- <interceptor-stack name="fileUploadMaxSize" class="com.xiaowei.interceptor.CheckFileLengthMax">
<interceptor-ref name="fileUpload"/> <interceptor-ref name="basicStack"/>
</interceptor-stack> -->
</package>
<constant name="struts.multipart.maxSize" value="20480000000"></constant>
<constant name="struts.multipart.saveDir" value="D:\\uploadFiles\\temp\\temp"></constant>
posted @
2013-06-27 13:13 魏文甫 閱讀(409) |
評論 (0) |
編輯 收藏
在簡單地main函數中輸出的結果:0.8999999999999999;而非0.9;因為是以二進制存儲的,所以不能除盡1/10。
解決方法有:1,
System.out.printf("%.1f",2.0-1.1); 還有一個網上看到的:
在double變量存入堆時確保精度的方法:
System.out.println(new BigDecimal(1.1)); 輸出的值為一大長串為:1.100000000000000088817841970012523233890533447265625
posted @
2012-02-28 19:17 魏文甫 閱讀(836) |
評論 (0) |
編輯 收藏
好些天沒更新了,有些牽絆耽擱了很久,要慢慢拾起來......我要培養自己做一個有始有終的人。
posted @
2012-02-22 20:46 魏文甫 閱讀(152) |
評論 (0) |
編輯 收藏HTML中的一些對象()
使用DOM-Document Object Model操作對象getElementById();getElementsByName();等
而改變標簽里的內容要用.innerHTML,改變鏈接用.href例如:
<!DOCTYPE html PUBLIC "-//W3C//DTD XHTML 1.0 Transitional//EN" "http://www.w3.org/TR/xhtml1/DTD/xhtml1-transitional.dtd">
<html xmlns="http://www.w3.org/1999/xhtml">
<head>
<title></title>
<script type="text/javascript">
function changerButton(){
var link = document.getElementById("links");
link.innerHTML = "NetEasy";//改變a標簽里的內容即改變了Sina
link.;//鏈接改變了
}
</script>
</head>
<body>
<a >Sina</a>
<input type="button" value="Change" id="myButton" onclick="changerButton()"/>
</body>
</html>
javascript里的一些應用:例如<!DOCTYPE html PUBLIC "-//W3C//DTD XHTML 1.0 Transitional//EN" "http://www.w3.org/TR/xhtml1/DTD/xhtml1-transitional.dtd">
<html xmlns="http://www.w3.org/1999/xhtml">
<head>
<title></title>
<script type="text/javascript">
var count = 0;
var st;
function showDiv() {
count++;
if(count >=10) {
clearTimeout(st);
} else {
var div = document.getElementById("myDiv");
div.innerHTML = div.innerHTML + "I love you!";
st = setTimeout("showDiv()",200);
}
}
</script>
</head>
<body>
<div id="myDiv"></div>
<input type="button" value="I love you!" onclick="showDiv()" />
</body>
</html>
script里可以嵌套if語句等
一些網頁里的時間顯示也可以用javascript來寫例如顯示時間的走動的簡單的頁面:
<!DOCTYPE html PUBLIC "-//W3C//DTD XHTML 1.0 Transitional//EN" "http://www.w3.org/TR/xhtml1/DTD/xhtml1-transitional.dtd">
<html xmlns="http://www.w3.org/1999/xhtml">
<head>
<title></title>
</head>
<body>
<div id="timer"></div>
<input type="button" value="showTime" onclick="showTimer()" />
<script type="text/javascript">
function showTimer() {
var mydate =
new Date();
var text = mydate.toLocaleString();
var div = document.getElementById("timer");
div.innerHTML = text;
setTimeout("showTimer()",1000);
}
window.onload = showTimer();
</script>
</body>
</html>
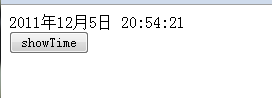
圖中時間顯示為走動的狀態(時間在變)。
posted @
2011-12-05 21:05 魏文甫 閱讀(217) |
評論 (0) |
編輯 收藏
JavaScript是編程語言,它跟html,css不同,簡單的理解為:html的作用是你所寫的網頁的內容,css是你對所寫網頁內容的布局(內容所在的位置,顏色,圖片等的美化),JavaScript是對網頁等得一些驗證,切換的效果等等。JavaScript一般寫在最后面(因為網頁顯示時按順序顯示,一個網頁最重要的內容要先顯示,再出現效果,而效果要比內容長得多)。
JavaScript可以在里面寫if...else語句,for語句,while語句等,但和java的語法不同;例如一個不太規范簡單的例子:
1 <!DOCTYPE html PUBLIC "-//W3C//DTD XHTML 1.0 Transitional//EN" "http://www.w3.org/TR/xhtml1/DTD/xhtml1-transitional.dtd"> 2 <html xmlns="http://www.w3.org/1999/xhtml">
3 <head>
4 <title></title>
5 <script type="text/javascript">
6 var a=prompt("請輸入a的值:");
7 var b=prompt("請輸入b的值:");
8 alert("a+b的和為:"+(parseInt(a)+parseInt(b)));
9 </script>
10 </head>
11 <body>
12 </body>
13 </html>
輸入兩個值后結果為一個兩數和的窗口。
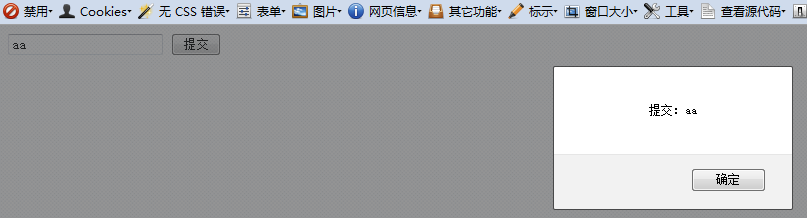
JavaScript寫在function中,函數是由事件觸發的,例:
1 <!DOCTYPE html PUBLIC "-//W3C//DTD XHTML 1.0 Transitional//EN" "http://www.w3.org/TR/xhtml1/DTD/xhtml1-transitional.dtd">
2 <html xmlns="http://www.w3.org/1999/xhtml">
3 <head>
4 <title></title>
5 <script type="text/javascript">
6 function sayHello(){
7 var name=document.myform.mytext.value;
8 alert("提交:"+name);
9 }
10 function clearMe(){
11 document.myform.mytext.value="";
12 }
13 </script>
14 </head>
15 <body>
16 <form action="" name="myform">
17 <input type="text" name="mytext" id="" value="" onclick="clearMe()"/>
18 <input type="button" name="click me" value="提交" onclick="sayHello()"/>
19 </form>
20 </body>
21 </html>
輸入一個值后彈出一個窗口:例
posted @
2011-12-03 23:17 魏文甫 閱讀(330) |
評論 (0) |
編輯 收藏HTML的定位
HTML中要顯示有層次時用定位;定位有絕對定位,相對定位和固定定位。
1.絕對定位:在選擇器中用position:absolute;此時它有類似與浮動的效果,相當于脫離了文檔流,如:
1 <!DOCTYPE html PUBLIC "-//W3C//DTD XHTML 1.0 Transitional//EN" "http://www.w3.org/TR/xhtml1/DTD/xhtml1-transitional.dtd">
2 <html xmlns="http://www.w3.org/1999/xhtml"
3 <head>
4 <title></title>
5 <style type="text/css">
6 body{
7 margin:0px;;
8 }
9 .div1{
10 width:100px;
11 height:100px;
12 background-color:#669900;
13 position:absolute;
14 }
15 .div2{
16 width:200px;
17 height:50px;
18 background-color:#aa00ff;
19 }
20 </style>
21 </head>
22 <body>
23 <div
class="div1">div1</div>
24 <div
class="div2">div2</div>
25 </body>
26 </html>
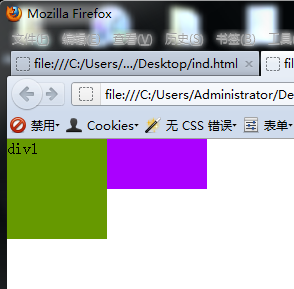
此時div1像浮動了,div2補上div1的位置(即有浮動的效果,div2被div1遮住了)
此時如果定義它的高和距離左右,定義的是該塊距離它的上一級(即它的父)的距離
如 1 <!DOCTYPE html PUBLIC "-//W3C//DTD XHTML 1.0 Transitional//EN" "http://www.w3.org/TR/xhtml1/DTD/xhtml1-transitional.dtd">
2 <html xmlns="http://www.w3.org/1999/xhtml"
3 <head>
4 <title></title>
5 <style type="text/css">
6 body{
7 margin:0px;;
8 }
9 .div1{
10 width:100px;
11 height:100px;
12 background-color:#669900;
13 position:absolute;
14 top:10px;
15 right:10px;
16 }
17 .div2{
18 width:200px;
19 height:50px;
20 background-color:#aa00ff;
21 }
22 </style>
23 </head>
24 <body>
25 <div
class="div1">div1</div>
26 <div
class="div2">div2</div>
27 </body>
28 </html>

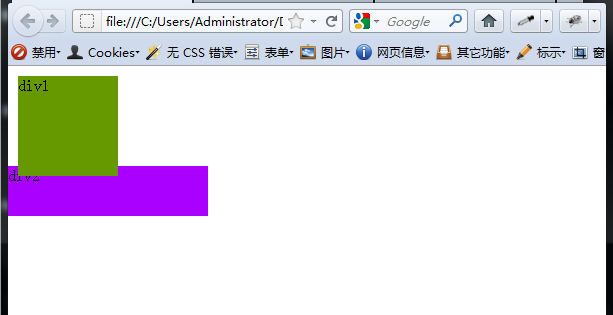
2.相對定位:position:relative;相對定位也有浮動的效果,只是它相對于原來的位置發生了偏移。例如:
1 <!DOCTYPE html PUBLIC "-//W3C//DTD XHTML 1.0 Transitional//EN" "http://www.w3.org/TR/xhtml1/DTD/xhtml1-transitional.dtd">
2 <html xmlns="http://www.w3.org/1999/xhtml"
3 <head>
4 <title></title>
5 <style type="text/css">
6 body{
7 margin:0px;;
8 }
9 .div1{
10 width:100px;
11 height:100px;
12 background-color:#669900;
13 position:relative;
14 top:10px;
15 left:10px;
16 }
17 .div2{
18 width:200px;
19 height:50px;
20 background-color:#aa00ff;
21 }
22 </style>
23 </head>
24 <body>
25 <div
class="div1">div1</div>
26 <div
class="div2">div2</div>
27 </body>
28 </html>
當在body中為絕對定位時,其父為相對定位如: 1 <!DOCTYPE html PUBLIC "-//W3C//DTD XHTML 1.0 Transitional//EN" "http://www.w3.org/TR/xhtml1/DTD/xhtml1-transitional.dtd">
2 <html xmlns="http://www.w3.org/1999/xhtml">
3 <head>
4 <title></title>
5 <style type="text/css">
6 body{
7 margin:0px;
8 }
9 div{
10 width:200px;
11 height:200px;
12 }
13 .div1 {
14 background-color:#ccc;
15 position:absolute;
16 bottom:0px;
17 right:0px;
18 z-index:999;
19 }
20 .div2 {
21 margin-left:60px;
22 width:500px;
23 height:300px;
24 background-color:#ff6600;
25 position:relative;
26 }
27 28 </style>
29 </head>
30 <body>
31 <div
class="div2">DIV2
32 <div
class="div1">DIV1</div>
33 </div>
34 </body>
35 </html>

此時div1的位置是相對于div2的位置來說的。
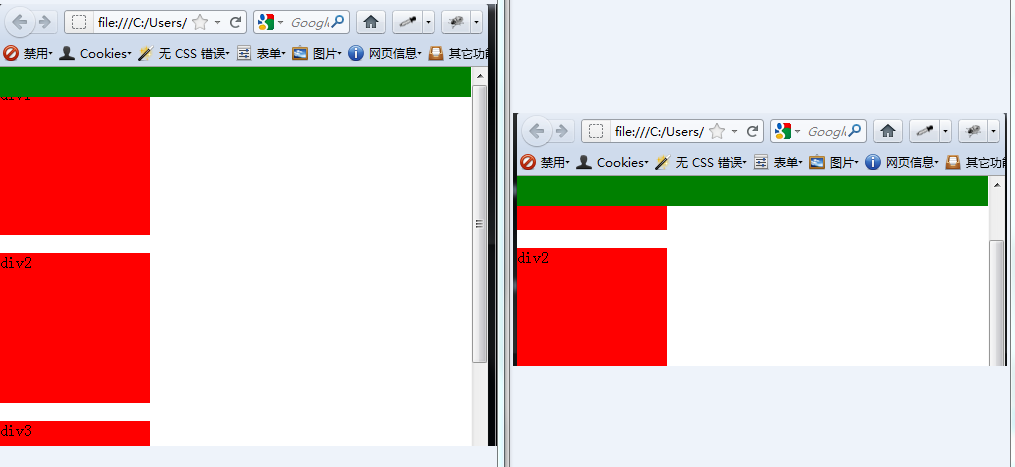
3.固定定位:固定定位個人認為可以理解為固定于瀏覽器邊框,不隨滾動條的滾動而滾動:如:
1 <!DOCTYPE html PUBLIC "-//W3C//DTD XHTML 1.0 Transitional//EN" "http://www.w3.org/TR/xhtml1/DTD/xhtml1-transitional.dtd">
2 <html xmlns="http://www.w3.org/1999/xhtml"
3 <head>
4 <title></title>
5 <style type="text/css">
6 body{
7 margin:0px;;
8 }
9 .toolbar{
10 height:30px;
11 width:100%;
12 background-color:green;
13 position:fixed;
14 top:0px;
15 left:0px;
16 }
17 .div{
18 width:150px;
19 height:150px;
20 background-color:#ff0000;
21 }
22 </style>
23 </head>
24 <body>
25 <div
class="toolbar"></div><br/>
26 <div
class="div">div1</div><br/>
27 <div
class="div">div2</div><br/>
28 <div
class="div">div3</div><br/>
29 <div
class="div">div4</div><br/>
30 <div
class="div">div5</div><br/>
31 <div
class="div">div6</div><br/>
32 <div
class="div">div7</div><br/>
33 <div
class="div">div8</div> <br/>
34 <div
class="div">div9</div><br/>
35 <div
class="div">div0</div><br/>
36 </body>
37 </html>
posted @
2011-12-01 18:57 魏文甫 閱讀(5301) |
評論 (1) |
編輯 收藏