Apache ActiveMQ用途: jms有两�U�消息机制一�U�是消息队列�Q�一�U�是消息订阅�Q�简单来说就是一对一�Q�和一对多�?/p>
一对一可以看做 一�l�消息对应一�?�?多个消息获取服务�Q�其中每一个单独的消息体都只会被一个消息获取服务获取�?/p>
一对多可以看做 一�l�消息对应一�?�?多个接收服务�Q�其中每一个单独的消息体发��Z��后都会被所有的接收服务收到一�ơ�?/p>
�Ҏ��以上两种模式我们可以�?发送短信的时候���?消息队列模式。也可以在分布式的时候��用消息队列模�?/p>
消息订阅模式用的不是很多但是�Q�在分布式中也可以应用同时可以结合WebService�q�行使用。例如一个新闻需要发�l�多个系�l�内的单独服务�?/p>
只要深刻理解了他的处理机制在很多情况下都可以应用�Q�如果实在不喜欢�q�种方式也可以遵照java JMS的API用线�E�自己模拟消息队列机制�?/p>
我个�����为区别不是很大。更何况很多时候MQ的很多功能我们有没有用到�Q�用�q�么个大家伙���是��Z��囄���事�?/p>
�q�里备注一下:按原有设定在创徏�q�接的时候MQ是不发送消息的�?/span>
下面我说以下使用方式�Q?/p>
本�h目前只会JAVA
需要的包�ؓ
activemq-all-5.2.0.jar
log4j-1.2.14.jar
spring-beans-2.5.5.jar
spring-context-2.5.5.jar
spring-jms-2.5.5.jar
spring-core-2.5.5.jar
�q�些应该���p��够了
我做���试的时候用的包�?/p>
activemq-all-5.2.0.jar
commons-pool-1.4.jar
log4j-1.2.14.jar
spring-beans-2.5.5.jar
spring-context-2.5.5.jar
spring-core-2.5.5.jar
spring-jms-2.5.5.jar
spring-tx-2.5.5.jar
spring-web-2.5.5.jar
spring-webmvc-2.5.5.jar
xbean-spring-3.4.jar
msbase.jar
mssqlserver.jar
msutil.jar
mysql-connector-java-5.0.4-bin.jar
mysql.jar
基本配置
下蝲 Apache ActiveMQ 不知道的googlean
安装服务的文件在
apache-activemq-5.5.0\bin\win32 目录下面Linux版也一样大同小�?�q�行.sh文�g���好�Q�如果出现问题请打开�q�行文�g查看里面参数
activemq.bat直接�q�行启动服务
InstallService.bat安装成windos服务
UninstallService.bat卸蝲windos服务
安装成功�?/p>
在运行中 cmd
netstat -an|find “61616” 查询端口是否已经打开
D:\apache-activemq-5.5.0\conf\activemq.xml 本文件�ؓ服务配置文�g
<transportConnectors>
<transportConnector name="openwire" uri="tcp://0.0.0.0:61618"/>
</transportConnectors>
�q�一���ؓ端口讄���
默认�?“61616”
目前以windos��Z��
把spring和项目联�p��v�?/p>
�W�一步�ؓweb.xml
<?xml version="1.0" encoding="UTF-8"?>
<web-app version="2.4" xmlns="http://java.sun.com/xml/ns/j2ee"
xmlns:xsi="http://www.w3.org/2001/XMLSchema-instance"
xsi:schemaLocation="http://java.sun.com/xml/ns/j2ee
http://java.sun.com/xml/ns/j2ee/web-app_2_4.xsd">
<!-- 配置Spring-->
<context-param>
<param-name>contextConfigLocation</param-name>
<param-value>
/WEB-INF/classes/NewFileMQ.xml
</param-value>
</context-param>
<listener>
<listener-class>
org.springframework.web.context.ContextLoaderListener
</listener-class>
</listener>
<welcome-file-list>
<welcome-file>index.jsp</welcome-file>
</welcome-file-list>
</web-app>
先说 一下消息队列(也就是一对一�Q?/p>
NewFileMQ.xml
<?xml version="1.0" encoding="UTF-8"?>
<beans xmlns="http://www.springframework.org/schema/beans"
xmlns:amq="http://activemq.apache.org/schema/core"
xmlns:xsi="http://www.w3.org/2001/XMLSchema-instance"
xsi:schemaLocation="http://www.springframework.org/schema/beans
http://www.springframework.org/schema/beans/spring-beans-2.0.xsd
http://activemq.apache.org/schema/core
http://activemq.apache.org/schema/core/activemq-core.xsd">
<!-- 配置JMS链接模版 -->
<bean id="connectionFactory" class="org.apache.activemq.spring.ActiveMQConnectionFactory">
<property name="brokerURL" value="tcp://localhost:61618"/>
</bean>
<!-- 配置JMS模版 -->
<bean id="jmsTemplate" class="org.springframework.jms.core.JmsTemplate">
<property name="connectionFactory" ref="connectionFactory"/>
<property name="pubSubDomain" value="false" />
<property name="explicitQosEnabled" value="true" /> <!-- deliveryMode, priority, timeToLive 的开养I��要生效,必须配置为true�Q�默认false-->
<property name="deliveryMode" value="1" /> <!-- 发送模�?nbsp; DeliveryMode.NON_PERSISTENT=1:非持�?; DeliveryMode.PERSISTENT=2:持久-->
</bean>
<!-- 发送消息的目的圎ͼ�一个队列) -->
<bean id="destination" class="org.apache.activemq.command.ActiveMQQueue">
<!-- 讄���消息队列的名�?-->
<constructor-arg index="0" value="HelloJmsQueue"/>
</bean>
<bean id="sender" class="message.Sender">
<property name="jmsTemplate" ref="jmsTemplate"></property>
</bean>
<!--消息获取�c?->
<bean id="receive" class="message.Receiver"></bean>
<!--�l�消息获取类加个监听让他能自动获取消�?->
<bean id="listenerContainer"
class="org.springframework.jms.listener.DefaultMessageListenerContainer">
<property name="connectionFactory" ref="connectionFactory"></property>
<property name="destination" ref="destination"></property>
<property name="messageListener" ref="receive"></property>
</bean>
</beans>
发送消息的�c?/p>
package message;
import javax.jms.Destination;
import javax.jms.JMSException;
import javax.jms.Message;
import javax.jms.Session;
import org.springframework.context.ApplicationContext;
import org.springframework.context.support.ClassPathXmlApplicationContext;
import org.springframework.jms.core.JmsTemplate;
import org.springframework.jms.core.MessageCreator;
public class Sender {
private JmsTemplate jmsTemplate;
public void setJmsTemplate(JmsTemplate jmsTemplate) {
this.jmsTemplate = jmsTemplate;
}
public void send(final String text){
System.out.println("---Send:"+text);
jmsTemplate.send(new MessageCreator(){
public Message createMessage(Session arg0) throws JMSException {
// TODO Auto-generated method stub
return arg0.createTextMessage(text);
}
});
}
public static void main(String[] args) {
ApplicationContext ctx = new ClassPathXmlApplicationContext("/applicationContext.xml");
JmsTemplate template = (JmsTemplate) ctx.getBean("jmsTemplate");
Destination destination = (Destination) ctx.getBean("destination");
for(int i=0;i<10;i++){
final String dd = i+"";
//jmsTemplate.convertAndSend(destination,"发送消息: ActiveMQ Text Message�Q?+dd);
template.send(destination, new MessageCreator() {
public Message createMessage(Session session) throws JMSException {
return session.createTextMessage("发送消息: ActiveMQ Text Message�Q?+dd);
}
});
}
System.out.println("成功发送了一条JMS消息");
}
}
接收消息�c?/p>
package message;
import javax.jms.Destination;
import javax.jms.JMSException;
import javax.jms.Message;
import javax.jms.MessageListener;
import javax.jms.TextMessage;
import org.apache.xbean.spring.context.ClassPathXmlApplicationContext;
import org.springframework.context.ApplicationContext;
import org.springframework.jms.core.JmsTemplate;
public class Receiver implements MessageListener {
//接听接收
public void onMessage(Message message) {
if (message instanceof TextMessage) {
TextMessage text = (TextMessage) message;
try {
System.out.println("Receive:�W�四个接收�? + text.getText());
} catch (JMSException e) {
// TODO Auto-generated catch block
e.printStackTrace();
}
}
}
//手动接收
public static void main(String[] args) throws JMSException {
ApplicationContext ctx = new ClassPathXmlApplicationContext("/applicationContext.xml");
JmsTemplate template = (JmsTemplate) ctx.getBean("jmsTemplate");
Destination destination = (Destination) ctx.getBean("destination");
while (true) {
TextMessage txtmsg = (TextMessage) template.receive(destination);
if (null != txtmsg)
System.out.println("收到消息内容�? " + txtmsg.getText());
else
break;
}
}
}
发布者模�?/p>
其实两种模式其它讄���基本相同
唯一不用的就�?Spring配置文�g中把一下这�D�|��换一下就可以�?/p>
<!-- 发送消息的目的圎ͼ�一个队列) -->
<bean id="destination" class="org.apache.activemq.command.ActiveMQTopic">
<!-- 讄���消息队列的名�?-->
<constructor-arg index="0" value="HelloJmsTopic"/>
</bean>
http://hi.baidu.com/wu_chao/blog/item/1d9aa2772e663107b051b9cc.html
]]>
1,��目中所引的�?/span>
2�Q�发送和接受消息的代码,每个都是一个Junit函数
package test;
import javax.jms.Destination;
import javax.jms.JMSException;
import javax.jms.Message;
import javax.jms.Session;
import javax.jms.TextMessage;
import junit.framework.TestCase;
import org.apache.xbean.spring.context.ClassPathXmlApplicationContext;
import org.junit.Test;
import org.springframework.context.ApplicationContext;
import org.springframework.context.support.FileSystemXmlApplicationContext;
import org.springframework.jms.core.JmsTemplate;
import org.springframework.jms.core.MessageCreator;
public class ActivemqTest extends TestCase {
@Test
public void testJmsTemplateSend() {
ApplicationContext ctx = new FileSystemXmlApplicationContext(
"WebRoot/WEB-INF/applicationContext.xml");
JmsTemplate template = (JmsTemplate) ctx.getBean("jmsTemplate");
Destination destination = (Destination) ctx.getBean("destination");
template.send(destination, new MessageCreator() {
public Message createMessage(Session session) throws JMSException {
return session.createTextMessage("发送消息:Hello ActiveMQ Text Message�Q?);
}
});
System.out.println("成功发送了一条JMS消息");
}
@Test
public void testJmsTemplateReceive() throws JMSException {
ApplicationContext ctx = new FileSystemXmlApplicationContext(
"WebRoot/WEB-INF/applicationContext.xml");
JmsTemplate template = (JmsTemplate) ctx.getBean("jmsTemplate");
Destination destination = (Destination) ctx.getBean("destination");
while (true) {
TextMessage txtmsg = (TextMessage) template.receive(destination);
if (null != txtmsg)
System.out.println("收到消息内容�? " + txtmsg.getText());
else
break;
}
}
public static void main(String[] args) throws Exception{
new ActivemqTest().testJmsTemplateSend();
new ActivemqTest().testJmsTemplateReceive();
}
}
3�Q�applicationContext.xml文�g内容
<?xml version="1.0" encoding="UTF-8"?>
<beans xmlns="http://www.springframework.org/schema/beans" xmlns:xsi="http://www.w3.org/2001/XMLSchema-instance"
xmlns:context="http://www.springframework.org/schema/context"
xsi:schemaLocation="http://www.springframework.org/schema/beans
http://www.springframework.org/schema/beans/spring-beans-2.5.xsd
http://www.springframework.org/schema/context
http://www.springframework.org/schema/context/spring-context-2.5.xsd">
<!-- 配置JMS�q�接工厂 -->
<bean id="connectionFactory" class="org.apache.activemq.spring.ActiveMQConnectionFactory">
<property name="brokerURL" value="tcp://localhost:61616"/>
</bean>
<!-- 配置JMS模版 -->
<bean id="jmsTemplate" class="org.springframework.jms.core.JmsTemplate">
<property name="connectionFactory" ref="connectionFactory"/>
</bean>
<!-- 发送消息的目的圎ͼ�一个队列) -->
<bean id="destination" class="org.apache.activemq.command.ActiveMQQueue">
<!-- Set the Queue Name -->
<constructor-arg index="0" value="HelloWorldQueue"/>
</bean>
</beans>
http://blog.csdn.net/hnzhangshilong/article/details/6629780
]]>
import javax.jms.Connection;
import javax.jms.ConnectionFactory;
import javax.jms.DeliveryMode;
import javax.jms.Destination;
import javax.jms.MapMessage;
import javax.jms.MessageProducer;
import javax.jms.Session;
import org.apache.activemq.ActiveMQConnection;
import org.apache.activemq.ActiveMQConnectionFactory;
public class MapSender {
private static final int SEND_NUMBER = 5;
public static void main(String[] args) {
ConnectionFactory connectionFactory = new ActiveMQConnectionFactory(
ActiveMQConnection.DEFAULT_USER,
ActiveMQConnection.DEFAULT_PASSWORD, "tcp://localhost:61616");
Connection connection = null;
Session session;
Destination destination = null;
MessageProducer messageProducer;
try {
connection=connectionFactory.createConnection();
connection.start();
session=connection.createSession(Boolean.TRUE, Session.AUTO_ACKNOWLEDGE);
destination=session.createQueue("FirstQueue");
messageProducer=session.createProducer(destination);
messageProducer.setDeliveryMode(DeliveryMode.NON_PERSISTENT);
MapMessage map=session.createMapMessage();
map.setBoolean("flag", true);
map.setDouble("dou", 1.01);
map.setInt("zx", 88);
map.setString("zifu", "zzzzzz");
messageProducer.send(map);
session.commit();
} catch (Exception e) {
e.printStackTrace();
}
}
}
package org.abin.lee.activemq;
import javax.jms.Connection;
import javax.jms.ConnectionFactory;
import javax.jms.Destination;
import javax.jms.MapMessage;
import javax.jms.MessageConsumer;
import javax.jms.Session;
import org.apache.activemq.ActiveMQConnection;
import org.apache.activemq.ActiveMQConnectionFactory;
public class MapReceiver {public static void main(String[] args) {
ConnectionFactory connectionFactory = new ActiveMQConnectionFactory(
ActiveMQConnection.DEFAULT_USER,
ActiveMQConnection.DEFAULT_PASSWORD, "tcp://localhost:61616");
Connection connection = null;
Session session;
Destination destination;
MessageConsumer consumer;
try {
connection = connectionFactory.createConnection();
connection.start();
session = connection.createSession(Boolean.FALSE,
Session.AUTO_ACKNOWLEDGE);
destination = session.createQueue("FirstQueue");
consumer = session.createConsumer(destination);
while(true){
MapMessage map=(MapMessage)consumer.receive(500000);
if (null != map) {
boolean flag=map.getBoolean("falg");
System.out.println("AcitveMQ 接收到的消息 flag="+flag);
double dou=map.getDouble("dou");
System.out.println("AcitveMQ 接收到的消息 dou="+dou);
int zx=map.getInt("zx");
System.out.println("AcitveMQ 接收到的消息 zx="+zx);
String zifu=map.getString("zifu");
System.out.println("AcitveMQ 接收到的消息 zifu="+zifu);
}else
break;
}
} catch (Exception e) {
e.printStackTrace();
}
}
}
]]>
�?Java 里有 JMS 的多个实现。其�?apache 下的 ActiveMQ ���是不错的选择。ActiveMQ 是Apache出品�Q�最���行的,能力强劲的开源消息�ȝ��。ActiveMQ 是一个完全支持JMS1.1和J2EE 1.4规范�?JMS Provider实现。这里示例下使用 ActiveMQ
�?ActiveMQ 最好还是了解下 JMS
| JMS 公共 | 点对点域 | 发布/订阅�?/strong> |
| ConnectionFactory | QueueConnectionFactory | TopicConnectionFactory |
| Connection | QueueConnection | TopicConnection |
| Destination | Queue | Topic |
| Session | QueueSession | TopicSession |
| MessageProducer | QueueSender | TopicPublisher |
| MessageConsumer | QueueReceiver | TopicSubscriber |
JMS 定义了两�U�方式:Quere�Q�点对点�Q�;Topic�Q�发�?订阅�Q��?/p>
ConnectionFactory 是连接工厂,负责创徏Connection�?/p>
Connection 负责创徏 Session�?/p>
Session 创徏 MessageProducer�Q�用来发消息�Q?�?MessageConsumer�Q�用来接收消息)�?/p>
Destination 是消息的目的地�?/p>
详细的可以网上找�?JMS 规范�Q�有中文版)�?/p>
下蝲 apache-activemq-5.3.0�?a target="_blank">http://activemq.apache.org/download.html �Q�解压,然后双击 bin/activemq.bat。运行后�Q�可以在 http://localhost:8161/admin 观察。也�?demo�Q?http://localhost:8161/demo 。把 activemq-all-5.3.0.jar 加入 classpath�?/p>
Jms 发�?代码�Q?/p>public static void main(String[] args) throws Exception {
ConnectionFactory connectionFactory = new ActiveMQConnectionFactory();
Connection connection = connectionFactory.createConnection();
connection.start();
Session session = connection.createSession(Boolean.TRUE, Session.AUTO_ACKNOWLEDGE);
Destination destination = session.createQueue("my-queue");
MessageProducer producer = session.createProducer(destination);
for(int i=0; i<3; i++) {
MapMessage message = session.createMapMessage();
message.setLong("count", new Date().getTime());
Thread.sleep(1000);
//通过消息生��者发出消�?nbsp;
producer.send(message);
}
session.commit();
session.close();
connection.close();
}
Jms 接收代码�Q?/p>
public static void main(String[] args) throws Exception {
ConnectionFactory connectionFactory = new ActiveMQConnectionFactory();
Connection connection = connectionFactory.createConnection();
connection.start();
final Session session = connection.createSession(Boolean.TRUE, Session.AUTO_ACKNOWLEDGE);
Destination destination = session.createQueue("my-queue");
MessageConsumer consumer = session.createConsumer(destination);
int i=0;
while(i<3) {
i++;
MapMessage message = (MapMessage) consumer.receive();
session.commit();
//TODO something....
System.out.println("收到消息�Q? + new Date(message.getLong("count")));
}
session.close();
connection.close();
}
JMS五种消息的发�?接收的例�?/font>
转自�Q?/font>http://chenjumin.javaeye.com/blog/687124
1、消息发�?/p>//�q�接工厂
ConnectionFactory connFactory = new ActiveMQConnectionFactory(
ActiveMQConnection.DEFAULT_USER,
ActiveMQConnection.DEFAULT_PASSWORD,
"tcp://localhost:61616");
//�q�接到JMS提供�?nbsp;
Connection conn = connFactory.createConnection();
conn.start();
//事务性会话,自动���认消息
Session session = conn.createSession(true, Session.AUTO_ACKNOWLEDGE);
//消息的目的地
Destination destination = session.createQueue("queue.hello");
//消息生���?nbsp;
MessageProducer producer = session.createProducer(destination);
producer.setDeliveryMode(DeliveryMode.NON_PERSISTENT); //不持久化
//文本消息
TextMessage textMessage = session.createTextMessage("文本消息");
producer.send(textMessage);
//键值对消息
MapMessage mapMessage = session.createMapMessage();
mapMessage.setLong("age", new Long(32));
mapMessage.setDouble("sarray", new Double(5867.15));
mapMessage.setString("username", "键值对消息");
producer.send(mapMessage);
//���消�?nbsp;
StreamMessage streamMessage = session.createStreamMessage();
streamMessage.writeString("streamMessage���消�?);
streamMessage.writeLong(55);
producer.send(streamMessage);
//字节消息
String s = "BytesMessage字节消息";
BytesMessage bytesMessage = session.createBytesMessage();
bytesMessage.writeBytes(s.getBytes());
producer.send(bytesMessage);
//对象消息
User user = new User("cjm", "对象消息"); //User对象必须实现Serializable接口
ObjectMessage objectMessage = session.createObjectMessage();
objectMessage.setObject(user);
producer.send(objectMessage);
session.commit(); //在事务性会话中�Q�只有commit之后�Q�消息才会真正到辄���的地
producer.close();
session.close();
conn.close();
2、消息接�Ӟ��通过消息监听器的方式接收消息
public class Receiver implements MessageListener{
private boolean stop = false;
public void execute() throws Exception {
//�q�接工厂
ConnectionFactory connFactory = new ActiveMQConnectionFactory(
ActiveMQConnection.DEFAULT_USER,
ActiveMQConnection.DEFAULT_PASSWORD,
"tcp://localhost:61616");
//�q�接到JMS提供�?nbsp;
Connection conn = connFactory.createConnection();
conn.start();
//事务性会话,自动���认消息
Session session = conn.createSession(true, Session.AUTO_ACKNOWLEDGE);
//消息的来源地
Destination destination = session.createQueue("queue.hello");
//消息消费�?nbsp;
MessageConsumer consumer = session.createConsumer(destination);
consumer.setMessageListener(this);
//�{�待接收消息
while(!stop){
Thread.sleep(5000);
}
session.commit();
consumer.close();
session.close();
conn.close();
}
public void onMessage(Message m) {
try{
if(m instanceof TextMessage){ //接收文本消息
TextMessage message = (TextMessage)m;
System.out.println(message.getText());
}else if(m instanceof MapMessage){ //接收键值对消息
MapMessage message = (MapMessage)m;
System.out.println(message.getLong("age"));
System.out.println(message.getDouble("sarray"));
System.out.println(message.getString("username"));
}else if(m instanceof StreamMessage){ //接收���消�?nbsp;
StreamMessage message = (StreamMessage)m;
System.out.println(message.readString());
System.out.println(message.readLong());
}else if(m instanceof BytesMessage){ //接收字节消息
byte[] b = new byte[1024];
int len = -1;
BytesMessage message = (BytesMessage)m;
while((len=message.readBytes(b))!=-1){
System.out.println(new String(b, 0, len));
}
}else if(m instanceof ObjectMessage){ //接收对象消息
ObjectMessage message = (ObjectMessage)m;
User user = (User)message.getObject();
System.out.println(user.getUsername() + " _ " + user.getPassword());
}else{
System.out.println(m);
}
stop = true;
}catch(JMSException e){
stop = true;
e.printStackTrace();
}
}
}
http://blog.csdn.net/caihaijiang/article/details/5903296
]]>
1.下蝲ActiveMQ
��d��方网站下载:http://activemq.apache.org/
2.�q�行ActiveMQ
解压�~�apache-activemq-5.5.1-bin.zip�Q�然后双击apache-activemq-5.5.1\bin\activemq.bat�q�行ActiveMQ�E�序�?/p>
启动ActiveMQ以后�Q�登陆:http://localhost:8161/admin/�Q�创��Z��个Queue�Q�命名�ؓFirstQueue�?/p>
3.创徏Eclipse��目�q�运�?/h2>
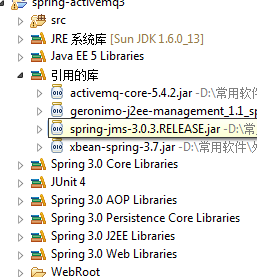
创徏project�Q�ActiveMQ-5.5�Q��ƈ导入apache-activemq-5.5.1\lib目录下需要用到的jar文�g�Q�项目结构如下图所�C�:

3.1.Sender.java
package com.xuwei.activemq;
import javax.jms.Connection;
import javax.jms.ConnectionFactory;
import javax.jms.DeliveryMode;
import javax.jms.Destination;
import javax.jms.MessageProducer;
import javax.jms.Session;
import javax.jms.TextMessage;
import org.apache.activemq.ActiveMQConnection;
import org.apache.activemq.ActiveMQConnectionFactory;
public class Sender {
private static final int SEND_NUMBER = 5;
public static void main(String[] args) {
// ConnectionFactory �Q�连接工厂,JMS 用它创徏�q�接
ConnectionFactory connectionFactory;
// Connection �Q�JMS 客户端到JMS Provider 的连�?br /> Connection connection = null;
// Session�Q?一个发送或接收消息的线�E?br /> Session session;
// Destination �Q�消息的目的�?消息发送给�?
Destination destination;
// MessageProducer�Q�消息发送�?br /> MessageProducer producer;
// TextMessage message;
// 构造ConnectionFactory实例对象�Q�此处采用ActiveMq的实现jar
connectionFactory = new ActiveMQConnectionFactory(
ActiveMQConnection.DEFAULT_USER,
ActiveMQConnection.DEFAULT_PASSWORD,
"tcp://localhost:61616");
try {
// 构造从工厂得到�q�接对象
connection = connectionFactory.createConnection();
// 启动
connection.start();
// 获取操作�q�接
session = connection.createSession(Boolean.TRUE,
Session.AUTO_ACKNOWLEDGE);
// 获取session注意参数值xingbo.xu-queue是一个服务器的queue�Q�须在在ActiveMq的console配置
destination = session.createQueue("FirstQueue");
// 得到消息生成者【发送者�?br /> producer = session.createProducer(destination);
// 讄���不持久化�Q�此处学习,实际�Ҏ����目军_��
producer.setDeliveryMode(DeliveryMode.NON_PERSISTENT);
// 构造消息,此处写死�Q�项目就是参敎ͼ�或者方法获�?br /> sendMessage(session, producer);
session.commit();
} catch (Exception e) {
e.printStackTrace();
} finally {
try {
if (null != connection)
connection.close();
} catch (Throwable ignore) {
}
}
}
public static void sendMessage(Session session, MessageProducer producer)
throws Exception {
for (int i = 1; i <= SEND_NUMBER; i++) {
TextMessage message = session
.createTextMessage("ActiveMq 发送的消息" + i);
// 发送消息到目的地方
System.out.println("发送消息:" + "ActiveMq 发送的消息" + i);
producer.send(message);
}
}
}
3.2.Receiver.java
package com.xuwei.activemq;
import javax.jms.Connection;
import javax.jms.ConnectionFactory;
import javax.jms.Destination;
import javax.jms.MessageConsumer;
import javax.jms.Session;
import javax.jms.TextMessage;
import org.apache.activemq.ActiveMQConnection;
import org.apache.activemq.ActiveMQConnectionFactory;
public class Receiver {
public static void main(String[] args) {
// ConnectionFactory �Q�连接工厂,JMS 用它创徏�q�接
ConnectionFactory connectionFactory;
// Connection �Q�JMS 客户端到JMS Provider 的连�?br /> Connection connection = null;
// Session�Q?一个发送或接收消息的线�E?br /> Session session;
// Destination �Q�消息的目的�?消息发送给�?
Destination destination;
// 消费者,消息接收�?br /> MessageConsumer consumer;
connectionFactory = new ActiveMQConnectionFactory(
ActiveMQConnection.DEFAULT_USER,
ActiveMQConnection.DEFAULT_PASSWORD,
"tcp://localhost:61616");
try {
// 构造从工厂得到�q�接对象
connection = connectionFactory.createConnection();
// 启动
connection.start();
// 获取操作�q�接
session = connection.createSession(Boolean.FALSE,
Session.AUTO_ACKNOWLEDGE);
// 获取session注意参数值xingbo.xu-queue是一个服务器的queue�Q�须在在ActiveMq的console配置
destination = session.createQueue("FirstQueue");
consumer = session.createConsumer(destination);
while (true) {
//讄���接收者接收消息的旉����Q��ؓ了便于测试,�q�里谁定�?00s
TextMessage message = (TextMessage) consumer.receive(100000);
if (null != message) {
System.out.println("收到消息" + message.getText());
} else {
break;
}
}
} catch (Exception e) {
e.printStackTrace();
} finally {
try {
if (null != connection)
connection.close();
} catch (Throwable ignore) {
}
}
}
}
4.注意事项
- 最后接收者跟发送者在不同的机器上���试
- ��目所引用的jar最后在ActiveMQ下的lib中找�Q�这样不会出现版本冲�H��?
5.���试�q�程
因�ؓ是在单机上测试,所以需要开启两个eclipse�Q�每一个eclipse都有自��n的workspace。我们在eclipse1中运行Receiver�Q�在eclipse2中运行Sender�?/p>
刚开始eclipse1中运行Receiver以后console介面没有��M��信息�Q�在eclipse2中运行Sender以后�Q�eclipse2中的console昄���如下信息�Q?/p>
发送消息:ActiveMq 发送的消息1
发送消息:ActiveMq 发送的消息2
发送消息:ActiveMq 发送的消息3
发送消息:ActiveMq 发送的消息4
发送消息:ActiveMq 发送的消息5
而回到eclipse1中发现console界面出现如下信息�Q?/p>
收到消息ActiveMq 发送的消息1
收到消息ActiveMq 发送的消息2
收到消息ActiveMq 发送的消息3
收到消息ActiveMq 发送的消息4
收到消息ActiveMq 发送的消息5
PS:2012-2-27
今天发现���试�q�不需要开启两个eclipse�Q�在一个eclipse下页可以启动多个�E�序�Q��ƈ且有多个console�Q�在上面的Receiver.java中,讄���一个较大的旉����Q�比如receive(500000)�Q�如下代码所�C�:
TextMessage message = (TextMessage) consumer.receive(500000);
�q�个时候运行Receiver.java的话�Q�会使得�q�个Receiver.java一直运�?00�U�,在eclipse中可以发玎ͼ�

点击那个�U�色方块可以手动停止�q�行�E�序�?/p>
�q�行玩receiver以后我们在运行sender�Q�在�q�行完sender以后�Q�我们要切换到receiver的console�Q�如下图所�C�:

http://www.cnblogs.com/xwdreamer/archive/2012/02/21/2360818.html
]]>