在NetBeans 6中開發Ajax功能的JSF組件
早些年,微軟件的開發利器總是讓Java陣營的IDE顯得很弱智。微軟種可視化的開發方式讓無數的Java程序員向往。雖然Eclipse的出現在一定程度上緩解了這種心態,但還是有差距啊。長江后浪推前浪,前浪死在沙灘上。如今的NetBeans 6號稱很牛,試一試,發現確實也比較牛,雖然不能完全與微軟的IDE相提并論,但至少讓我們看到真正可視化編程的曙光。下面就介紹一下如何在NetBeans6中可初見化的開發具有Ajax功能的JSF組件。
開發運行環境:NetBeans 6+GlassFish v2
一、創建設計頁面
1.在NetBeans6下創建一個名稱為ListboxExample的web application,選擇Visual Web JavaServer Faces框架,進入Page.jsp的可視化設計器界面。
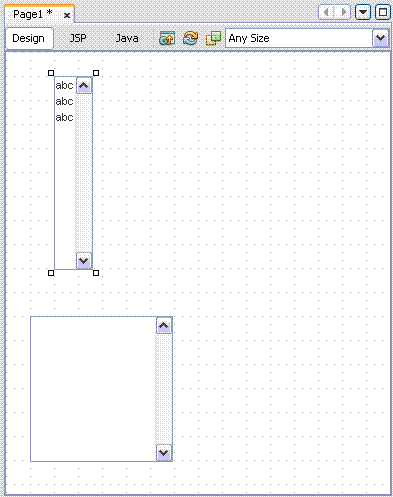
2.從工具面板(Palette)中拖一個Listbox組件放在頁面的左上方,在屬性面板(Properties),設置Listbox的id為personDD。看看,這是不是有點像早期的VB6或是如今的VS2008的操作了?
3.設置Listbox的multiple屬性為True,這里主要是為了讓Listbox可以進行多個值的選擇。
4.在工具面板(Palette)中拖一個Text Area組件,放置在頁面的右邊。它用于顯示在Listbox選擇一個選項時它的子選擇。
5.在屬性窗口中,設置Text Area組件的row屬性為10。
二、設計Bean
為了將ListBox中的數據保存起來,這里采用了JavaBean的方式。
1.在Navigator窗口中,右擊SessionBean1,并選擇Edit Java Source.。
2.在sessionBeans1類中加入代碼:
Option[] listOptions;
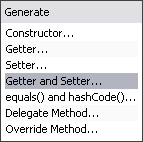
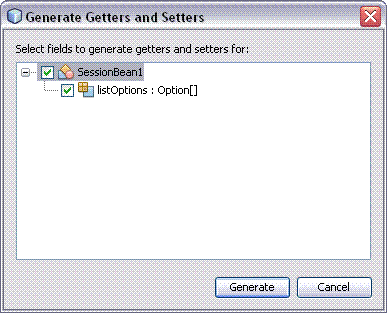
3.在listOptions是點擊右鍵,選擇Insert Code選擇項,選擇Getter and Setter選擇項,如下圖所示:
在出來的界面上,打上勾,點擊OK。
com.sun.webui.jsf.model.Option5.以同樣的方式,再添加代碼
String[] choices;
并加入getter與setter方法
6.在這個Bean時,還需要在這的構造函數里添加初始化Listbox的代碼,代碼如下:
 listOptions = new Option[]{
 new Option("選項1", "第一個選擇"),
 new Option("選項2", "第二個選擇"),
 new Option("選項3", "第三個選擇")
 };
}; choices = new String[]{};
三、綁定Listbox組件至Bean
接下來需要將上面所設計的Listbox與Bean進行數據綁定。
1.打開Page1.jsp頁面的設計頁面,右擊Listbox組件,選擇choose Bind to Data選項。
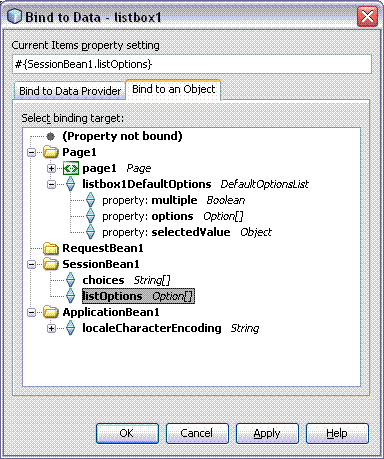
2.在出來界面中,選擇SessionBean 1>listOptions,點擊OK,如下圖所示:
3.在Listbox的屬性窗口,選擇selected屬性,點右邊的按鈕,在出來的對話框(與上面的有點類似)選擇SessionBean1 > choices,點擊OK。
四、Listbox的Ajax功能實現
當選擇Listbox中的一條記錄時,在Text Area中應該顯示該記錄的子選項。
1.在設計頁面中,右擊Listbox組件,選擇Edit Event Handler>processValueChange。
2.在該方法中添加如下代碼
 getSessionBean1().setChoices((String[]) personDD.getSelected());
 //get the current selections from the SessionBean1
 String[] mySelections = getSessionBean1().getChoices();
 String showSelections = "";
 if (mySelections != null) {
 // Create a list of the values of the selected items
 for (int i = 0; i < mySelections.length; i++) {
 showSelections = showSelections + mySelections[i] + "\n";
 }
} }
} if (showSelections.equals("")) {
 showSelections = "沒有選擇任何值";
 } else {
 showSelections = "Select Value:\n" + showSelections;
 }
} // Display the list in the textArea1 text area
 getTextArea1().setValue(showSelections);
3.在頁面的設計模式下,選擇Listbox的屬性窗口,點擊onChange屬性,在出來的對話框中輸入如下代碼
 document.getElementById('form1:textArea1').refresh('form1:listbox1'); return false;
至此,功能已經完成,可以運行來看效果。但下面再加一個增加與刪除的功能。
五、Listbox選擇項的維護
為了對Listbox能進行頁面上的增加與刪除,這里加多兩個button.
1.打開SessionBean1的代碼進行編輯,加入新的屬性,如下
 int counter = 0;
當然,按前面的方法為counter增加getter與setter方法。
2.在SessionBean1增加如下的兩個方法
 public void addOption() {
 // add a new item to the list
 // by creating an updated array that contains the new item
 setCounter(getCounter() + 1); // counter to assure unique values
 String newItemVal = "新增項" + getCounter();
 Option opt = new Option(newItemVal, "新增子項 " + getCounter());
 Option[] current = getListOptions();
 Option[] newOpts = new Option[current.length + 1];
 // add the current items to the new array
 for (int i = 0; i < current.length; i++) {
 newOpts[i] = current[i];
 }
} newOpts[current.length] = opt;
 setListOptions(newOpts); // update the list
 setChoices(new String[]{newItemVal}); // select the new item
 }
}
 public void removeOptions(String[] selectedValues) {
 // remove the options that are selected in the list
 // by matching the values to the options
 Option[] current = getListOptions();
 int curLength = current.length;
 if (selectedValues != null) {
 int numSelected = selectedValues.length;
 int newLength = curLength - numSelected;
 Option[] newOpts = new Option[newLength]; // updated list array
 int k = 0; // counter for the updated list
 boolean found = false;
 for (int i = 0; i < current.length; i++) {
 // scan the current items to identify the ones to remove
 found = false;
 for (int j = 0; j < numSelected; j++) {
 if (current[i].getValue().equals(selectedValues[j])) {
 // this item will be removed
 found = true;
 break;
 }
} }
} if (!found) {
 // since this item was not selected, add it to the updated list
 newOpts[k] = current[i];
 k++;
k++; }
} }
} setListOptions(newOpts); // update the list
 setChoices(null); // remove the existing selected values
 }
} }
}

3.打開頁面的設計模式,從工具面板中拖一個Button,將ID修改為add,名稱修改為增加。再拖一個Button,ID為Remove,名稱為刪除。
4.雙擊增加按鈕,在add_action()方法中添加如下代碼
 getSessionBean1().addOption();
 getTextArea1().setText("新增Item");
 return null;
5.雙擊刪除按鈕,在remove_action ()方法中添加如下代碼;
 getSessionBean1().removeOptions((String[]) getPersonDD().getSelected());
 getTextArea1().setText("選擇項已被刪除");
 return null;
完成,運行整個工程。
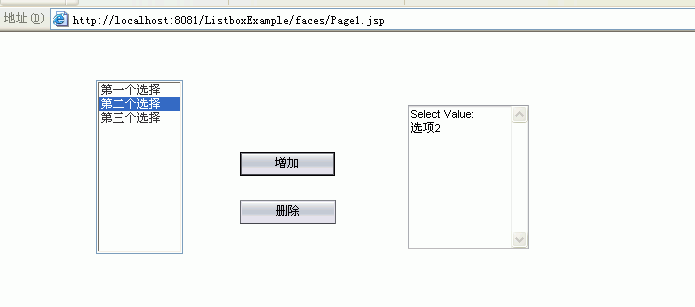
參考:http://www.netbeans.org/kb/60/web/clientsiderendering.html

