由于公司需要測(cè)試系統(tǒng)的最大用戶承受能力,所以需要學(xué)習(xí)使用loadrunner。在安裝的時(shí)候碰到了不少問題,所以寫下此文章總結(jié)遇到的問題以及解決方案,希望能幫到大家。也希望大家轉(zhuǎn)載注明出處。
Winsows 的Loadrunner 安裝就不多講了,這個(gè)太容易了。
以下是Linux 中安裝 Load Generator 說明:
Linux 系統(tǒng)版本:CentOS5.4
Load Generator 版本 : Load Generator 11
安裝步驟如下:
1. 到HP官網(wǎng)下載Load Generator 安裝文件 Software,_Load_Generator_11.00_T7330-15010.iso
2.確保系統(tǒng)安裝了c++ , gclib 相關(guān)工具(我的系統(tǒng)在安裝前已經(jīng)安裝了gclib ,所以還不知道沒裝這個(gè)會(huì)發(fā)生什么問題)
3. 在Windows 系統(tǒng)下將Software,_Load_Generator_11.00_T7330-15010.iso 解壓出來會(huì)有三個(gè)文件夾(HP , Linux , Solaris),這三個(gè)文件夾是相關(guān)系統(tǒng)的安裝包。請(qǐng)根據(jù)你的系統(tǒng)選擇對(duì)應(yīng)的文件夾copy到 要安裝的Linux 系統(tǒng)中。為什么要使用這種解壓后copy的原因是因?yàn)槲腋鶕?jù)網(wǎng)上的方法copy iso 文件到Linux 系統(tǒng)中并使用掛載的方式進(jìn)行安裝,碰到了很多問題,所以使用這種方式,這可是我原創(chuàng)的哦。我是copy到/home/LoadRunner/目錄下
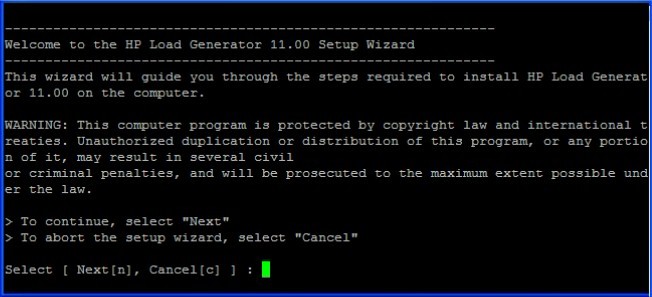
4. 緊跟著就是安裝了,只需要執(zhí)行指令/home/LoadRunner/Linux/installer.sh 會(huì)出現(xiàn)如下圖中的安裝向?qū)g迎界面,選擇Next [n] 即可。
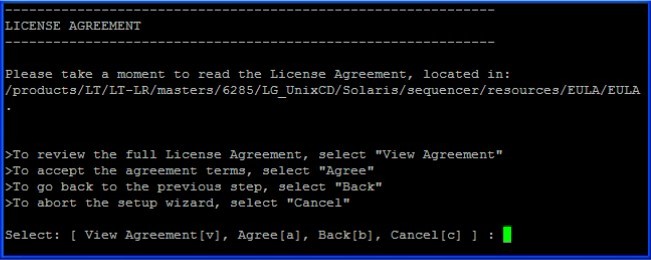
5. 出現(xiàn)下圖許可協(xié)議界面,也只需點(diǎn)擊Agree [a],當(dāng)然你可以選擇View Agreement [v] 查看協(xié)議的詳細(xì)內(nèi)容
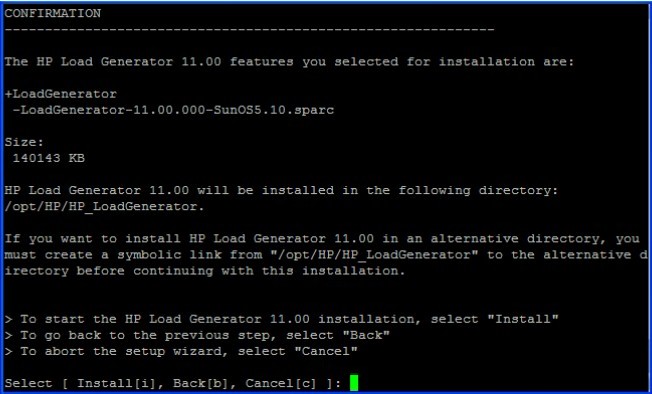
6. 出現(xiàn)確認(rèn)安裝界面,選擇Install [i] 即可
7. 出現(xiàn)安裝界面如下圖

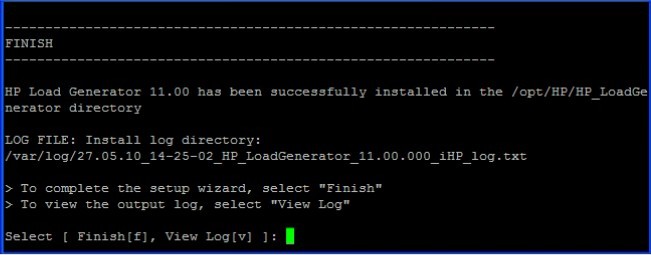
8. 完成安裝,選擇Finish [f] 即可,恭喜你安裝成功
9. 緊跟著就是配制環(huán)境了,網(wǎng)上有說要配置env.csh 的,但我安裝后env.csh 已經(jīng)默認(rèn)配置好了,這里也將的默認(rèn)配置文件分享一下
setenv PRODUCT_DIR /opt/HP/HP_LoadGenerator
setenv M_LROOT $PRODUCT_DIR
if ( `uname` == SunOS ) then
setenv LD_LIBRARY_PATH ${M_LROOT}/bin
else if ( `uname` == Linux ) then
setenv LD_LIBRARY_PATH ${M_LROOT}/bin
else if ( `uname` == AIX ) then
setenv LIBPATH ${M_LROOT}/bin
else if ( `uname` == HP-UX ) then
setenv SHLIB_PATH ${M_LROOT}/bin
endif
setenv PATH ${M_LROOT}/bin:$PATH
10 .除了上文中講到的還需要在/root/.bashrc文件中添加如下配制,保存修改后注銷用戶重用登錄
export PRODUCT_DIR=/opt/HP/HP_LoadGenerator
export M_LROOT=$PRODUCT_DIR
export LD_LIBRARY_PATH=${M_LROOT}/bin
export PATH=${M_LROOT}/bin:$PATH
11 . Load Generator會(huì)安裝到/opt/HP/HP_LoadGenerator目錄下,我也是使用默認(rèn)的。進(jìn)行/opt/HP /HP_LoadGenerator/bin 目錄執(zhí)行./verify_generator (不能使用root用戶,至于為什么還不清楚) 檢查安裝是否成功,如果成功會(huì)有以下信息,
===================================================
HP
Vuser Environment Verification Utility
===================================================
Product: LoadRunner 11.0
Version: 11.0.0.8866
Build: 8866
localhost.localdomain:
verify_generator...OK
verify_generator...OK
verify_generator...OK
Don't forget to make sure that the name of the controller machine
is also in .rhosts
Verify $M_LROOT ...Failed
_____It was not possible to set the $M_LROOT from
_____the shell dot files. One of several things might be happening:
_____1) $M_LROOT is not set at all in the shell dot files.
_____2) There is some error in the shell dot files which stops their execution
_____ before it sets $M_LROOT.
_____3) There is conditional code in the shell dot files (most likely related to
_____ interactive and non interactive shells) and $M_LROOT is set
_____ only in one of the sections.
_____Aborting virtual user tests on host localhost.localdomain
verify_generator...OK
_______________________________________________
Summary:
________
Vuser Host localhost.localdomain: Failed
這些Failed 我都忽略了,因?yàn)檫@些Failed并不影響運(yùn)行。我很希望哪位大蝦看過此文章后能在此回復(fù)解釋一下這些Failed可以解決嗎?
上面是正確的信息,我剛開始的時(shí)候遇到了下面這些提示,注意其實(shí)這些提示都很直觀,缺少了 libstdc++.so.5 , 安裝就可以了。調(diào)用 yum install libstdc++.so.5 .安裝后再調(diào)用 ./verify_generator 就可以看到上面的信息了。
===================================================
HP
Vuser Environment Verification Utility
===================================================
Product: LoadRunner 11.0
Version: 11.0.0.8866
Build: 8866
localhost.localdomain:
/opt/HP/HP_LoadGenerator/bin/lrv/chk_thread_lmt: error while loading shared libraries: libstdc++.so.5: cannot open
shared object file: No such file or
directory
/opt/HP/HP_LoadGenerator/bin/lrv/limithost: line 134: [: : integer expression expected
/opt/HP/HP_LoadGenerator/bin/lrv/chk_sems_lmt: error while loading shared libraries: libstdc++.so.5: cannot open
shared object file: No such file or d
irectory
/opt/HP/HP_LoadGenerator/bin/lrv/limithost: line 154: [: : integer expression expected
verify_generator...OK
verify_generator...OK
verify_generator...OK
Warning: The file .rhosts does not exist in the home directory of the user.
Verify $M_LROOT ...Failed
_____It was not possible to set the $M_LROOT from
_____the shell dot files. One of several things might be happening:
_____1) $M_LROOT is not set at all in the shell dot files.
_____2) There is some error in the shell dot files which stops their execution
_____ before it sets $M_LROOT.
_____3) There is conditional code in the shell dot files (most likely related to
_____ interactive and non interactive shells) and $M_LROOT is set
_____ only in one of the sections.
_____Aborting virtual user tests on host localhost.localdomain
verify_generator...OK
_______________________________________________
Summary:
________
Vuser Host localhost.localdomain: Failed
12 . 啟動(dòng) Load Generator ,在安裝的bin目錄下輸入 ./m_daemon_setup start 即可開戶服務(wù)了 (不能使用root 用戶啟動(dòng))
13 . 修改防火墻策略,對(duì)54345端口開放,或者直接關(guān)閉防火墻(不建議直接關(guān)閉)
講到這里安裝步驟就完,現(xiàn)在講如何在Windows 系統(tǒng)下啟用 剛才安裝的Load Generator
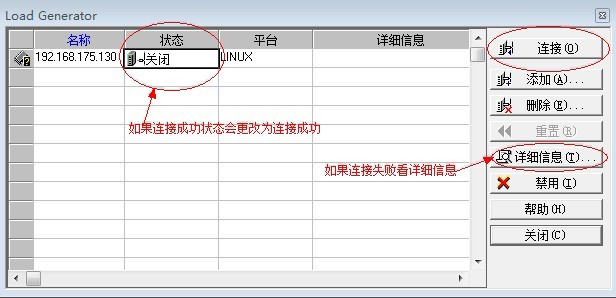
1. 打開Controller 的Load Generator 。 點(diǎn)擊 場(chǎng)景--> Load Generator
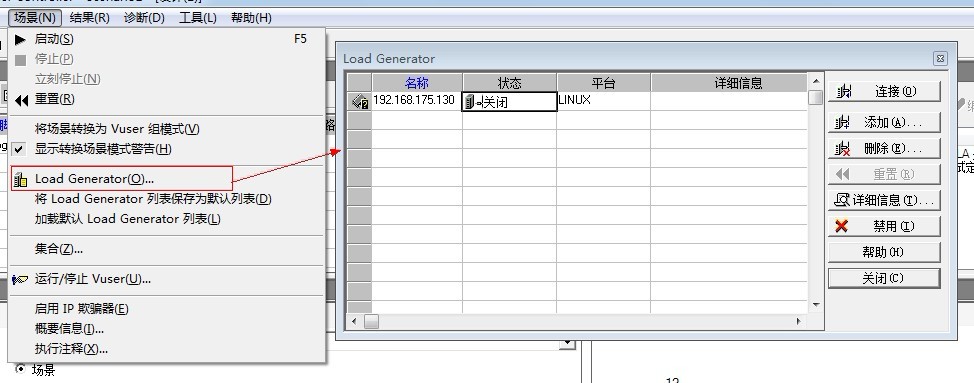
2. 添加一個(gè)Load Generator 。點(diǎn)擊 添加--> 輸入名稱(名稱即ip)--> 選擇平臺(tái) --> 點(diǎn)擊更多 --> 點(diǎn)擊 Unix 環(huán)境 --> 勾選“不使用RSH” --> 確定

3. 添加后測(cè)試連接,如果顯示連接成功就功造成了,連接時(shí)如果有其它問題建議大家多思考,注意那些連接不成功的提前。我個(gè)人覺得LoadRunner 在提示之方面做的比較好,出了問題基本上看提示就知道問題在哪里。祝大家一切順利。