Summary
In this tutorial we will build and execute a JavaServer Faces application, and highlight the features contributed by the JSF Tools Project.
By Raghu Srinivasan, Oracle Corporation.
May 24, 2006
Introduction
In this tutorial we will create and execute a web application with JavaServer Faces capabilities. The WTP JSF Tooling project has provided features for improving JSP source editing and validation, along with simplified application building, configuration and execution.
You may wish to visit Building and Running a Web Application before attempting this tutorial. That tutorial covers setup of the server instance that this tutorial does not.
Setup
Register JSF libraries
This feature allows for a named sets of jars to be created for use with JSF Applications. We will be creating a library containing the Sun JSF RI, Apache commons and JSTL jars.
Select Windows->Preferences->Web and XML->JSF Libraries. Click on the New.. button to add a new library. Create the JSF Libraries as shown in the following figures. Check the is JSF Implementation check box when adding the Sun JSF RI library.


Create a JavaServer Faces Project
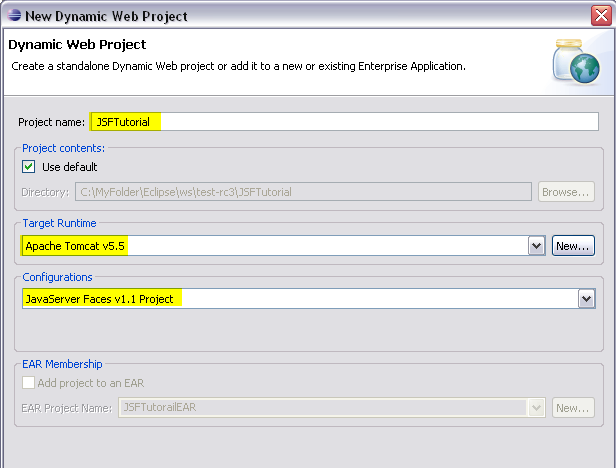
Create a New Dynamic Web Application with the name of JSFTutorial. Set the target runtime to the Apache Tomcat 5.5
In the configuration section, select the JavaServer Faces Project v1.1. Skip the next two panels to get to the JSF Capabilities page.
On the JSF Capabilities page, add the Commons and JSTL library and select the Deploy JARS to WEB-INF/lib.
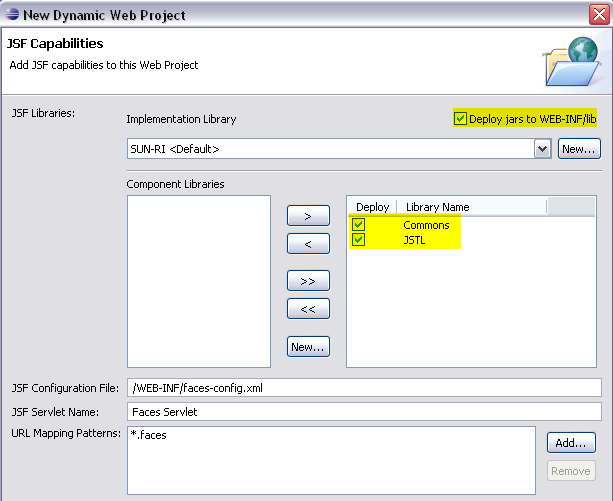
Click on the
Finish button to create the JavaServer Faces Application. You may be prompted to accept the license for the Web App DTD from Sun. You may also be asked to choose the J2EE perspective upon completion. In both cases accept.
Your JSF application has been created. Note that the web.xml file has been updated with the Faces Servlet and servlet-mapping, a stub JSF application configuration file (faces-config.xml) has been created, and the build path has been updated with the implementation jars.

 If you have an existing Dynamic Web Application, it is possible to add JSF capabilities by going to:
Project Properties > Project Facets > Add\Remove Project Facets…
Create a JSF JSP Page
Use the JSP Page wizard to create a page called login.jsp in the Web Content folder of the new application. In the Select Templates page of the wizard, select the New JSP(html) template. Click Finish.
Add the JSF taglibs, the view and the form tag. The JSP page should look like the following:

Add the following JSF tag,
<h:messages layout=""></h:messages> . Postion the cursor inside the double-quotes of the
layout attribute and hit
Ctrl+space .You will get a pop-up with the list of valid values for the attribute. Select
table .The editor provides
content assist for values of attributes that have a discrete list of values.

Now, change the value of the layout attribute to say,
tablex and save the change. The editor will validate the value of this attribute against the meta-data defined list of valid values and will flag the line with a warning that the value is invalid.

Change the value of the layout attribute back to
table and save. Note that the warning message disappears.
Add the following JSF tag,
<h:outputLabel rendered=""></h:outputLabel> . Position the cursor inside the double-quotes of the
rendered attribute and hit
Ctrl+space .You will get a pop-up with the list of values for the attribute. Select the value,
true . The editor provides
content assist for values of attributes that are of Boolean type.

Complete the tag as shown,
<h:outputLabel rendered="true" value="Name"></h:outputLabel> Add the JSF tag,
<h:inputText tabindex="" ></h:inputText> with an empty string for the value of the attribute
tabindex and save. The Editor will report a warning that the value is not a valid integer. Enter the value
0 and save. The Editor provides meta-driven validation of values of attributes based on the type of the value as defined in the meta-data.

Add the
value attribute to the above tag, with an empty EL expression for the value attribute without a closing double-quote as shown below and save. The editor has comprehensive validation of EL syntax and will indicate a syntax error.
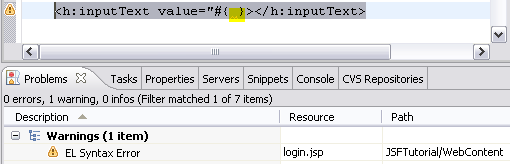
Change the EL expression to include the double-quote, but now remove the closing bracket as shown below and save. The editor will mark the line with an error.

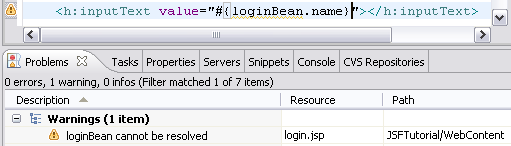
Now enter a value binding expression referring to an undefined managed bean,
"#{loginBean.name}" and save. The editor will flag a warning indicating that the variable cannot be resolved.
Create a Java class,
com.tutorial.LoginBean with the following code and save.

In the Project Explorer, expand the node, JSFTutorial->WebContent. Double-click on
faces-config.xml . This will launch the faces-config editor. Select the
ManagedBean tab.
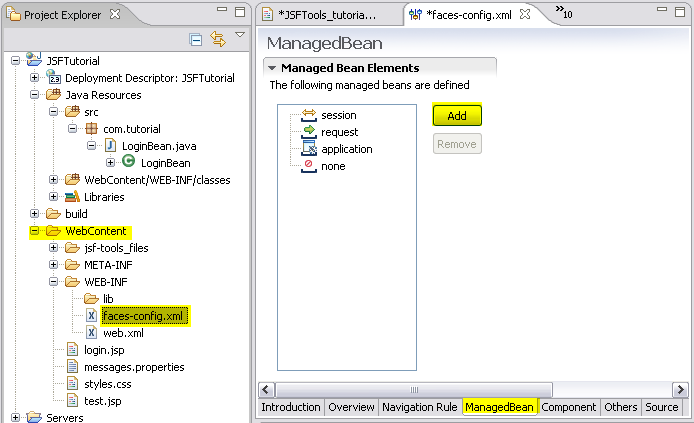
Click on the
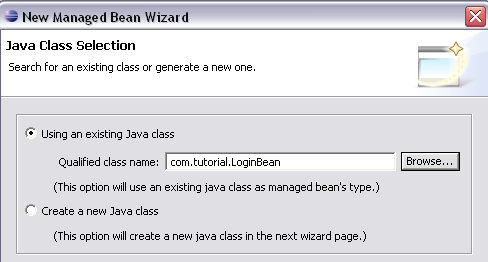
Add button. This will launch the New Managed Bean wizard. Select the class,
com.tutorial.LoginBean . Click the Next button twice and the select the Finish button. This will register the managed bean.
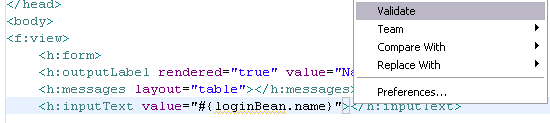
Switch to the
login JSP page. Right-mouse click on the page and from the context menu, select the
validate option. Note that the page should now be valid.
Add the JSF tag,
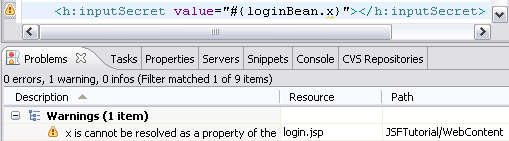
<h:inputSecret value="#{}"></h:inputSecret> . With the cursor inside the brackets, hit
Ctrl+spacebar . You should see a pop-up with a list of all the implicit objects plus the managed bean defined above. Select the managed bean,
loginBean 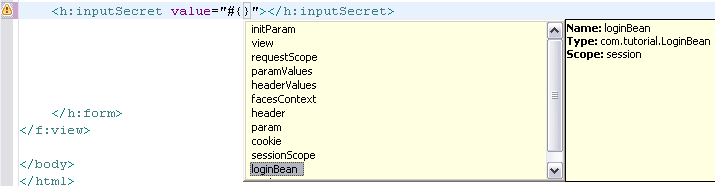
Enter the name of a property, say x, that is not defined in the managed bean and save the change. The editor will report a warning that the property cannot be resolved.
Delete the invalid property. Hit
Ctrl+spacebar after the
'.' in the bean name. You should see a pop-up listing the properties defined in the managed bean. Select
password from the menu.

The property
password has nested properties. Enter a dot after
password and Hit
Ctrl+spacebar .The editor will pop-up a list of the nested properties. Select
convertedID 
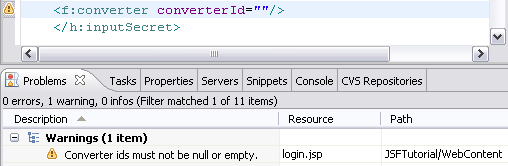
Add the JSF tag,
<f:converter converterId=""></f:converter > and save. The editor will flag a warning that the converterId attribute can not be null. The editor provides meta-data driven validation for attribute values.
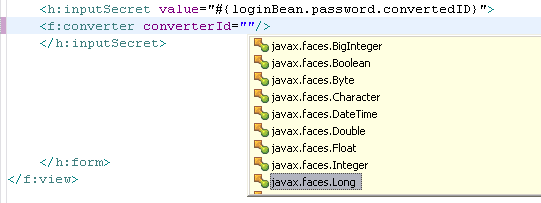
With the cursor inside the double-quote of the
converterId , hit
Ctrl+spacebar . You should see a pop-up with a list of all the standard converters plus those registered in the faces-config file. The editor provides content assist for various artifacts registered in the faces-config files including validators.Select the
javax.faces.Long id.
Create a Java class,
com.tutorial.validatePassword that implements the
Validator interface and save.

In the Project Explorer, expand the node, JSFTutorial->WebContent. Double-click on
faces-config.xml . This will launch the faces-config editor. Select the
Component tab. Expand the
Validators section.
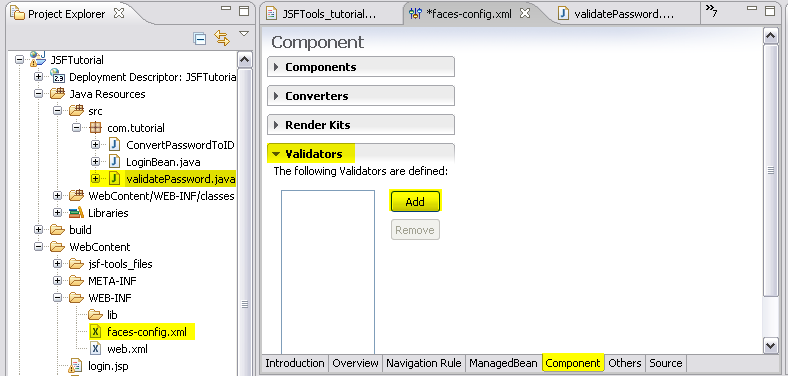
Click on the
Add button. Select the
Browse button associated with the
Validator Class field and select the
com.tutorial.ValidatePassword class. Save the changes.

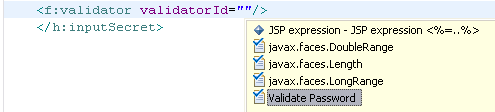
Add the JSF tag,
<f:validator id=""></f:validator > . With the cursor inside the double-quote, hit
Ctrl+spacebar . You should see a pop-up with a list of all the standard validators plus those registered in the faces-config file. Select
Validate Password .
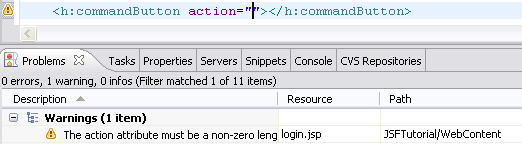
Add the JSF tag,
<h:commandButton action=""></h:commandButton > and save. The editor will flag a warning that the action attribute can not be null. This is another example of meta-data driven validation for attribute values.
Complete the tag as shown below.
<h:commandButton action="login" value="Login"></h:commandButton> We will now move the static strings we have used in the page to a resource bundle. To do this, add a file called,
messages.properties in the folder
com.tutorial . Define the properties as shown below and save the file.

Add the JSF tag,
loadBundle as shown below.

Delete the string,
Name in the value attribute of the
outputLabel tag. Position the curson inside the brackets and hit
Ctrl+spacebar . You should see a pop-up with a list that includes the
msg variable that you defined in the
loadBundle tag. Select it.

Enter a dot after
msg and and hit
Ctrl+spacebar . You should see a pop-up with a list of properties defined in the
messages.properties file. Select the property,
name .

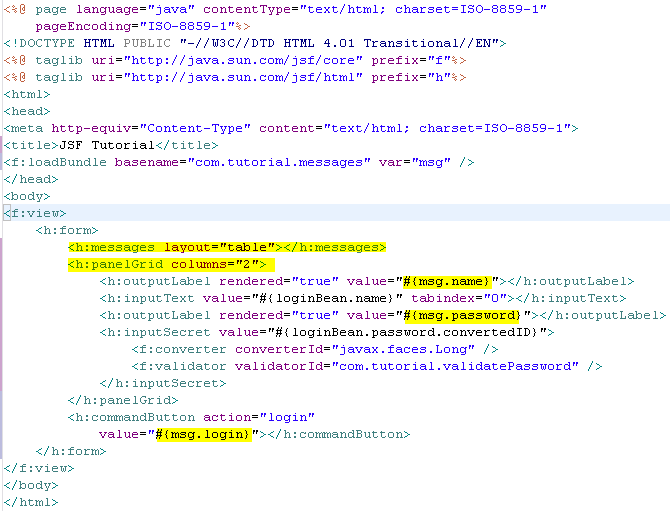
Complete the login page as shown below.
Create a new JSF page,
welcome.jsp as shown below.

Faces Configuration Resource Editor
The JSF Tools project includes a special editor for the faces configuration resource files. The following section gives a brief introduction to the editor. A comprehensive tutorial detailing all the features of the editor will be published soon.
Double-click on the
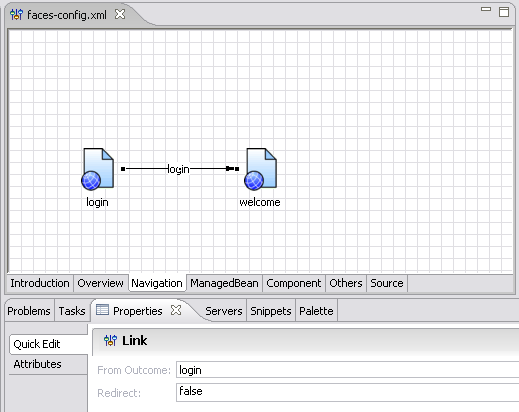
faces-config.xml file to launch the Faces configuration editor. Switch to the
Navigation tab.

- Add the login.jsp and welcome.jsp to the Navigation tab. Select the Page control from the Palette and drop it on the Navigation tab. Choose the page in the resulting Select JSP File dialog.
- Connect the two pages. Click on the Link control in the Palette, select the login page and draw a line to the welcome page. Select the line in the Navigation tab and in the property view, set the value of the from-outcome to login .
Testing the JSF JSP Page
1) We will now execute the page against the Apache Tomcat server. Choose Run on Server using the context menu while selecting the login.jsp page in the navigator.

2) Choose your Apache Tomcat server and set it up as required if you had not already done so.
3) Click Finish. You should see from the Console view that the Tomcat server starts and then you should see the executing login page appear in the Web Browser like below.

Click on the
login button. You should navigate to the
welcome page.

Congratulations! You have created and executed your first JavaServer Faces application using the new Eclipse WTP JSF tooling.